 Your new post is loading...
For individuals experiencing a turf toe injury, can knowing the symptoms help athletes and non-athletes with treatment, recovery time, and returning to activities? Turf Toe Injury A turf toe injury affects the soft tissue ligaments and tendons at the base of the big toe under the foot. This condition usually occurs when the toe is hyperextended/forced upward, such as when the ball of the foot is on the ground and the heel is lifted. (American Academy of Orthopaedic Surgeons. 2021) The injury is common among athletes who play sports on artificial turf, which is how the injury got its name. However, it can also affect non-athletes, like individuals working on their feet all day. - Recovery time after turf toe injury depends on the severity and the type of activities the individual plans to return to.
- Returning to high-level sports activities after a severe injury can take six months.
- These injuries vary in severity but usually improve with conservative treatment. In severe cases, surgery could be required.
- Pain is the primary issue that stops physical activities after a grade 1 injury, while grades 2 and 3 can take weeks to months to heal completely.
Meaning A turf toe injury refers to a metatarsophalangeal joint strain. This joint comprises ligaments that connect the bone on the sole of the foot, below the big toe/proximal phalanx, to the bones that connect the toes to the larger bones in the feet/metatarsals. The injury is usually caused by hyperextension that often results from a pushing-off motion, like running or jumping. Grading Turf toe injuries can range from mild to severe and are graded as follows: (American Academy of Orthopaedic Surgeons. 2021) - Grade 1 - The soft tissue is stretched, causing pain and swelling.
- Grade 2 - The soft tissue is partially torn. Pain is more pronounced, with significant swelling and bruising, and it is difficult to move the toe.
- Grade 3 - Soft tissue is completely torn, and symptoms are severe.
Is This What's Causing My Foot Pain? Turf toe can be an: - Overuse injury - caused by repeating the same motion repeatedly for an extended period, that causes symptoms to worsen.
- Acute injury - that occurs suddenly, causing immediate pain.
Symptoms can include the following: (Mass General Brigham. 2023) - Limited range-of-motion.
- Tenderness in the big toe and surrounding area.
- Swelling.
- Pain in the big toe and surrounding area.
- Bruising.
- Loose joints can indicate there is a dislocation.
Diagnosis If experiencing turf toe symptoms, see a healthcare provider for a proper diagnosis so they can develop a personalized treatment plan. They will perform a physical exam to assess pain, swelling, and range of motion. (American Academy of Orthopaedic Surgeons. 2021) If the healthcare provider suspects tissue damage, they may recommend imaging with X-rays and (MRI) to grade the injury and determine the proper course of action. Treatment A healthcare provider will determine the best treatment based on the severity of the injury. All turf toe injuries can benefit from the RICE protocol: (American College of Foot and Ankle Surgeons. Foot Health Facts. 2023) - Rest - Avoid activities that worsen symptoms. This can include using an assistive device like a walking boot or crutches to reduce pressure.
- Ice - Apply ice for 20 minutes, then wait 40 minutes before reapplying.
- Compression - Wrap the toe and foot with an elastic bandage to support and reduce swelling.
- Elevation - Prop the foot above the level of the heart to help decrease swelling.
Grade 1 Grade 1 turf toe is classified by stretched soft tissue, pain, and swelling. Treatments can include: (Ali-Asgar Najefi et al., 2018) - Taping to support the toe.
- Wearing shoes with a rigid sole.
- Orthotic support, like a turf toe plate.
Grades 2 and 3 Grades 2 and 3 come with partial or complete tissue tearing, severe pain, and swelling. Treatments for more severe turf toe can include: (Ali-Asgar Najefi et al., 2018) - Limited weight bearing
- Using assistive devices like crutches, a walking boot, or a cast.
Other Treatment - Less than 2% of these injuries require surgery. It is usually recommended if there is instability in the joint or when conservative treatments are unsuccessful. (Ali-Asgar Najefi et al., 2018) (Zachariah W. Pinter et al., 2020)
- Physical therapy is beneficial for decreasing pain and improving the range of motion and strength after injury. (American Academy of Orthopaedic Surgeons. 2021)
- Physical therapy also includes proprioception and agility training exercises, orthotics, and wearing recommended shoes for specific physical activities. (Lisa Chinn, Jay Hertel. 2010)
- A physical therapist can also help ensure that the individual does not return to physical activities before the injury is fully healed and prevent the risk of re-injury.
Recovery Time Recovery depends on injury severity. (Ali-Asgar Najefi et al., 2018) - Grade 1 - Subjective as it varies depending on the individual's pain tolerance.
- Grade 2 - Four to six weeks of immobilization.
- Grade 3 - Eight weeks minimum of immobilization.
- It can take up to six months to return to normal function.
Returning To Normal Activities After a grade 1 turf toe injury, individuals can return to normal activities once the pain is under control. Grades 2 and 3 take longer to heal. Returning to sports activities after a grade 2 injury can take around two or three months, while grade 3 injuries and cases that require surgery can take up to six months. (Ali-Asgar Najefi et al., 2018) General Disclaimer * The information herein is not intended to replace a one-on-one relationship with a qualified healthcare professional or licensed physician and is not medical advice. We encourage you to make healthcare decisions based on your research and partnership with a qualified healthcare professional. Our information scope is limited to chiropractic, musculoskeletal, physical medicines, wellness, sensitive health issues, functional medicine articles, topics, and discussions. We provide and present clinical collaboration with specialists from various disciplines. Each specialist is governed by their professional scope of practice and their jurisdiction of licensure. We use functional health & wellness protocols to treat and support care for the injuries or disorders of the musculoskeletal system. Our videos, posts, topics, subjects, and insights cover clinical matters, issues, and topics that relate to and directly or indirectly support our clinical scope of practice.* Our office has reasonably attempted to provide supportive citations and identified the relevant research studies or studies supporting our posts. We provide copies of supporting research studies available to regulatory boards and the public upon request. We understand that we cover matters that require an additional explanation of how it may assist in a particular care plan or treatment protocol; therefore, to further discuss the subject matter above, don't hesitate to contact Dr. Alex Jimenez or contact us at 915-850-0900. Dr. Alex Jimenez DC, MSACP, CCST, IFMCP*, CIFM*, ATN* email: coach@elpasofunctionalmedicine.com Licensed in: Texas & New Mexico* References American Academy of Orthopaedic Surgeons. (2021). Turf toe. Mass General Brigham. (2023). Turf toe. American College of Foot and Ankle Surgeons. Foot Health Facts. (2023). RICE protocol. Najefi, A. A., Jeyaseelan, L., & Welck, M. (2018). Turf toe: A clinical update. EFORT open reviews, 3(9), 501–506. https://doi.org/10.1302/2058-5241.3.180012 Pinter, Z. W., Farnell, C. G., Huntley, S., Patel, H. A., Peng, J., McMurtrie, J., Ray, J. L., Naranje, S., & Shah, A. B. (2020). Outcomes of Chronic Turf Toe Repair in Non-athlete Population: A Retrospective Study. Indian journal of orthopaedics, 54(1), 43–48. https://doi.org/10.1007/s43465-019-00010-8 Chinn, L., & Hertel, J. (2010). Rehabilitation of ankle and foot injuries in athletes. Clinics in sports medicine, 29(1), 157–167. https://doi.org/10.1016/j.csm.2009.09.006
Triathlon training involves running, biking, and swimming. This much fitness training takes a toll on the body. Pulled hamstrings, twisted ankles, and sore heels are common, but triathlon training can also cause or worsen back pain. Because the back muscles are connected to many other muscles, certain types of movement after a tough training session can present with back pain. There was an Ironman triathlete study that found that 90% of the athletes suffered some form of soft-tissue injury during training, with 70% reporting low back pain and/or sciatica. A 2020 study in BMC Musculoskeletal Disorders found that 14% of recreational half-marathon runners presented with low-back pain. Triathlon Training Hard on the Back High-impact activities/exercises, constant repetitive motion, places a heavy pounding on the body that impacts the joints and spine. Using improper techniques will aggravate any issues. The stresses applied from repetitive motions, and poor form can lead to the joints breaking down. If new to intense training the muscles might not be strong enough yet, which could also cause back pain and injury. The back stabilizer muscles tend to get neglected in the training, but these muscles support the structures in the midline, spine, and joints. Strengthening the: - Base muscles
- Glutes
- Back muscles
- Core
- Ensures stability of the spine and joints from all the wear and tear.
Training and Overtraining Errors Even veteran athletes can make mistakes during their training that can lead to sore backs. The biggest mistake individuals make during triathlon training is that they only swim, bike, and run. Training for the specific sport/s is important; but weight lifting, core strengthening, and flexibility training are just as important. Proper rest can become neglected as the individual wants to get in as much training as possible that often gets overlooked, leading to overuse injuries. However, rest is a vital part of training to allow the body to fully recover and operate at full and optimal potential. Preventing and Avoiding Back Pain When Training How to sidestep back pain altogether during training includes: Sleep A healthy lifestyle includes proper sleep cycles and is even more important during training. The mental aspects a triathlon competition can create require proper rest. Fatigue can also lead to poor technique/form, placing excess stress on the joints and the spine, leading to injury. Flexibility Muscles need to maintain flexibility to preserve function and recovery ability. After a training session stretching and working on flexibility will help with overall performance. Stretching should be done after activity when the muscles are warm, and the fibers can be stretched/elongated for optimal recovery. Proper nutrition The body needs high-performance fuel to support high-calorie deficits that are associated with intense training and competition. Strengthening the body Having a solid body foundation is the objective. Everything is balanced with strong muscles supporting healthy bones. Specific exercises that target the multifidus muscles. These are the body's back brace. Strengthening these muscles will help prevent spinal injury/s. Back-strengthening exercises include: Rest days no matter what Plan rest days no matter what. Pushing through will not make the body stronger or able to perform better, and could cause performance to decrease leading to injury. This does not mean sleeping all day, but engaging in active recovery where the body gets the rest it needs while still maintaining fitness. Active recovery includes: Technique Improvement Proper form and technique can really make the difference between staying injury-free and injury/s. Using the right form promotes healthy function. It could help to have gait, swim stroke, and bike techniques evaluated by a professional to ensure that proper form is being utilized. Body awareness Stop if the body signals one to stop. This is why the body feels pain. It is the internal mechanism that tells the individual something is wrong. It is not recommended to follow the phrases train through the pain, and no pain, no gain. Individuals are recommended to: - Always pay attention if pain presents and does not go away after exercising or warming up.
- Pain that limits function.
- Pain that interferes with daily activities.
- These could significantly exacerbate a spinal injury and should be checked by a doctor.
Rest and Recovery During rest and recovery, the body goes back to normal or homeostasis. This is the body’s resting rate or normal phase. The body is always trying to go back to homeostasis. This is done by: - Maintaining core temperature regulated
- Blood pressure stable
- Muscles refreshed
When exercising/training, the homeostasis phase is disturbed, meaning the body needs a period of rest to return to normal. The process of homeostasis uses a lot of energy, which results in an abundant amount of calories burned. After exercise, there is an increase in excess post-exercise oxygen consumption or EPOC. The body uses up more oxygen during recovery than it does before or during exercise. This increase results in burned calories and strong muscles. The most important part of recovery is the rebuilding of muscle. When working out, especially resistance training, tiny tears are made in the muscle fibers. For the tiny tears to turn into growing muscles, they need to repair themselves. This happens during rest. Apart from the physiological benefits, rest helps prevent injury caused by overuse and assists in healing when injuries do occur. Time off helps with mental health as well to refocus, reassess, and apply what has been learned. What rest and recovery can do for the body includes: - Burn massive calories
- Build muscle
- Refuels the muscles
- Prevents injury
- Improves mental health and motivation
General Disclaimer * The information herein is not intended to replace a one-on-one relationship with a qualified health care professional, licensed physician, and is not medical advice. We encourage you to make your own health care decisions based on your research and partnership with a qualified health care professional. Our information scope is limited to chiropractic, musculoskeletal, physical medicines, wellness, sensitive health issues, functional medicine articles, topics, and discussions. We provide and present clinical collaboration with specialists from a wide array of disciplines. Each specialist is governed by their professional scope of practice and their jurisdiction of licensure. We use functional health & wellness protocols to treat and support care for the injuries or disorders of the musculoskeletal system. Our videos, posts, topics, subjects, and insights cover clinical matters, issues, and topics that relate to and support, directly or indirectly, our clinical scope of practice.* Our office has made a reasonable attempt to provide supportive citations and has identified the relevant research study or studies supporting our posts. We provide copies of supporting research studies available to regulatory boards and the public upon request. We understand that we cover matters that require an additional explanation of how it may assist in a particular care plan or treatment protocol; therefore, to further discuss the subject matter above, please feel free to ask Dr. Alex Jimenez or contact us at 915-850-0900. Dr. Alex Jimenez DC, MSACP, CCST, IFMCP*, CIFM*, ATN* email: coach@elpasofunctionalmedicine.com Licensed in: Texas & New Mexico* References American journal of physical medicine & rehabilitation/Association of Academic Physiatrists. (October 2014) “Efficacy of Aerobic Exercise for Treatment of Chronic Low Back Pain: A Meta-Analysis” https://www.researchgate.net/publication/266682158_Efficacy_of_Aerobic_Exercise_for_Treatment_of_Chronic_Low_Back_Pain_A_Meta-Analysis Scientific Reports. (April 2017) “Running exercise strengthens the intervertebral disc” https://www.researchgate.net/publication/316262547_Running_exercise_strengthens_the_intervertebral_disc Stretch Before and After Journal of Chiropractic Medicine. (Winter 2003) “Changes in low back pain in a long-distance runner after stretching the iliotibial band” https://www.sciencedirect.com/science/article/pii/S0899346707600718
There has been an increasing number of professional athletes and athletic teams in recent years that have chosen to use chiropractors to treat their injuries, help manage their pain, and help keep them at the top of their game in terms of performance and stamina. Top athletes like Jordan Spieth, Phil Mickelson, Vernon Davis, and Aaron Rodgers recognize that value in good chiropractic care and have incorporated it into their overall health and wellness programs. One of the biggest draws is chiropractic’s whole-body approach to health care. A chiropractor will not just treat the symptoms of a problem (such as pain), he or she will work to uncover the cause of the problem and recommend lifestyle changes that will help the athlete not only eliminate their pain, but resolve the issue causing the pain, and take steps to help prevent the problem from recurring. The NFL Chooses Chiropractic The National Football League (NFL) has long kept chiropractic care as a standard treatment for its players. In fact, the Professional Football Chiropractic Association estimates that the average team chiropractor for the NFL will perform anywhere from 30 to 50 chiropractic adjustments or treatments a week during the football season. When you consider that the NFL teams employ around 35 chiropractors, that adds up to about 27,000 adjustments in that short 16-week span. But it’s worth it to keep the players in tip-top shape and many continue chiropractic care even after they retire. The PGA Chooses Chiropractic Many top golfers in the Professional Golfers’ Association (PGA), such as Arnold Palmer, Jack Nicklaus, and Phil Mickelson see chiropractic care not only as a necessary element in their wellness routines but also as a playing a vital role in their success. Many use it to enhance their athletic performance, help prevent injuries, help heal from injuries, manage pain, and improve their overall health. Some golfers, like Masters Tournament winner Jordan Spieth, have a chiropractor who travels with him on a full-time basis and provides treatments several times a day. Olympic Teams and Chiropractic At the Olympics, the best of the best compete – and put their bodies through a lot of stress and punishment in the process. Most Olympic teams have two chiropractors who travel with them in an official capacity. After practice or competition, they will get treatments to keep their bodies at optimal performance level. If any of the athletes sustain injuries, the chiropractors can help to manage pain and help heal the injury. Studies show that most injuries that are treated with chiropractic care heal faster and more complete. The MLB, NBA, and NHL Choose Chiropractic Most of the teams in the NHL, NBA, and MLB either have a chiropractor they refer to that is outside or their organization or they have one on staff. This means that not only are chiropractors treating athletes, but they are also treating some of the best athletes in the world. These people make a living based on how well their bodies perform so it stands to reason they would not turn to just any type of treatment or trend. They choose to reap the benefits of the tried and true chiropractic care. Chiropractic for Athletes Athletes know the many benefits that they can get from regular chiropractic care. Some of the top include: - It is drug-free and non-invasive.
- It is very effective in pain management.
- It can reverse the punishment that the body undergoes while participating in sports.
- It can help prevent injury.
- It is very effective in treating most sports injuries.
- It helps to enhance athletic performance
If you play sports, even if you enjoy a game of touch football on the weekends, you might benefit from chiropractic care. If it’s good enough for the pros, it’s good enough for you!
A club golfer was cured of a nagging consistent shoulder pain. Shoulder injury chiropractor, Dr. Alexander Jimenez evaluates the case study. Here’s a pertinent quote from the late lamented author of Letter From America, Alistair Cooke: ‘To get an elementary grasp of the game of golf, you must learn, by endless practice, a continuous and subtle series of highly unnatural movements, involving about 64 muscles, that result in a seemingly “natural” swing, taking all of two seconds from beginning to end.’ An avid club golfer with a handicap of 4 and a right-handed stroke asked for assistance with his nagging L shoulder pain that had recently become markedly worse and finally was threatening to stop him playing. He explained he knew he must have asked for help sooner, but he believed it would just go away (one of the most commonly heard statements by treating practitioners!) and it had now been hanging around for about six months in total, despite routine training. He explained that initially it only used to damage when he caught his chipper from the grass and disrupted his follow-through, but now if he used an iron he'd feel a sharp pain unless he happened to stroke the ball flawlessly. It would also ache when he slept on the side, and after playing a full round it ached for some days. He had tried a million stretches and even appeared quite flexible with specific movements around the shoulder. In addition, for some years he had battled with R low- back pain and anterior hip pain which, when really bad, would render him limping a couple of days after an 18-hole round. AssessmentEvaluation showed all the signs of rotator-cuff tendinitis (inflammation and microscopic breakdown of tendon), together with accompanying weakness of the muscle itself, leading, over time, to excessive anterior translation of the head of his humerus (extra shearing of the ball in his socket joint) on follow-through. This would likely cause an impingement of his already thickened tendon beneath the rectal acromial arch of the shoulder, giving him the sharp stabs of pain he complained of more lately. His standing posture gave us the most clear clues as to why this had evolved, without ever needing to video his stroke biomechanics: rounded shoulders and a very noticeable low- rear arch (lumbar lordosis) are classic signs of poor postural control resulting in wrong movement patterns within his stroke. Gradually over time something needed to give often it's the non-dominant arm. Had he had been middle-aged, we may have X-rayed his shoulder to search for any calcification of his tendon (he'd just turned 30), and only if progress wasn't going well would we believe doing an ultrasound scan to find out the size of scarring and limb breakdown. TreatmentRehabilitation could have a month or two if all went according to plan the key unknown factor is how well he'd take on the challenge of holding his shoulders and pelvis differently; this re-education procedure is frequently the most difficult. The general treatment procedure will first entail improving flexibility so that appropriate posture positions can be held most of us get stiffness in a number of our joints because of gravity wrecking our great posture. Recent improvements in sports physiotherapy have enhanced the speed of the process significantly. Aside from a systematic stretching regime from the patient, we 'release' muscle tightness by deep-tissue massage and trigger-point treatment, heat, a home program of self-pressure massage with a tennis ball, and mobilizing of the tight parts of the capsule of the shoulder with seat-belts. Tightness in the posterior rotator-cuff muscles of this specific patient took a lot of effort to workout, and lat dorsi and pec major/minor were also big players. Additionally, he had considerable stiffness in his thoracic spine, particularly with L rotation, which was worked loose, as were certain gluteal and hip-flexor muscles. The Next Two PhasesSecondly, postural muscles needed to be 'turned on', ie recruited correctly, and a schedule of gradual strengthening of their ability to restrain the joints to which they're responsible began. In this instance the crucial ones were the lower and mid trapezius and transversus abdominus muscles we also taped up them sometimes to help him remember to continue using them, until it became more habitual. Around this time, pain has gotten less and less of a problem along with his postural control was growing nicely. He was able to come back to his coach and start utilizing the positional changes in his stroke, slowly increasing the stroke distance and frequency and all the while maintaining his flexibility with the tennis ball. This third phase, which entails integrating the right posture into the stroke, has to do with the coach, and requires substantial discipline on the part of the athlete to ensure he remains inside the realms of what his brand new system can tolerate without being overloaded. Because he can still overdo it! All went well, with all the golfer reaching one of his best-ever scores in the Queensland Open Tournament three months later. However, two weeks after that he dived badly in a game of rugby and twisted the exact same L shoulder and ripped the exact same rotator-cuff tendon he'd worked so hard to fix. Back to the chiropractor.
This system can revolutionize your approach to stability workouts and it delivers. Science based core chiropractor, Dr. Alexander Jimenez goes through the routines in this part I of a two part article. If you have ever had a sports injury involving damage to, for instance, your back, groin, hamstrings or knee, your sports therapist or physiotherapist will probably have given you some core stability exercises to do as part of your rehabilitation work. Within the repertoire of core stability there is a large range of exercises, the suitability of which will vary according to the injury and therapeutic needs of each individual. There are three major groups of exercises: - those focusing on getting the small deep-lying stabilizing muscles (such as the lower abdominals and deep spinal muscles) to work properly. These exercises are often taken from clinical Pilates
- static bodyweight exercises that concentrate on developing stability and/or strength endurance in certain postures. These need you to learn how simultaneously to work your small stabilizer muscles and the larger mobilizer muscles. One popular example is the ‘plank’
- traditional dynamic strength exercises for the main movement muscles of the trunk, often performed on the floor or Swiss ball.
While sports therapists utilize many different approaches, It's common to start you off working on the very first kind of exercise (how to use the smaller stability muscles properly) and then progress to more strength-based work as your injury improves. Core stability work is by no means restricted to the rehabilitation clinic, nevertheless. Sports doctors, chiropractors and strength and conditioning coaches also recommend that their clients perform regular core stability or back strength exercises to prevent injury. The rationale for prophylactic instruction is that increased recruiting of the stabilizer muscles and increased intensity of the prime movers (principal movement muscles) will carry over into improved posture and more management, both in daily life and in athletic motions. So it's very likely you will have come across several core stability exercises throughout the regional gym, gym or some other general training context. The majority of us often have a list of three or four of these exercises which we include within our workouts each week. While this 'pre-habilitative' strategy is well intentioned it has two limits. The first is behavioral. Core stability exercises can quite quickly become 'standardized equilibrium'! It requires self-discipline to do 20 to 30 minutes of the same exercises three or more times a week during a lengthy period, so many people lapse, or at greatest centering on this portion of the workout after a while. The second limitation is physiological. The key coaching fundamentals of specificity and progression apply to core work in the same manner that they do to any other aspect of physical fitness. In my experience it is quite normal for an athlete to perform exactly the exact same core pattern on a long period and get very good at four or five moves or 'holds'. But instruct exactly the identical athlete a new core exercise and they'll find it difficult, simply because it is a new stimulation. The message is that progression and variety are crucial to optimizing benefits of a strengthening program. The strategy of core coaching menus presented here targets to overcome the issues of non-compliance and lack of struggle, so as to offer a system in which an individual may adhere to a prophylactic or rehabilitative heart stability and strengthening program using a vast array of moves to maximize adaptations for advancement, and which muscle groups are targeted for training. The system is designed for people who have already developed some fundamental ability in utilizing their all-important lower abdominal stability muscles (transversus abdominis) and who are familiar with several core exercises. This is a challenging program, covering all the back and pelvic muscles, and running out of fundamental recruiting to very advanced strength moves. The training system contains ten exercise menus, each employing a single piece of training devices. A menu contains three to four exercises, which between them target most trunk and pelvic muscles. Some of the exercises include immunity, some weightlifting, some are just about muscle recruiting. Within a menu that the difficulty of exercises fluctuates; a couple of the menus are very advanced (and consequently not within the competence of all readers). Trainers, therapists and people should set the amount of sets and repetitions for each exercise according to the standard principles of training overload and fatigue. If you're in doubt about how many sets and repetitions you should be performing, consult a qualified coach or (if recovering from injury) a sports therapist, so that you aren't functioning pointlessly or, worse, unsafely. Select the most appropriate menus, and then use them in rotation. If you're utilizing eight menus and performing four components of core training each week, over the span of a fortnight that you will perform each menu after. This will ensure that you operate each of the muscles in a variety of ways, using different pieces of equipment. ‘This is a challenging program, covering all the trunk and pelvic muscles, and running from basic recruitment to very advanced strength movements.' Menu 1: Floor, StaticMenu rationaleTo develop a basic level of lumbar and pelvic stability, working front, rear and side muscles of the trunk. This menu can also be used as a maintenance dose of training for intermediate to advanced level athletes. The PlankOverview: A common exercise that requires good abdominal strength and co-contraction of the abdominal wall musculature to hold the lumbar spine and pelvis in correct alignment. Level: Basic/intermediate Muscles targeted: Rectus abdominis Abdominal wall (transversus abdominis/internal obliques) Technique: Hold a straight body position, supported on elbows and toes. Brace the abs, and set the low back in the neutral position, once you are up. Sometimes this requires a pelvic tilt to find the right position. The aim is to hold this position, keeping the upper spine extended, for an increasing length of time up to a maximum of 60 secs. Perform 2 to 3 sets. Keep shoulders back and chest out while maintaining the neutral lumbar position. This makes the exercise considerably more challenging. Progression: Lift one leg just off the floor; hold the position without tilting at the pelvis. The Side PlankOverview: Recommended as a safe and effective exercise for the obliques and quadratus lumborum (a key lumbar stabilizing muscle). Recent research also shows this to be an excellent exercise for the lower abdominal muscles. Level: Basic/intermediate Muscles targeted: Obliques (internal and external) Quadratus lumborum Transversus abdominis Technique: Lie on one side, ensuring the top hip is ‘stacked’ above the bottom hip. Push up until there is a straight body line through, feet, hips and head. Hold the position, increasing the length of hold up to a maximum of 60 secs. Perform 2 to 3 sets. Keep the elbow under the shoulder to avoid upper body strain. Lower under control and repeat on opposite side. Progression: Raise the top leg in the air and hold it in that position throughout. The Gluteal BridgeOverview: Research suggests this is more a low-back than gluteal exercise. However, it is a good way to learn how to recruit the gluteals (buttock muscles) in the ‘inner range’ position. Level : Basic Muscles targeted: Gluteus maximus Erector spinae/multifidus Technique: Lie on the floor with your knees bent. Squeeze your gluteals and then push your hips up until there is a straight line through knee and hip to upper body. Shoulders remain on the floor. Beware of raising too high or of flaring the ribs, which pushes the back into hyperextension. Hold the position. Start with 5 sets of 10 sec holds, progressing to 2 to 3 sets of 60 sec holds. Progression: Extend one leg carefully ahead of you, and hold the position without dropping or tilting the pelvis. ‘Birddog’ Or ‘Superman’Overview: Recommended as a safe and effective exercise for the lumbar and thoracic portions of the erector spinae (long back) muscle. This exercise also requires co-contraction of the abdominal wall muscles to stabilize the pelvis. Level: Basic/intermediate Muscles targeted: Thoracic and lumbar portions of erector spinae Technique: Start with hands below shoulders and knees below hips. Set your low back into neutral and brace your abs slightly. Slowly slide back one leg and slide forward the opposite arm. Ensure that the back does not slip into extension, and that the shoulders and pelvis do not tilt sideways. Hold, increasing the duration up to a maximum of 20 secs. Slowly bring your leg and arm back and swap sides. Perform sets of 5 to 10, alternating sides after each hold. Progression: none. Menu 2: Floor, DynamicMenu rationaleTo develop a good level of strength endurance in the major trunk muscles. Overall the level of these exercises is intermediate to advanced. Active Straight Leg RaiseOverview: Requires a strong static contraction of the abdominals to stabilize the lumbar spine against the load of the legs. It also requires good active range of motion of the hamstrings. Level: intermediate/advanced Muscles targeted: Rectus abdominis Abdominal wall hip flexors Technique: Lie on your back with knees bent. Set your lumbar spine in neutral and brace the abs. Lift one leg up straight in the air, ensure your back does not move. Lift the other leg up, again keeping your back in place. (If the back cannot be stabilized during this movement, the exercise is too advanced, and more static transversus stability control work will be needed first.) Keeping one leg in the air, slowly lower the other down to the floor. Only go as far as you can, until you feel the lumbar spine start to move. Placing your fingers under your back will help you to gauge when this happens. Keep bracing the abs and then lift the leg slowly back up. Repeat with the other leg. Perform sets of 5 to 10 reps, alternating legs. Progression: Lower and raise both legs together Oblique CrunchOverview: A good exercise for both the obliques and the abdominals. Level: Intermediate Muscles targeted: Rectus abdominis Obliques Technique: Lie on your back with right ankle resting on left knee. Right arm is placed on the floor out to the side. Keeping the right shoulder down, curl the left shoulder up to the right knee. Crunch at the top and return slowly, under control. Perform sets of 15 to 30 reps on each side in turn. Avoid ‘head nodding’ during the movement: keep head off the floor and look forward throughout. Progression: Hold a dumb-bell in the hand by your head. Keep arm still so you are forced to raise the dumbell using your abs and not your arm. Side Lying Hip AbductionOverview: This is an exercise to isolate the use of gluteus medius (upper buttock). Strength in this muscle group has been shown to be useful in preventing lower limb injuries in female athletes. Level: Basic Muscles targeted: Gluteus medius Technique: Lie on your side and set pelvis so your top hip is stacked above lower hip. Roll shoulders forward a little and brace the abs to control pelvic position. Lift the top leg slowly up and down, without hitching at the hip. Perform sets of 20 to 30 reps, each side in turn. Progression: Weight the top leg with an ankle weight or tie a resistance band between your ankles and pull the band apart as you lift the leg. Lying Windscreen WipersOverview: An advanced active mobility exercise working the obliques and trunk rotation. Level: Advanced Muscles targeted: Rectus abdominis Obliques Technique: Lie on your back with arms out to the sides. Lift legs straight up in the air until the hip is at 90 degrees. Set the lumbar spine in neutral and aim to keep it set throughout. Keeping legs straight and maintaining hip angle, move the legs to one side, controlling any movement in the trunk. Go as far as you can in control, keeping your upper back and shoulders on the floor. Bring the legs to a halt, pull them back up to the start position and then over to the other side, under control. The slow side-to- side movement is like a ‘windscreen wiper’ arc. Menu 3: Swiss Ball, StaticThe four exercises in this routine challenge your ability to hold good posture and pelvic alignment against both bodyweight and the instability of the Swiss ball. The positions of the holds are similar to the static floor exercises in Menu 1, except that they are performed on the ball. Research shows that the performance of core exercises upon the labile surface of the Swiss ball can increase the levels of trunk muscle activation; so this menu is a progression from floor-based work. Overall Menu 3 is intermediate in difficulty. Swiss Ball Sit & Leg LiftOverview: Challenges your ability to co-contract the abdominal wall and maintain a neutral lumbar spine position on an unstable seat. Level: Basic Muscles targeted: Abdominal wall (transversus abdominis, internal obliques) Technique: Sit on a Swiss ball with hips on the top of the ball and feet hip-width apart. Ensure the size of ball is correct: your knees should be level with or slightly lower than your hips and at 90 degrees in sitting. Relax and find a neutral lumbar spine position. Set this position by lightly bracing your abdominal muscles. Think about good upper back and shoulder posture as you sit (stomach in, chest lifted, shoulders low and relaxed). It is important to hold an upright sitting position – not leaning forward or back. Once you are set, carefully lift one foot a few centimeters off the floor. Maintain your balance, lumbar and pelvic alignments as you hold the position on one leg. Hold for a count of 5 to 10, maintaining form. Perform 5 reps each side. Progression: Keeping the lifted foot only just off the floor, straighten the leg in front of you, stretching the hamstring. Resist any tilting of your pelvis as the leg straightens by keeping a good hold of the abdominals and maintaining posture against the stretch. Supine Swiss Ball BridgeOverview: A posterior-chain exercise (hamstrings, gluteals and back), where the aim is to hold perfectly straight hip and back alignment against the load of your bodyweight and the instability of the ball. A big co-contraction of the trunk muscles is required to perform this exercise well. Level: Intermediate Muscles targeted: Gluteals Hamstrings Erector spinae Abdominals Obliques Technique: Lie on your back with heels on the top of the Swiss ball, hip-width apart to aid stability. Suck in the abs and squeeze up from your gluteals, lifting your hips until there is a straight line from heels to upper back. Shoulders and head stay firmly on the floor. Take care not to lift the hips too high or flare the ribs so that your back hyperextends. Hold for 30 seconds and lower under control. Perform 2 to 3 sets. Progression: i. Place the feet close together on the ball to increase the balance challenge as you lift your hips. ii. Roll your legs slowly from side to side with control, keeping hips up for an advanced level of challenge. Swiss Ball Gluteal BridgeOverview: A second posterior-chain exercise. But with the knees bent and the weight bearing down through the feet, the work is felt mainly in the gluteal muscles Level: Intermediate Muscles targeted: Gluteals Erector spinae Abdominals Obliques Technique: Lie on your back with your shoulders and head on the top of a Swiss ball; feet on the ground, hip-width apart for stability. Squeezing up from the gluteals, lift hips until there is a straight line running through the knees, hips and shoulders. Do not lift the hips too high or flare the ribs so that your back hyperextends. Hold for 30 seconds and lower under control. Perform 2 to 3 sets. Progression: i. Place the feet close together to increase the balance challenge. ii. Single-leg bridge, alternating legs with 5 second holds, is an advanced challenge. Swiss Ball PlankOverview: A challenging strength exercise for abdominals, focusing on maintaining good alignment of the spine. Level: Intermediate to advanced Muscles targeted: Abdominals Technique: Kneel in front of the Swiss ball and place elbows on the top of the ball in the center. Slowly roll the ball away from your body until there is a straight line through knees, hips and head and your weight is being supported through your elbows down on to the ball. Once in this position it may be necessary to tilt the pelvis so that it is held in neutral with correct lumbar spine alignment. Also be careful not to round off the shoulders: aim for a ‘long spine’. The better your spinal alignment, the harder the work for the abdominals. If the main pressure is felt in the low back, either your alignment is incorrect or you have insufficient abdominal strength-endurance to hold the correct line. Hold at the far point for 30 to 60 secs with good form. Perform 2 to 3 sets. Progression: Move the ball around, forward, left and right with your upper body whilst keeping your hips in place and your head still in its alignment. Menu 4: Swiss Ball, DynamicThese exercises challenge trunk strength. The use of the Swiss ball both increases the difficulty because of the instability, and allows you to work through useful ranges of movement. This menu targets the front, back and side of the trunk musculature at intermediate to advanced level. Swiss Ball Back ExtensionOverview: The use of the ball for this exercise allows the movement to isolate back extension without hip extension; and to co-ordinate upper back extension with lumbar extension. Level: Intermediate Muscles targeted: Erector spinae (lumbar and thoracic portions) Technique: Kneel over a Swiss ball with thighs and stomach in contact with the ball and head and shoulders dipping over the front of the ball. With your back straight and parallel to the floor, position the lumbar spine in neutral and then set your hips so they do not move. Allow the chest to drop and fall over the ball, flexing the upper back. Place your hands at the sides of the head, elbows bent. From this position, lift your chest up, extending your upper back until it is higher than at the starting position. Maintain abdominal contraction throughout to fix the hips and limit hyperextension of the lumbar spine. Perform 10 reps under control, increasing to 20 reps; 2 to 3 sets. Progression: Add a light dumb-bell held behind the head for extra resistance. Swiss Ball Overhead PullsOverview: The use of the ball for this exercise allows full extension of the body. The abdominals have to work hard to support the spine as the arms extend and pull back. Very good for shoulder stability. Level: Intermediate to advanced Muscles targeted: Abdominals, Latissimus dorsi, Pectorals, Scapular stability muscles Technique: Start in the press-up position with your shins on the ball and hands shoulder width apart under shoulders. Place knees apart slightly for stability. Set lumbar spine in neutral and ensure that the shoulders are stable with shoulder blades down and chest out. Roll backwards until your hands are above your head, maintaining straight body position and neutral low back. Use your abs, ensuring your hips do not drop. Brace your abs and pull yourself forwards to return to the start position. Perform 5 reps with good form, increasing to 10 reps; 2 to 3 sets. Progression: Lengthen your bridge position by starting with feet alone on the ball. The abs have to support more bodyweight. Swiss Ball Squat ThrustOverview: The old-school exercise transposed to the ball. This allows for a focus on the flexion of the hips and low back, maximizing the use of abs. Holding the position through several reps is a great strength-endurance challenge for the abdominals. Unlike the traditional version where speed is of the essence, the Swiss ball version is more demanding if performed slowly with control. Level: Intermediate Muscles targeted: Abdominals Technique: Start in the press-up position with shins on the ball, hands shoulder-width apart under the shoulders. Place knees slightly apart for stability. Set lumbar spine in neutral and ensure shoulders are stable with shoulder blades down and chest out. Pull knees to your chest and crunch the abs to get an extra flex of the hips and back. Slowly extend knees back, using your abs to prevent the hips dropping down. Perform 10 reps slowly, increasing to 20 reps; 2 to 3 sets. Progression: Perform the squat thrust and the overhead pull as a combination exercise. Swiss Ball Side CrunchOverview: An excellent exercise for the obliques. The Swiss ball simply replaces the need for a frame or partner support for your legs. Electromyography research has shown this exercise delivers high recruitment levels of the obliques. Level: Intermediate Muscles targeted: Obliques Technique: Position your- self sideways on the ball, balanced on lower hip with top hip stacked vertically. Brace feet against a wall, one slightly in front of the other for stability. Ensure a straight line through legs, hips and shoulders. Place your hands, elbows bent, by your head. Lift upper body up away from the ball, crunching sideways towards your feet and focusing upon your oblique muscles. Slowly return, under control. Perform 10 reps, increasing to 20 reps; 2 to 3 sets. Progression: Hold a weight across your chest to increase the load. Menu 5: Pulley, KneelingBodyweight-only exercises by definition have strict limits on your ability to increase the load against which the muscles are working. So the main tool for progression is to increase the number of sets and reps being performed, which is good for muscular endurance, but not for pure strength. The pulley system allows us to treat trunk training like limb training, working at higher resistance levels as your strength improves. Overall, these exercises are advanced. Chop RotationOverview: Excellent for dynamic trunk rotation strength co- ordinated with the upper body. This exercise and its pair are functional to many sporting and daily life movements. When performed in the kneeling position, the exercise requires dissociation between the pelvis and shoulder rotation, which is a great stability challenge. Level: Advanced Muscles targeted: Abdominals Obliques (Plus upper body) Technique: Kneel, facing forwards, by the side of the pulley column. Handle attachment is set at (standing) head height. Fix the hips square to the front and set your lumbar spine in neutral. Twisting through the waist, turn shoulders towards the pulley column and grasp the handle with both hands. Pull down on the handle, rotating your shoulders away from the column and crunching down. Finish with hands by your hips and shoulders facing away. Hips remain square to the front throughout the movement. Perform 8 to 10 reps; 2 to 3 sets each side.
Progression: Increase the weight, keeping to sets of 8 to 10 reps. Lift RotationOverview: The natural opposite to the chop movement exercise. Perform these two as a pair to ensure balanced development of trunk rotation strength. The lift movement requires co-contraction of the low back muscles with the obliques to produce the rotation. Level: Advanced Muscles targeted: Erector spinae Obliques (Plus upper body) Technique: Kneel, facing forwards, by the side of the pulley column. Handle attachment is set just below (kneeling) hip height. Fix hips square to the front and set your lumbar spine in neutral. Twisting through the waist, turn shoulders towards the pulley column and grasp the handle with both hands. Pull up on the handle, rotating the shoulders away. Finish with hands above your head and shoulders facing away from the column. Hips remain square to the front throughout. Perform 8 to 10 reps; 2 to 3 sets each side.
Progression: Increase the weight, keeping to sets of 8 to 10 reps. Pulley CrunchOverview: This is a pure trunk flexion movement targeting the development of abdominal strength. The use of the weights allows for high resistances. Care must be taken to fix the hips throughout the exercise, otherwise the hip flexors will contribute, significantly reducing the training effect on the abdominals. Level: Advanced Muscles targeted: Abdominals Technique: Kneel with back to the pulley column, holding a rope attachment with each hand around your neck. Start with hips fully extended (ie, kneeling fully upright) and pelvis set in neutral. Shoulders, hips and knees should all be in line and upright. Focusing on the abs, crunch down, pulling the weight and flexing your trunk forward. The arms simply hold on – avoid using them to assist in pulling the weight. Ensure the pelvis remains set and stable throughout: all the movement comes from the spine flexion, so there should be no hip flexion, forward lean or forwards pelvic tilt. Perform 5 to 10 reps; 2 to 3 sets.
Progression: Increase the weight, keeping to sets of 5 to 10 reps. Sourced From: © Green Star Media Ltd 2014 Published by Green Star Media Ltd, Meadow View, Tannery Lane, Bramley, Guildford GU5 0AB, UK Publisher Jonathan A. Pye
Editor Jane Taylor
Designer The Flying Fish Studios Ltd The information contained in this publication is believed to be correct at the time of going to press. Whilst care has been taken to ensure that the information is accurate, the publisher can accept no responsibility for the consequences of actions based on the advice contained herein.
Chiropractor, Dr. Alexander Jimenez examines the ankle sprain treatment options presented in this case. The treatment plan I outline below has been utilized in professional sports for years but hasn't entered into mainstream injury management protocols. I suspect the reason is simple: it is very uncomfortable! Nonetheless, it works: I have seen athletes on crutches after sustaining diagnosed Grade 2 2+ ankle sprains who could walk without crutches with only a minimal limp following their first session of this treatment, and who had been back training after three to four days (obviously with a great deal of tape support). Readers will probably be familiar with what occurs after an ankle sprain: internal bleeding, inflammatory processes, pain and swelling. The brain also gets involved, producing muscle inhibition and a decrease in proprioception, which usually compels the injured athlete to limp in an effort to reduce pain. By numbing the toe and tricking the brain into allowing the ankle to move through a normal range of motion without pain, I believe we can minimize the detrimental effects of ankle sprains. 25-Minute Cryo-Kinetic Ice BathBy icing the ankle in an ice tub, just following the protocol outlined below, I think you will be able to: - Limit the bleeding by reducing the micro-circulation (Knobloch et al, 2006)
- Trick the brain and hence the muscles into thinking that the ankle isn’t that badly injured, so normal function can be restored more rapidly than you would otherwise expect.
Precaution!- You MUST check whether your client has any vascular conditions (such as Reynaud’s disease) or diabetes, which will be adversely affected by this cold treatment.
If so, this obviously isn’t for them. - If your patient experiences severe unremitting pain during this process (rather than extreme discomfort that settles after 4-5 minutes), it is possible that they have suffered an ankle fracture, so cease icing immediately. If you suspect an ankle fracture, don’t prescribe this technique until after an x-ray has excluded any fractures.
- Action! – The ice-bucket protocol
- Use a bucket (rectangular is best) that can easily accommodate the client’s foot.
- Fill with cold water and enough ice to make the water really cold (How cold? I’m not aware of any research that states an optimal temperature, but I suggest 12-15°C).
- Check precautions and contraindications of ice applications with your client before you start treatment.
- Sit the client on a chair with their foot and ankle (up to mid shin) in the iced water for 10 minutes. It is normal to feel pain from the cold but this should abate after five minutes, as the foot and ankle go numb.
- After 10 minutes, the client stands, with their foot still in the bucket, and performs two minutes of mini squats, keeping the range within what pain permits (ie, don’t push into pain).
- Client sits again for two minutes with their foot stationary in bucket.
- Client stands and performs two minutes of small calf raises, again within pain limits (ie, the calf raises should not cause pain).
- Client sits for two minutes.
- Client stands and repeats the two minutes of mini-squats.
- Client sits for two minutes.
- Client stands and repeats the two minutes of calf raises.
- Client sits for one minute, totaling 25 minutes of cryo-kinetic icing.
Perform this regime every two to three hours for the first two days following the injury. In professional sports, injured athletes may also set their alarms and ice a few days, late at night and early morning (eg, 12pm and 3am) to minimize swelling and optimize recovery speed. For your averagely active individual who also has a day job, I'd get them to perform this program as soon as possible following the accident and after that, for the initial two to three days, once a day towards the end of the day once they're back from work and have settled down to the evening. I have even had success using this technique on chronic swollen ankles that was sprained four to six weeks previously. After one to two sessions in the bucket, the swelling was minimal and the range of movement improved dramatically. Caution!There are a few basic principles which the patient should be informed of: - Only exercise within pain limits, to avoid making tissue damage worse.
- Only take as much weight on the injured foot as you can tolerate within pain levels, but aim to progress the amount of weight-bearing during the ice sessions.
- This regime is supplemental to, not a replacement for the other RICE principles, so it is vital that you continue with compression and elevation between ice sessions.
Sourced From: Mark Alexander was sports physiotherapist to the 2008 Olympic Australian triathlon team, is lecturer and coordinator of the Master of sports physiotherapy degree at Latrobe University (Melbourne) and managing director of BakBalls (www.bakballs.com). Scott Smith is an Australian physiotherapist. He works at Albany Creek Sports Injury Clinic in Brisbane, specializing in running and golf injuries. He is currently working with Australian Rules football teams in Brisbane. Sean Fyfe is the strength and conditioning coach and assistant tennis coach for the Tennis Australia National High Performance Academy based in Brisbane. He also operates his own sports physiotherapy clinic. Mark Palmer is a New Zealand-trained physiotherapist who has been working in English football for the past five years. He has spent the past three seasons as head physiotherapist at Sheffield Wednesday FC.
There's so much more to stretching than just extending. Chiropractic sports injury specialist, Dr. Alexander Jimenez compares, contrasts & debunks. Stretching is now a science. A developing understanding of the physiology of stretching means sports support professionals finally have a enormous variety of methods to use with clients for training, injury prevention and rehabilitation. This report provides an summary of some of the most popular types of extending, their benefits and drawbacks, in order to help therapists and trainers pick the most important forms for their clients. I have used the description of a hamstring muscle stretch in every instance to illustrate the various techniques. Active Stretching (Static)Popularized in the 1980s by Bob Anderson(1), an active stretch is one in which the client performs the stretch unaided. There's little if any motion as the controlled stretch position is maintained for approximately 30 seconds, then occasionally repeated. Inherent into the practice of yoga, physiologically this Kind of stretch has been termed 'a form of visoelastic myofascial release'(two). Put simply, muscles and their associated fascia begin to lengthen slowly in response to a gentle and constant load. In therapeutic terms this physiological response is a real property of fascia and muscle known as 'creep'. The fact that the load applied is continuous and gentle is key to the efficacy of active stretching. Many people wrongly believe that active static stretching can aid warm-ups and cool-downs, reduce DOMS, reduce injury, and enhance athletic performance. There is not much evidence to support these beliefs (3). How To Do ItA static active hamstring stretch might be done by lying supine, clasping the hands behind an extended knee and flexing at the hip to produce the stretch. Hold the position stable for approx 30 minutes prior to releasing and optionally repeating. Advantages- Client can carry out the stretch themselves in the home or after exercise to maintain joint range.
- Gives the athlete control over their own rehab or flexibility routine.
- Useful if the athlete doesn't have access to a trainer or therapist.
- Can be done nearly anywhere and in any time.
- No equipment is necessary.
- Is comparatively simple.
- Strengthens agonistic muscles (see below).
- Is known to enhance range of movement.
- Is allegedly safe.
- Could possibly be utilised in early-stage rehabilitation.
Disadvantages- Inexperienced clients may embrace an incorrect position and fail to stretch the intended muscle.
- The athlete may not maintain the stretch place for long enough.
- The technique demands strength in the agonistic muscles, which may be troublesome for inactive customers or those with muscle atrophy (although arguably it is also great for them -- view key benefits below).
- It is boring.
- Most sporting movements are ballistic in nature, so for many athletes there may be little practical bene t from raising static flexibility.
Key Benefits- Useful in a clinical setting where flexibility has been limited by weakness at the agonist muscles being used to bring about the stretch (as an Example, a sportsperson needing to Obtain knee extension after knee surgery or a hamstring injury where maintenance of quadriceps strength is as important as hamstring rehabilitation).
- Coupled with controlled breathing, it might be helpful within a comfort program.
Passive StretchingWhile an athlete can do passive stretches unaided, by utilizing a piece of gear, the expression is commonly utilized to indicate that another person is needed to help bring about the stretch. This individual is often another team participant, the trainer or a therapist. No muscles are contracted as a way to bring about the stretch. How To Do ItA passive hamstring stretch might be done lying in supine, using a towel hooked around the thigh to help to bring the hip to flexion in order to extend the hamstring muscles without deliberate contraction of quadriceps. Instead in supine, a coach uses the straight leg raise position to extend the client's hamstring. Advantages- Makes stretching less effortful, since the client relaxes into a position that makes it possible for the trainer to facilitate the stretch.
- When done as a member of a group action, can make stretching more enjoyable, facilitate concern for fellow staff members and enhance feelings of advancement.
- Is relatively easy to do.
- Can be performed almost anywhere.
- No equipment is needed.
Disadvantages- Unless gear is used, a stretching partner is necessary.
- There's a danger of the athlete being overstretched by an inexperienced partner.
- The athlete must trust their partner.
Key Benefits- Passive spouse stretching is a great option when flexibility is limited by the elasticity of this muscle/s to be stretched.
- Also useful therapeutically when the agonist is too weak to result in a successful active stretch.
Active (Ballistic) StretchingThe stretched muscles serve as a kind of spring to assist the athlete bounce repeatedly and rhythmically in and out of the stretch place, in effect producing several tiny moves. Muscles are not allowed to stay in the extended position even for a few seconds. Instead, the athlete uses momentum to stretch into and beyond their end of scope position with the intent of raising range of movement (ROM) with subsequent movements. The degree to which ROM is expected to improve with each stretch is not given in research, nor is there a recommended number or variety of stretches required for every targeted muscle (contrast this with AIS below). Ballistic stretching can significantly raise tendon elasticity(4), a more useful finnding given that tendon elasticity seems crucial to the discharge of stored energy employed in several sports. Nick Grantham(5) has previously pointed out the similarities between ballistic stretching and the more recent variant of dynamic stretching where controlled leg and arm movements are used to help take the limb into the constraints of the associated joint variety. He notes that in the latter circumstance, movements are gentle and controlled, whereas in ballistic stretching they are forceful and less controlled. Plyometrics is another form of ballistic training. It utilizes the elastic recoil of this muscle-tendon unit following a surprising stretch of the muscle to enhance muscle strength and is thus helpful in explosive sports. As an instance, after a leap, the muscle-tendon device of the ankle plantar flexors is stretched as the plantar flexors (gastrocnemius and soleus) are eccentrically contracting to help slow the entire body once the feet hit the ground and the ankle begins to dorsi flex. As Sean Fyfe describes(6): '...this stretch-upon-impact can lead to the muscle building larger elastic force in response to the stretch.' From a security point of view, ballistic stretching is controversial on the grounds that it does not permit sufficient time for tissue adaptation and carries a relatively high risk of harm if poorly implemented. A sudden stretch may stimulate the stretch re ex, muscles contract, muscle strain increases and cells become more challenging to stretch, beating the object of the activity. However, advocates of plyometric training argue that, properly regulated, it plays an important part in late stage rehabilitation, as plyometric movements (running, jumping and throwing) occur widely in sport (6). How To Do ItA ballistic hamstring stretch may be done standing, bent in the trunk. With straight legs. Make small bounces up and down, trying to touch your toes (this also affects spinal extensors, not just hamstrings). Advantages- Reportedly useful for sports with a ballistic component, such as kick boxing.
- Helps build lively versatility, so can be used to increase training specificity.
- Performed after static stretching, it seems to contribute to greater flexibility.
- Clients may do it in your home or following exercise.
- Gives an athlete management over their own flexibility routine.
- Might be done almost anytime, anyplace.
- Does not need any equipment.
- Is relatively easy.
Disadvantages- Critics think the ballistic movement is more likely to damage muscles, since there isn't sufficient time for creep to occur in soft tissues.
- Can't be used in early-stage rehab.
- The sudden stretch stimulates the stretch re ex, increasing muscle tone and making it harder to extend the muscle.
- Shouldn't therefore be relied on in order to attain developmental flexibility or permanent lengthening of cells, as fast/high-force extending tends to increase muscular stiffness.
- If tissues are stretched too quickly in 1 movement, they may tear, leading to soreness and limited ROM.
- Because of a scarcity of investigation (ethically it is hard to test potentially damaging kinds of stretching), it is not clear what effect ballistic stretching has on range of motion.
VariationA version of active/ballistic stretching known as busy isolated stretch (AIS) involves stretching one isolated muscle at a time by repeatedly hammering the opposite muscle for only 2 seconds, up to ten times. For each contract/relax, the resistant stage is surpassed by 1-4°. Alter (3), in his literature review of AIS, found 10 almost equal variants on this kind of extending, each using a different title, and differing only on the matter of this 2-second protocol. AIS (also referred to as the Mattes Method after its developer, Aaron L Mattes) seems to differ in ballistic stretching in 2 ways: it's formulaic in its protocol, and in ballistic stretching the stretch isn't held but simply 'bounced' out of. PNF StretchingDeveloped in the 1940s as a physical therapy to help rehabilitate victims of migraines, there are many forms of proprioceptive neuromuscular facilitation (PNF), all of which use effective muscle contractions.
Probably the most recognizable is the 'single airplane' PNF technique, where an athlete's muscle is accepted several times to a stage of immunity and the athlete restricts the muscle isometrically (often using a coaching partner or therapist as resistance), even before the muscle is then stretched either actively by the client or passively from the spouse. One of the most exhaustive and well-known books on the topic is by McAtee and Charland (7).
The Way To Do ItTo carry out a PNF hamstring stretch, in supine the hamstrings are taken into mild stretch. The athlete then isometrically contracts the hamstrings, while the partner provides resistance. There's no consensus on how long to maintain or how powerfully to contract the stretching muscle. Generally PNF contractions are more powerful than those used in MET (see below). Following an agreed period, eg, 6 to ten seconds, the athlete relaxes the hamstrings and the muscle is actively or passively eased to a lengthened position, where the stretch is replicated. Advantages• More pleasurable and less boring than straightforward static stretching. • Improves range of motion. • Advocates claim many other benefits including improved strength, improved joint stability, improved co-ordination, improved endurance, improved blood circulation. Disadvantages- Normally requires a partner.
- Since there are many variants, athlete and spouse / therapist / trainer have to be clear about which protocol they are using.
- There could be more stress in the muscle being stretched than happens in active stretching, raising the potential danger of this technique.
- Done incorrectly, may cause harm, eg, from over- extending by a zealous partner.
- May not be suitable for hypertensive clients, since there's a possibility of the valsalva phenomenon occurring during isometric contraction (customer holds their breath after deep motivation, increasing systolic pressure).
Key Benefits - Good for highly motivated people and to aid team- building, in which staff members are encouraged to stretch each other.
- Specific forms may be useful therapeutically where active movement isn't feasible because of pain or weakness, or ROM severely restricted.
VariationPNF can also involve spiral diagonal patterns of motion, on the premise that muscles have a tendency to spiral around bones; this form of stretch intends to maximize natural motion patterns. MET StretchingMuscle energy technique (MET) originated from the late 1950s/early 1960s as an osteopathic technique, by the work of individuals like TJ Ruddy and Fred Mitchell Snr. The main differences between MET and PNF lie inside their roots, coming as they do from two distinct disciplines. This gives rise to different terminology, which can be widespread anyhow within the subject of extending -- helping to add to the confusion. In technical terms, the force of contraction exerted by a client utilizing MET is reduced in contrast to PNF. The use of submaximal contractions has been shown to be equally as beneficial since maximal contractions at enhancing hamstring flexibility in areas not able to reach 70° of hip flexion, and might therefore be safer in early-stage rehabilitation of cartilage and muscle injuries(8). There are many variations and applications of MET(two). At its simplest, the therapist requires a client's muscle into a point of mild tension, in which the customer contracts it isometrically (up to 20 percent of their force), whereas the therapist provides resistance. The muscle can be lengthened either following regeneration, when the client relaxes (called post-isometric relaxation extending, PIR); or during contraction (an isolytic contraction, where the muscle is having to contract eccentrically). In this second kind of MET, rather than fitting the force of the client's contraction, the therapist accomplishes it, raising ROM in the associated joint, thereby stretching the contracting muscle. MET is gentle and may be used without the stretching component. The very low-level contractions involved in the procedure may be helpful in early stage rehabilitation, to help grow or maintain muscle strength when tissues are in the initial stages of repair. How To Do ItTo carry out a MET hamstring stretch in supine, the client actively exes the hip to its maximum with knee bends, then extends the knee until they reach a point of mild stretch/restriction (therapists can refer to this as the 'point of glancing' or ' first barrier'). The therapist maintains that this position while the athlete tries to ex the knee by contracting the hamstrings, using up to 20 percent of their force, making an isometric contraction resisted by the therapist for 7-10 minutes. The client relaxes and on exhalation, the therapist gently extends the knee to the new barrier position. This place is held for 10-30 minutes and the procedure repeated. Advantages- Stretches soft and muscle tissue.
- Strengthens muscle.
- Relaxes muscle.
- Helps regain correct muscle functioning.
- Enhances local circulation.
- Helps to de-activate trigger points.
- Contrary to PNF, among the goals of MET is combined mobilization.
- Advocates claim there are no contraindications.
Disadvantages- There are many distinct kinds of the technique and coaching is needed to understand how and when to utilize them.
Key BenefitsMET is used to deal with many patterns of muscle dysfunction. Chaitow (2) explains in detail the use of eight variants on the basic MET technique and when they might be implemented. Soft Tissue Release StretchingUtilized by physiotherapists, this entails 'locking' a passively shortened muscle close to, or on its own origin prior to stretching the muscle. By forming a false source, the stretch could be applied specifically to areas of brotic tissue. Advantages- Stress and stretch are believed to ease a lengthening of soft tissues and an increase in range of motion (9).
- Certain stretches may be performed either actively or passively.
- Comparatively easy to use.
- Performed knowingly, the only equipment needed is a tennis ball.
- Can readily be incorporated into a massage series, so can be helpful where massage is indicated as part of a rehab or care program.
- Helps de-activate activate points.
Disadvantages- Therapists will need to learn the method, which can take many forms.
- Cannot be used on all customers (eg, people who bruise easily and have fragile skin).
- May result in soreness, very similar to DOMS.
Key Benefits- Useful where a client can't take a joint through a full range because of injury, or with hypermobile clients where starting a stretch at the end point may not be desirable.
- Valuable for targeting areas of fibrotic tissue in muscles which might otherwise not be stretched with gross active stretching.
ConclusionThis summary isn't meant to be comprehensive -- there is not any space here, for example, to cover techniques like tractioning, neural mobilization and non-traditional kinds of extending. All kinds of stretching can be utilized within a sports-specific endurance regular; it's all up to this support professional to comprehend the repertoire available to help optimize the benefits to their client. References
1. Anderson B (1981) Stretching.
2. Chaitow L (2001) Muscle Energy Techniques. Churchill Livingstone.
3. Talter, Michael J (2004) Science of Flexibility. Human Kinetics.
4. Witvrouw E, Mahieu N, Roosen P and McNair P (2007) The role of stretching in tendon injuries, Br J Sports Med 41: 224-226.
5. Grantham, Nick (2008) Dynamic flexibility, Sports Injury Bulletin 77, March.
6. Fyfe S (2007) Why you should put plyometric into rehab, Sports Injury Bulletin 71 July/Aug.
7. McAtee E and J Charland (1999) Facilitated Stretching. Human Kinetics.
8. Feland JB and Marin HN (2004) Effect of submaximal contraction intensity in contract-relax proprioceptive neuromuscular facilitation stretching, Br J Sports Med 38 e18.
9. Sanderson M (2002) Soft Tissue Release.
Imagine you trained well for a significant race, got yourself into form and cruised through the first half of the course without any issues, and were on pace for a nice PR. All of a sudden, you started to notice tightness in one of your hamstrings. In the beginning, it was a hindrance that could be ignored, but the tightness got steadily worse until your hamstring was a stiff, painful mass of tissue which cried out to cease. You slowed down, you ceased to stretch, massaged it, but nothing helped. Realizing that this was the conclusion of your race, you limped to the end, disappointed and frustrated that after six months of attentive, time-consuming preparations, some strips of muscular tissue in the back of your thigh had prevented you from attaining your goal. Does this situation sound familiar to someone or has this happened to someone you know?
Chiropractor, Dr. Alexander Jimenez looks at exactly what the recent study says concerning the identification and treatment of pelvic and hip anxiety fractures in athletes. Stress fractures are a rare cause of pain in The overall sporting population with some reports indicating they account for just 2% of all reported accidents. A significantly higher incidence of stress fractures is observed in long distance runners and triathletes(1). Stress fractures around the anus are Relatively rare but must be regarded as a differential diagnosis when athletes (particularly long distance runners and triathletes) accounts hip/groin or buttock pain during and after running. This article concentrates on stress fractures across the pelvic/ hip area including sacral, pubic rami and femoral neck. The anatomy, clinical presentation, diagnosis and therapy for each of these kinds of stress fractures will be discussed. Why Stress Fractures Happen?Stress fractures occur over time when bone can't resist submaximal persistent forces. They've been described as either insufficient (if normal pressures result in fracture of a bone together with decreased bone density -- ie within an elderly osteoporotic individual) or fatigue fractures (when abnormal stress is placed on normal bone plus a fracture happens -- ie long distance runner)(2). This guide focuses on fatigue fractures. When bone is subjected to loading, then the Initial physiological response is a relative increase in osteoclastic activity (bone resorption) and thus temporary structural weakening occurs before new bone formation. If these stresses continue to occur without sufficient time to get the bone to adjust then continuing osteoclastic activity exceeds bone regeneration and microfractures happen(3). The First feature of a pressure reaction Viewed on imaging is bone oedema on MRI, also increased action on bone scanning. Bone scan in the acute phase has high sensitivity but low specificity, and increased uptake may also be caused by disease, bone infarction or neoplastic action(4). Latshaw et al stated that 60-70\% of x-rays in the acute period of a stress fracture (less than 2 weeks) show a negative effect (5). Because of its lack of radiation, high sensitivity and higher specificity MRI (even though its higher price) is often the most favored modality to determine stress fractures at the early phases. A Number of different intrinsic and extrinsic factors are identified as risk factors for stress fractures. These include, but are not restricted to, sneakers, biomechanics, nutrition, stamina, versatility and hormonal or menstrual disturbances. These all need to Be considered when analyzing a patient with a suspected stress fracture. Johnson et al found in their investigation of 8 female athletes with sacral stress fractures the most significant risk factor for these types of fractures was a quick increase in impact action with a more vigorous exercise plan(6 pounds). A spike in workload must therefore be regarded as a significant risk factor for a stress fracture. Sacral Stress FracturesAnatomyThe sacrum usually consists of 5 fused Vertebrae (S1-S5) and is triangular in shape (see Fig.1).) It contrasts with the ilium in the sacroiliac joint and also has been described due to its shape and its role in the supply of forces because the keystone to the arch of the pelvis. Figure 2 reveals the anatomy of the anatomy of the pelvis, and also how the sacrum (like an inverted arch) encourages the whole upper body weight and transports force into the pelvis. Fractures based on their place (see table1) (7).) Sacral stress fractures most often occur in zone 1 and therefore are more often seen in women. It has been suggested that the form of the female limb leads to less efficient weight reduction through the sacrum than the typical penile tissues(8pounds). But, it's also true that several male elite Australian triathletes have endured sacral stress fractures in recent years. Clinical PresentationAn athlete with a sacral stress fracture will Frequently present with acute onset back, buttock or hip pain they explain occurred suddenly during a jog and they will report that they had been not able to continue that run. They might have limited back motions, and might or might not have pain on palpation of the sacrum. Often they have no neurological symptoms. Pain or tightness will likely be experienced walking and they'll have pain on leaping on the side. They also commonly report pain on single leg loading tasks -- for example placing trousers on. DiagnosisBecause of the excessive overlying soft tissue, Complex bone anatomy and/or connective tissue, plain radiographs seldom show a sacral stress fracture(8). Bone scan, MRI or CT may be used to discover a sacral stress fracture; MRI is most frequently the modality of choice as a result of dearth of radiation. Fig 3 shows a stress fracture of the back ala. CT and MRI findings indicate that sacral stress fractures occur due to repeated compressive forces resulting in shear microfractures of their trabecular bone(6). These fractures seldom create a visible callus on plain radiograph therefore MRI or CT must be used to follow up imaging when inferior recovery is supposed(8). TreatmentAs these are secure cracks, treatment Progression is largely depending on the athlete's symptoms and can advance from non-weight bearing to weight bearing to slow return to operate as symptoms subside. Usually a span of 6 weeks with no running followed by a 6-8 week period of gradual return to running is demanded. Most published literature shows a full return to activity by 4 months, with rare instances taking 14 months(8). Repeated CT scans 4 and 8 months after Diagnosis often show no symptoms of previous fracture, which indicates a rapid and complete recovery of this well-vascularised trabeculae microfractures when compared to fractures that involve the less well- vascularised cancellous bone. Johnson et al showed that those girls who had the best diets, regular menses and fewer before anxiety injuries or menstrual irregularities healed the fastest(6). Pubic Rami Stress FracturesAnatomyThe inferior pubic ramus slopes down And medial out of the superior ramus, and becomes thin as it stinks. It's the attachment site for the adductor magnus, brevis and gracilis as well as obturator internus and externus (see figures 4a and 4b). They generally occur in the inferior pubic rami adjoining to the pubic symphysis. Miller suggested that these fractures occur because of repetitive forces transferred to bone through muscle contraction or fatigue(9). In a study on female army recruits Hill et al proposed that over-striding throughout sanity was potentially a mechanism for pubic rami pressure fractures(10). Clinical PresentationThese fractures often present in competitive races or even intensive coaching sessions. They generally occur in the back of the adductors and/or external rotators of the hip. Athletes with pubic rami pressure fractures may complain of pain in the hip, buttock, inguinal or adductor area that develops with activity and decreases with rest. They generally limp and on clinical testing suffer from passive hip abduction, resisted hip adduction and resisted hip external rotation. Noakes et al said that a stress fracture of the diaphragm might be made with confidence even without radiographic evidence in the following 3 criteria will be met(11) 1) Running is impossible due to acute Discomfort in stomach region; 2) Discomfort in groin with kneeling position on leg (positive standing test); 3) Deep palpation revels exquisite, nauseating tenderness localized to pubic ramis. DiagnosisPlain radiographs may reveal undisplaced fracture lines however a lack of radiographic evidence in the early stages is not unusual. Bone scan, CT or MRI could be used to identify fracture and bone oedema could be evident on MRI. TreatmentThese fractures have a high recovery rate following 6-10 weeks of rest however they have a small hazard of non-union and re-fracture when sufficient rest has not been undertaken(11). Those fractures which show delayed marriage will likely reveal complete recovery when further conservative direction is performed(9). Progression of treatment ought to be guided by pain and thus initially, crutches might be required if walking is painful. Femoral Neck Stress FracturesAnatomyThe femoral neck is the flattened, pyramid shaped piece of bone that connects the femoral head to the femoral shaft. Athletes with femoral neck stress fractures may record hip/groin pain when running. This pain typically has an insidious onset and usually worsens with the intensity or length of a run. It can initially only happen at the end of a rush but while the stress reaction worsens the pain gifts earlier later on, and longer period is necessary after the jog to get symptomatic settlement. Athletes with femoral neck stress fractures can possess hip/ groin pain in rest, and may wake with pain at night. They frequently also report pain with rolling up in bed, active straight leg raise and single leg posture. DiagnosisConventional radiographs are usually negative from the acute setting but might show signs in situations where symptoms are present for two weeks or longer. TreatmentAs mentioned, tension side pressure fractures require instant orthopedic opinion due their risk of displacement. Compression facet fractures are often handled invisibly with safe weight bearing and ongoing monitoring to evaluate healing. Initial phases of management should include non-weight posture on crutches till no pain whatsoever, then advance to partial weight bearing to full weight bearing over a period of 4-6 months(10). A slow return to run program can be initiated at 8-12 weeks when the athlete can walk without pain/symptoms. Return-To-Running StrategyWith all stress fractures across the anus, A gradual return to run plan is an important component of the rehabilitation process. To ensure progressive loading with spikes in work load, then the yield to conduct plan ought to be at least as long as time off from working out. By way of example if an athlete had a knee strain fracture which took 6 weeks of no running afterward athlete requires at least a 6-week gradual return to running strategy before they might be at their previous conducting load. A Lower-limb strengthening program can be put into place quite early in the rehabilitation process initially beginning with non-weight bearing exercises, which may be improved as the athlete is in a position to weight bear with no pain. Early strengthening can help decrease muscle Loss and tackle any biomechanical difficulties. As the fracture heals and the tolerance for Load enhances, these exercises can be Developed to higher-load exercises to prepare the body to the return to working out. References
1.BMJ Open. 2012 Nov 19;2(6)
2.Current Sports Medicine Reports 2006; Vol 5 37-43
3.Sports Medicine and arthroscopic review 2012. Vol 20 No 4 206-213
4.British Journal of radiology 2012; 85 1148-1156
5.American Journal of Sports Medicine 1981. Vol 9, No 1 54-57
6.American Journal of Sports Medicine 2001 Vol 29, No4 498-508
7.Clinicla cases in mineral and bone metabolism 2011; 8 (3), 19-23
8.Current Sports medicine reports 2007. Vol 6 39-42
9. Sports Medicine 2003; Vol33, No13, 1003-1012
10.Journal of Bone and Joint Surgery 1996. Vol 78, No3, 383-386
11.American Journal of Sports Medicine 1985. Vol 13, no 2 120-123
Corticosteroid injections are widely used to aid injury rehabilitation but we still understand very little about their mechanism. Chiropractor, Dr. Alexander Jimenez examines the current thinking and discusses how this potentially impacts treatment options... Corticosteroids are used for their anti- inflammatory and pain reducing effects. They can also reduce muscle spasms and influence local tissue metabolism for faster healing. Injection therapy is now widely available from specially trained general practitioners, physiotherapists and consultants, and can be offered for a wide range of clinical conditions. Because of this wide availability and the growing desire for injury “quick fixes”, it is important that they are used correctly and the full consequences are understood prior to injection. The main indications for corticosteroid injection use are(1): - Acute and chronic bursitis
- Acute capsulitis (tight joint capsule)
- Chronic tendinopathy
- Inflammatory arthritis
- Chronic ligament sprains
Steroid injections of hydrocortisone are a synthetic form of a naturally produced hormone within the body called cortisol. Cortisol is important for regulating carbohydrate, protein and fat metabolism. It is also involved in metabolic responses in times of stress such as emotional problems, trauma, and infection, where levels of inflammation are elevated. Steroid injections work on the immune system by blocking the production of chemicals that activate the inflammatory reactions, therefore reducing inflammation and pain within injury locations. Steroid injections can be directed into a joint, muscle, tendon, bursa, or a space around these structures. Figure one shows an injection aiming for the bursa within the shoulder joint. This is often a source of irritation and causes impingement when the shoulder moves. The location will depend on what tissue is causing the symptoms. When injected locally to the specific structure, the effects are primarily only produced there and widespread detrimental effects are minimal(2). When To UseIdentifying the correct time to issue a steroid injection following injury requires careful consideration. The mechanical status of the tissue is important because this will vary depending on the stage of healing and therefore the effectiveness of the injection will also vary. Figure 2 shows the different stages that a tendon can progress through following trauma. This is equally applicable to muscles, fascia, and other tissues too. A reactive tendinopathy (tendon degeneration/damage) will present shortly after injury/trauma/stress/ excessive loading, and will display acute swelling and inflammation. The initial care should be 2-3 weeks of rest, analgesia, ice application and gentle physiotherapy. If symptoms have not significantly improved after this period, then the introduction of a corticosteroid injection is appropriate for providing symptomatic relief by reducing inflammation and eliminating the occurrence of further damage because mechanical normality will be quickly restored(3). If the tendon continues to be placed under excessive load, swelling and inflammation will remain or escalate, and continuous loading will eventually cause micro trauma and further tendon degeneration. If this is prolonged for long enough then the tendon will fail structurally(4). The use of corticosteroids here is questionable because there is unlikely to be inflammation present to combat, and the injection alone will not repair this physical damage. Injection treatment at this stage may only be indicated if the athlete is in too much pain to participate in any significant rehabilitation. The symptomatic relief the injection may bring at this point could allow exercises to be performed, which can help accelerate the repair of physical damage. Ultimately, physical exercise is a key component in recovery following corticosteroid injections. Impact On Treatment & PerformanceFor the best outcome, post-injection care – particularly with respect to timing – is important. Relative rest is recommended for the first two weeks post-injection. During this first two weeks the tissues are weakened and their failing strengths are reduced by up to 35%; this means the strength at which they would fail (tear) is much lower and more susceptible to rupturing(8). By six weeks the bio-mechanical integrity is reestablished and the tissues are deemed ‘normal’ again, with increased strength and function(8). Benefits are optimal within this 6-week period and often short-lived; therefore the athlete must comply strictly to a rehabilitation program to gradually load the tissues and ensure the correct load is applied during this period(9). Research has also shown that at twelve weeks post-injection there is little significance in the difference between those who received a steroid injection and those who focused on exercise therapy alone, suggesting this early symptom relief should be used to enhance rehabilitation(10). If loading is accelerated in the early stages the athlete risks re-aggravation of the injury, delayed healing, further weakening and thus rupture. If this rehabilitation protocol is followed, the athlete will likely maximize their outcome. They can return to training, and with the severity of their symptoms reduced, this can allow progression to the next stage of training. If the injury is severe enough that surgery may be considered within three months, a steroid injection should not be performed as this can affect the success of the surgery. Evidence For Sports InjuriesHere we will consider some of the more common sports injuries and summarize what the current evidence regarding steroid injection suggests. ShouldersInjection therapy is indicated in subacromial impingement or bursitis (as in Figure 3 below) to allow the inflammation reduction and restoration of normal movement. It is also indicated in rotator cuff pathology where the tendons are again inflamed, but also damaged and unable to undergo exercise therapy. Shoulder injections are shown to produce early improvements in pain and function with a high level of patient satisfaction(10). Symptoms are similar to those without injection at 12 weeks however, suggesting physical therapy is also important(10). Injection is not appropriate for shoulder instability as it can make the joint more unstable. Exercise therapy alone is recommended for this condition. Hip PainTwo soft tissue conditions that benefit the most from injection are piriformis syndrome (muscle tightness running deep to the buttock muscles), and greater trochanter pain syndrome (affecting the bursa surrounding the hip joint, or the gluteal tendons that are all in close proximity to the lateral hip)(11). Injection success is reported to be approximately 60-100% if the diagnosis is accurate and the correct protocols are adhered to(12). Other regions such as the adductor and hamstring tendons can also be treated for tendinitis or groin pains. However, injections into these regions are deep and painful, and require extensive rest afterwards. Knee PainKnee joint injections for arthritic conditions are most commonly used, with injection to the soft tissues much less common due to the complex diagnosis, and risk of detrimental side effects. The various bursa around the knee, the iliotibial band, and quadriceps and patellar tendons have all been shown to significantly benefit in the short-term; however accurate location is essential to ensure the tendon itself is not penetrated – only the surrounding regions(13). Plantar FasciitisThis is a painful injection to receive, and pain can last for well over one week post- injection (see figure 4). There is an approximate 2-4% risk that the fascia can rupture. In addition, there’s a risk of local nerve damage and wasting of the fat pad within the heel. Studies have demonstrated that at 4 weeks post-injection pain and thickness of the injured plantar fascia are reduced and these benefits remain three months later, suggesting a good outcome if the risks are avoided(14). References
1. Injection Techniques in Musculoskeletal Medicine, Stephanie Saunders. 2012; 4th Ed.pg 82
2. BMJ. 2009;338:a3112 doi:10.1136/bmj.a3112
3. J Musculoskel Med. 2008; 25: 78-98
4. BJSM. 43: 409-416
5. Rheumatology. 1999; 38:1272-1274
6. Br Med J. 1998; 316:1442-1445
7. Ann Rheum Dis. 2009; 68(12): 1843-1849
8.Am J Sports Med. 1976; 4(1):11-21
9. B J Gen Pract; 2002; Feb:145-152
10. BMJ. 2010;340:c3037doi:10.1136/bmj.c3037
11. J Muscuoloskel Med. 2009; 26:25-27
12.Anesth Analg. 2009; 108: 1662-1670
13. Oper Tech Sports Med. 2012; 20:172-184
14. BMJ. 2012;344:e3260
Historically athletes were barefoot in the sporting arena and it is only a relatively recent phenomenon for shoes to be worn in competition. In Roman times wrestlers competed barefoot, whilst runners wore little more than thin leather sandals to compete over long distances. More recently several athletes have achieved significant success competing barefoot: Abebe Bikila from Ethiopia won the Rome Olympic marathon in 1960, and Zola Budd became the world record holder over 5000 meters. Since the 1970’s athletic shoe manufacture has boomed and with it so too has the incidence of running-related lower limb injuries. This prompted the question of whether these new designs were to blame for the injuries or simply reflected the growing interest in distance running as a sport. That notwithstanding, the interest around barefoot running to reduce such injuries has grown exponentially. This account aims to appraise some of the literature on this contentious subject.
Summertime is the perfect season to start a running program. With the sun shining, there’s simply no reason to not lace up your sneaks and hit the road. But before you get started, learn the five mistakes every beginning runner makes. And skip them! The most common mistake new runners make: going too hard, too fast. By not easing into it, you end up exhausted much sooner than expected, and the tail end of your run becomes a wind-sucking session. This can make running seem too hard, which can lead you to quit your program all together.
The key is pacing yourself; running is a sport in which progress is especially slow and gradual. If you’re running outside, downloading a pacing app like RunKeeper (free, iTunes and Google Play) can help you keep track of your speed. Start off at a moderate pace, and gradually increase throughout your run. This will make for not only a more enjoyable run, but it’s also the key to building endurance.
A sprain is medically defined as a stretch or tear of the ligaments, the strong cords of fibrous tissue which connect two bones together at the joints. Sprains most commonly occur on areas of the body which can be injured during a fall or sudden twisting motion, such as the ankle. According to the U.S. National Library of Medicine, approximately 2 million ankle sprains alone occur each year. An incorrect fall or abrupt twist usually causes a sprain because the unusual movement can force a joint into an abnormal position that may wind up stretching or tearing the ligament. Ankles, wrists, knees, and fingers are all frequently sprained areas of the body. A strain is medically defined as a stretch or tear of the muscle or tendon. A tendon is a fibrous band of tissue that connects the muscles to bones. Strains most commonly occur on the lower back and on the hamstring muscle located on the posterior side of the thigh, most commonly as a result of overexertion, trauma, or repetitive movements. Strains most frequently occur on the back, hamstring, and even the shoulder, because these areas are greatly mobile and highly used during strenuous physical activity, leading to a stretch or tear of a single, or multiple, muscle and tendon due to overuse. Although sprains and strains significantly differ from each other, these do share several similarities, which is the main reason individuals generally confuse the two conditions. Both sprains and strains include symptoms of pain, swelling, and limited mobility around the region of the injury. The symptoms can range from moderate to intense, according to the injury’s level of severity. Individual’s who’ve suffered an injury and are experiencing these symptoms can temporarily relieve their pain and discomfort using ice therapy to reduce the inflammation around the affected area as well as getting plenty of rest and elevation.
|
Wrestling is a sport that requires speed, strength, and endurance that involves intense physical contact, pushing and pulling the muscles, tendons, ligaments, and joints to their limits. Wrestlers' are constantly contorting their bodies. Pushing the body to its limits increases the risk of developing wrestling injuries that include: Wrestling Injuries The most common injuries usually occur from forceful contact or twisting forces. And if a wrestler has been injured, there is an increase for re-injury. Wrestling tournaments typically take place over days, often with back-to-back matches, which significantly fatigues the body and increases injury risk. The most common wrestling injuries include: - Muscle strains of the lower extremities and/or the back.
- Chronic problems can result from hours in the forward stance posture and repetitive motions.
- Trigger points.
- Neck injuries.
- Ligament knee injuries - Meniscus and MCL tears.
- Pre-patellar bursitis/Osgood Schlatter's syndrome from consistently hitting the mat.
- Ankle injuries.
- Hand and finger dislocations and fractures.
- Dislocations and sprains of the elbow or shoulder from take-downs.
- Cauliflower ear - is a condition that can cause ear deformity and develops from friction or blunt trauma to the ears.
- Skin infections occur from constant contact, sweating, bleeding, and rolling on the mats. Infections include herpes gladitorium, impetigo, folliculitis, abscesses, and tinea/ringworm.
- Concussions are usually caused by hard falls/slams or violent collisions with the other wrestler.
Injuries can cause wrestlers to alter/change their technique, exacerbating the existing damage and potentially creating new injuries. Chiropractic Rehabilitation and Strengthening There can be a variety of pain generators/causes when it comes to wrestling injuries. Joints and muscles can get overstretched, muscles can spasm, and nerves can become compressed and/or irritated. For example, a neck muscle spasm could be caused by nerve irritation from a shifted vertebrae. To determine the specific cause or causes of the injury/pain, a detailed chiropractic examination will be performed that includes: - Range of motion testing
- Ligament tests
- Muscle palpation
- Gait testing
Injuries often relate to the proper weight, neuromuscular control, core strength, proper technique, hygiene, and hydration management. Successful treatment depends on identifying the root cause of the wrestling injury. Chiropractic restores proper alignment through massage, specific manual adjustments, decompression, and traction therapies. Adjustments can include the back, neck, shoulder, hips, elbows, knees, and feet. Once correct body alignment is achieved, rehabilitative exercises and stretches are implemented to correct and strengthen muscle function. We work with a network of regional medical doctors specializing in referral situations and strive to return the athlete to their sport as soon as possible. General Disclaimer * The information herein is not intended to replace a one-on-one relationship with a qualified health care professional or licensed physician and is not medical advice. We encourage you to make your own healthcare decisions based on your research and partnership with a qualified healthcare professional. Our information scope is limited to chiropractic, musculoskeletal, physical medicines, wellness, sensitive health issues, functional medicine articles, topics, and discussions. We provide and present clinical collaboration with specialists from a wide array of disciplines. Each specialist is governed by their professional scope of practice and their jurisdiction of licensure. We use functional health & wellness protocols to treat and support care for the injuries or disorders of the musculoskeletal system. Our videos, posts, topics, subjects, and insights cover clinical matters, issues, and topics that relate to and directly or indirectly support our clinical scope of practice.* Our office has reasonably attempted to provide supportive citations and identified the relevant research study or studies supporting our posts. We provide copies of supporting research studies available to regulatory boards and the public upon request. We understand that we cover matters that require an additional explanation of how it may assist in a particular care plan or treatment protocol; therefore, to further discuss the subject matter above, please feel free to ask Dr. Alex Jimenez or contact us at 915-850-0900. Dr. Alex Jimenez DC, MSACP, CCST, IFMCP*, CIFM*, ATN* email: coach@elpasofunctionalmedicine.com Licensed in: Texas & New Mexico* References Boden, Barry P, and Christopher G Jarvis. "Spinal injuries in sports." Neurologic clinics vol. 26,1 (2008): 63-78; viii. doi:10.1016/j.ncl.2007.12.005 Halloran, Laurel. "Wrestling injuries." Orthopedic nursing vol. 27,3 (2008): 189-92; quiz 193-4. doi:10.1097/01.NOR.0000320548.20611.16 Hewett, Timothy E et al. "Wrestling injuries." Medicine and sport science vol. 48 (2005): 152-178. doi:10.1159/000084288 Mentes, Janet C, and Phyllis M Gaspar. "Hydration Management." Journal of gerontological nursing vol. 46,2 (2020): 19-30. doi:10.3928/00989134-20200108-03 Wilson, Eugene K et al. "Cutaneous infections in wrestlers." Sports health vol. 5,5 (2013): 423-37. doi:10.1177/1941738113481179
Athletes both recreational and fully competitive can be impacted by injuries to the muscles and ligaments around the hip. These injuries interfere with performance levels and sometimes end participation completely. Excessive pronation along with shoes with poor shock absorption has been found to be an underlying cause for various leg/hip injuries. Custom made Orthotics improve the biomechanics of the feet and reduce the extent of pronation helping to prevent sport-related leg/foot injuries. Over Foot Pronation Research has determined that athletes with more foot pronation have a higher probability of sustaining a leg injury, including iliotibial band syndrome that comes from excessive tightness of the hip muscles. People involved in sports or recreational activities lower their likelihood of developing traumatic and overuse hip injuries through chiropractic treatment and using custom foot orthotics. - The amount of pronation during standing and while running at a standard speed is determined by measuring the angles of the footprints.
- Athletes with more pronation have a higher likelihood of an overuse injury.
- Standing (static) and running (dynamic) prints show the amount of pronation and is a predictor of developing an overuse injury.
- Athletic performance and injury prevention involve regularly checking the alignment of patients’ feet in the standing position.
Hip Injuries & The Hamstring Many hip injuries develop from poor biomechanics and improper movement, especially when running. Smooth muscle coordination provides balance and support for the pelvis and is needed for optimum sports performance. This includes: - Hamstring muscles
- Hip abductor muscles
- Tensor fascia lata or the iliotibial band
When there is an issue with the feet and ankles, abnormal motion like over-rotating the entire leg is the perfect set-up for pulls, sprains, and strains. 50% of standing consists of heel strike and maximum pronation. The hamstring muscles function to control the knee and ankle when the heel strikes and absorb the impact. The theory behind orthotic support is that orthotics help the hamstrings control the position of the calcaneus and knee, so there is less stress on the hip and pelvis. Hip Injuries & Over-Pronation Orthotics can correct excessive pronation and treatment of hip problems. These are some of the problems/pathologies that can develop. Hip and pelvis pathologies: - Anterior pelvic tilt
- Hip adductor muscle strain
- Hip flexor muscle strain
- Hip joint capsulitis
- Iliotibial band syndrome
- Piriformis muscle strain
- Tensor fascia lata strain
These conditions develop in athletes who push their body's to the limit going for optimal performances. Conclusion Overpronation and poor shock absorption contribute to leg injuries — from: - Foot
- Lower leg
- Knee
- Thigh
- Hip
These conditions can be prevented with custom-made orthotics. - Foot biomechanics evaluation is a must
- To avoid hip injuries, athletes need regular evaluations of foot alignment and function
- Wear well-designed and solid-constructed shoes
Chiropractors can prevent arch breakdown and foot problems with custom orthotics, and also treat numerous injuries to the lower extremities, especially the hips. The following video discusses how excessive foot pronation can ultimately affect foot posture and mobility. Several factors can affect foot posture and mobility, such as excessive foot pronation. Excessive foot pronation is most prevalent among the general population, therefore, it is considered to be one of the most common factors for abnormal foot posture and mobility, which can lead to a variety of health issues like overuse injuries. Excessive foot pronation and even supination can ultimately affect overall health and wellness. Hip Labrum tears in athletes can occur from a single event or recurring trauma. Running may cause labrum tears due to the labrum being utilized more for weight-bearing and taking excess forces while at the end-range motion of the leg. Sporting activities are probable causes, specifically those that require frequent hip rotation or pivoting to a loaded femur as in ballet or hockey. Constant hip rotation places increased strain on the capsular tissue and harm to the iliofemoral ligament. This subsequently causes hip instability putting increased stress on the labrum and causing a hip labrum tear. What's Afoot Chiropractic seeks to find the cause of the conditions it is used to treat, including pain, instead of just treating symptoms. Because of this, the chiropractor will work to find the cause of the pain, in this case, overpronation and overpronation, and correct it – or the effects of the condition – in addition to treating the back pain. Overpronation and oversupination can cause a variety of injuries and conditions that affect not only the feet and ankles, but also the knees, hips, and back as well. Some of the more common injuries and conditions include: - Flat feet or posterior tibial tendon dysfunction
- Ankle Sprains
- Achilles tendinitis
- Arch pain
- Plantar fasciitis
- Corns
- Shin splints
- Heel pain
- Tight calves
- Calluses
- Knee pain
- Patellar tendonitis
- Tight hip flexors
- Back pain
- Sciatica
- Herniated disks
James Hill, teacher and father to two older sons and a younger daughter named Madison Hill. Belonging to an athletic family, Madison began participating in many sports since she was a young girl, however, she consequently experienced numerous sports injuries. Luckily, James Hill and his daughter Madison Hill went to visit Dr. Alex Jimenez and he has tremendously helped her recover after every injury. Together, they have learned to trust in chiropractic care, particularly following Dr. Alex Jimenez's innovative therapy procedures and techniques. Mr. Hill expresses his gratitude as well as just how much Dr. Alex Jimenez's understanding in sports injury therapy has greatly enlarged his general comprehension of the body's healing procedure. After Madison endured a recent ankle sprain, she was instantly reassured by Dr. Alex Jimenez regarding how much quicker she would return-to-play through chiropractic care. James Hill and Madison Hill highly recommend Dr. Alex Jimenez as the non-surgical selection for volleyball sports injuries, among others. Every year, countless young athletes engage in high school sports. However, once an injury occurs, it may become a problem which may result in them having to discontinue their specific sport if not treated properly. The pressure to keep on participating in the sport or physical activity can cause young athletes to not follow appropriate recovery guidelines, which may then lead to more harm with long-term consequences. Sports injuries among young athletes fall into two key groups: overuse injuries and severe injuries. Both types include injuries to the soft tissues and bones. Whether an injury is severe or due to overuse, a young athlete who develops a symptom that impacts their athletic performance should be diagnosed accordingly by a health care professional. Sports accidents that are untreated can cause permanent disability. Many high school sports injuries can be prevented through appropriate conditioning and instruction. We are blessed to present to you El Paso’s Premier Wellness & Injury Care Clinic. Our services are specialized and focused on injuries and the complete recovery process. Our areas of practice include: Wellness & Nutrition, Chronic Pain, Personal Injury, Auto Accident Care, Work Injuries, Back Injury, Low Back Pain, Neck Pain, Migraine Headaches, Sport Injuries, Severe Sciatica, Scoliosis, Complex Herniated Discs, Fibromyalgia, Chronic Pain, Stress Management, and Complex Injuries. As El Paso’s Chiropractic Rehabilitation Clinic & Integrated Medicine Center, we passionately are focused treating patients after frustrating injuries and chronic pain syndromes. We focus on improving your ability through flexibility, mobility and agility programs tailored for all age groups and disabilities. If you have enjoyed this video and/or we have helped you in any way please feel free to subscribe and recommend us. Recommend: Dr. Alex Jimenez – Chiropractor Health Grades: http://www.healthgrades.com/review/3SDJ4 Facebook Clinical Page: https://www.facebook.com/dralexjimene... Facebook Sports Page: https://www.facebook.com/pushasrx/ Facebook Injuries Page: https://www.facebook.com/elpasochirop... Facebook Neuropathy Page: https://www.facebook.com/ElPasoNeurop... Yelp: http://goo.gl/pwY2n2 Clinical Testimonies: https://www.dralexjimenez.com/categor... Information: Dr. Alex Jimenez – Chiropractor Clinical Site: https://www.dralexjimenez.com Injury Site: https://personalinjurydoctorgroup.com Sports Injury Site: https://chiropracticscientist.com Back Injury Site: https://www.elpasobackclinic.com Linked In: https://www.linkedin.com/in/dralexjim... Pinterest: https://www.pinterest.com/dralexjimenez/ Twitter: https://twitter.com/dralexjimenez Twitter: https://twitter.com/crossfitdoctor Recommend: PUSH-as-Rx ®™ Rehabilitation Center: https://www.pushasrx.com Facebook: https://www.facebook.com/PUSHftinessa... PUSH-as-Rx: http://www.push4fitness.com/team/
Sports fitness & injury chiropractor, Dr. Alexander Jimenez suggests additional exercises that will assist you avoid shoulder pain. The functional anatomy of the shoulder an the way the weakness at the rotator cuff and an inability of the scapula to stabilize the shoulder are the significant contributors to shoulder impingement injuries. Three important exercises for strengthening the rotator cuff and approaches to boost scapula stabilization. This article provides more exercise suggestions and provides further practical tips to help athletes prevent shoulder pain. 1. Balance Your Upper-Body WorkoutsA good way to prevent shoulder injuries is to ensure that your upper-body strength sessions are more balanced. This means that every push or press exercise must be balanced using a pull or row exercise. Too many athletes and weight trainers focus on creating the 'mirror muscles', the upper trapezius, anterior deltoid and pectorals. As a result, the 'non mirror- muscles', lower trapezius, rhomboids, latissimus dorsi and rear deltoid, are underdeveloped. This also contributes to a muscle imbalance in the shoulder, which results in poor scapular stabilization because the non-mirror muscles are those that function to stabilize the scapula. Moreover, over developed mirror muscles may lead to some round-shouldered position, which wrongly places the scapula up and forward. Redressing this imbalance is quite vital for the prevention and rehabilitation of shoulder impingement injuries. The following is a good illustration of a balanced upper-body workout which I would recommend. Note the 1:1 ratio between push/press and pull/row exercises. ● Bench press (pectorals, anterior deltoid). ● Seated row (rhomboids, mid-trapezius, latissimus). ● Flies (pectorals). ● Rear lying prone flies (rhomboids, mid-trapezius, rear deltoid). ● Lat raises (anterior mid deltoid, upper trapezius). ● Lat pull downs wide grip (latissimus, lower trapezius). For those who are more prone to shoulder pain or are recovering from a shoulder injury, then I would advise changing the ratio to 2:1 in favor of the non-mirror muscles. Remember, it is the push/press exercises which cause the problems, so you need to change your accent before the imbalances have been redressed. Additional pull/row exercises include: bent-over row, single-arm dumbbell rows, single-arm cable pulls, bent-over rear fly, pull-ups (wide or narrow), stiff-arm pull-downs with cable/flexaband. 2. Limit Your Range Of Movement, & Take It EasyRehabilitation from a shoulder impingement injury should focus on rotator-cuff strengthening. But it is important to remember that when it comes to re-introducing your own weight-training exercises, you must progress slowly. Frequently this implies avoiding specific ranges of movement where the shoulder joint sub-acromial space is compressed the most. The impingement zone to avoid is between 70 and 120 degrees of shoulder abduction (when you move the arm laterally away from the side of the body). To start training the non-mirror muscles, start with the seated row, since the shoulder joint is not abducted in this workout. Once the pain is totally gone, then introduce the overhead exercises for example pull-ups and lat pull-downs. You ought to be even more careful when it comes to the mirror-muscle exercises. I'd avoid lateral raises, upright rows and shoulder presses completely for a while. But, incline bench press with arm abducted to 45 degrees are a great place to begin again. Slowly build up to the normal bench-press range as strength improves. It is also crucial that you don't increase your weights too soon. Bear in mind that the tendons and ligaments need to accommodate to exercise as well as the muscles, and they may take longer to do so. I'd suggest staying in the 12-20 rep scope for a while before pushing up the weights, particularly with the mirror- muscle exercises. While I realize that it is important for many athletes to be powerful at exercises such as the seat and shoulder press, I would advise that you develop gradually to maximum advantage. Reducing your reps by two every 2 weeks is a fantastic guideline. During heavy workouts, ensure that you warm up the shoulder joint and rotator cuff thoroughly prior to lifting. 3. Correct Scapula Positioning When Performing ExercisesThe appropriate position for the scapula (shoulder blade) is back and rotated down. Essentially, this means maintaining a great 'military posture', together with shoulders back and chest out. A round- shouldered or hunched posture is to be avoided at all times.To achieve the right position, you need to use your rhomboids, mid and lower trapezius muscles to retract the shoulder and pull the scapula down. When you do any upper-body weight-training exercise, always get into the habit of starting with good upper-body posture and pinching the shoulder blades together. You need to feel that the scapula is a good platform which keeps the shoulder properly positioned as you do the exercise. As mentioned by Dr Kemp, a fantastic way to learn the correct position is through the seated row exercise by keeping your scapula down and back while you move your arms. Throughout the exercise, you should believe that the rhomboids and trapezius muscles have been statically contracting to maintain the scapula set up, and the latissimus is working to carry out the movement. After you have the feel for maintained scapula stability during the seated row, try to achieve it during all upper-body exercises. What you may find is that exercises such as the press-up or front raise, in which the shoulder may become impinged, won't be painful if you stabilize your scapula correctly. In effect, by using the scapular muscles you can achieve better shoulder mechanisms and avoid injury. Correct scapular stability is hard to learn and demands a lot of concentration and practice during your training sessions. First you need to understand what the correct position is, and frequently this needs a trainer/physio to guide you. Then, during training sessions, instruction and observation from a trainer can help you reach and maintain the right shoulder position. 4. Sports-Specific Exercises Plyometrics For The ShoulderJust as rehabilitation training for leg injuries needs a functional progression from simply strength exercises to sports- specific exercises, so does rehab for your shoulder. This means that for the athlete, eg a thrower or tennis player, conventional resistance exercises at the gym might not be enough to allow a full return to competition. Often what is needed to bridge the gap would be plyometric exercises for the shoulder that mimic sports- specific movements. Plyometrics for the shoulder usually involve medicine balls of different weights. Plyometric exercises have two advantages. First, they're performed fast, and second, they demand stretch-shortening- cycle movement patterns. This means that they are much more sports-specific than traditional resistance exercises. Specifically, plyometric exercises for the rear-shoulder and external rotator muscles are extremely useful since they provide eccentric training for these muscles. This enhances their ability to control the shoulder through the potent concentric actions of the pectorals and anterior deltoid involved in throwing or serving. Thus it's important to ensure that your plyometric workouts are balanced between the prime movers (pectorals, latissimus, anterior deltoid) as well as also the rear-shoulder and upper-back muscles. I would recommend incorporating shoulder plyometrics through general conditioning exercises to prevent injuries and in the later phases of shoulder rehab to guarantee a functional progression back to competition. Here are two suggestions. The key to both these exercises is that the medicine ball is caught, the impact quickly absorbed (fast eccentric phase) and then thrown back explosively (powerful concentric phase). a. Power drops (pectorals, anterior deltoids). This exercise is like a plyometric bench press, using a medicine ball instead of a barbell. Lie on your back, legs bent and lower-back flat down. Partner stands above your head and drops ball (3-6kg). You catch ball with straight arms and then quickly let the ball drop to your chest, flexing your arms, and then immediately throw the ball back, powerfully extending your arms. Make sure you keep your back flat down, concentrating your effort on your arms only. Perform sets of 8-12 reps. b. Catch and throw backhands (external rotators). This exercise is a plyometric version of the external rotator exercise, and is similar to a backhand shot in tennis. Stand with your feet shoulder-width apart, with a stable base and good posture. Bend your arm to 90 degrees and tuck your elbow into your side. Keeping your trunk facing forward, rotate your arm out ready to catch. Your partner stands to your right and throws a small ball (1kg) to your hand. You catch it, then quickly take the ball back across your body, rotating your arm inwards, and then immediately throw the ball back, powerfully rotating your arm out. Make sure you don’t use your trunk, and keep your elbow tucked into your side at all times, concentrating the effort on your rear shoulder and external rotator muscles. Repeat for the left side. Perform sets of 12-20 reps.
We're not supposed to sit around all day. So when we do, here's what happens. Core chiropractor, Dr. Alexander Jimenez investigates this way of life for so many. Sitting for extended periods during the day may adversely affect your performance in your chosen sport and can be quite frequently a predisposing factor in injury. The majority of us are not professional athletes and invest huge amounts of daily sitting hunched over a computer, at a car or slumped on the couch. In most individuals, prolonged sitting will cause all or a few of the following: - tight hip flexor, hamstring and calf muscles
- tightness through the external hip rotator muscles, which can lead to restricted movement at the hip joint
- reduced extension through the lower back, causing stiffness
- stiffness in the mid (thoracic) spine
- tight and hunched shoulders with weak lower shoulder muscles
- tight and weak muscles at the back of the shoulder
- ‘poked chin’ posture and muscle imbalances in the neck and upper shoulders
The better the position one can maintain during the day, the less likely it is that the aforementioned areas will become debatable. Conversely, the older the athlete and the more time spent sitting down over time, the further ingrained these issues will be. Let's consider Jack, a 30-year old delivery guy who is attempting to break a three-hour marathon time. His training is being increasingly affected by the low back and rear thigh distress he feels whenever he tries to run more than 15km. Jack sits the majority of the day in rather bad posture, slouched over with his knees out to the side. All of which has generated some muscle imbalances, weaknesses and restrictions on his range of hip motion through recent years. Jack's daily training regimen and flexibility program have to be corrected to combat the hours that he spends sitting at the truck. Now meet Denise, a 40-year-old lawyer and triathlete who spends hours on end, day and night, in front of a computer, and then more hours sitting on a bike -- mostly in the hunched 'aero' position. Denise has an increased curvature of the mid-spine plus also a 'poked chin'. She also has several muscular imbalances and weaknesses, and flexibility limits in her shoulders and mid-spine. These can endanger Denise's efficiency in her swimming stroke, and worse still make her a traditional candidate for a shoulder impingement/tendinitis injury -- the last thing she would want leading up into a qualifying race. Exactly like Jack, Denise should undertake daily flexibility exercises and regular standing to combat the consequences of spending so much time in a seated position. She'll also need a workout program to train postural and shoulder equilibrium muscle groups. Intense sitting has also been associated with acute muscle breeds in lively sports, particularly hamstring strains. The lower spine stiffness related to sitting contributes to transformed neural input into the back thigh, the theory goes. This may manifest as increased muscle tone of their hamstrings, which will increase the danger of strain. Sit Up & Pay AttentionThe solution begins with education. You must first learn how to set your body into good posture during the day; the way to hold your spine in a correct position. Lots of people try to sit up tall by just leaning back in the base of the backbone without altering their mid-spine or shoulder posture. What you should do is finding a neutral lower spine position and correcting your mid- to upper-back position, so that you may effectively pull your shoulder blades down your back working with the reduce shoulder muscles, combatting the propensity to hunch forward. "Many people try to sit up tall by just leaning back from the base of the spine without altering their mid-spine or shoulder position" But it's extremely hard to hold good posture if your workstation is badly set up; for example with the computer keyboard too high or sat at an old seat with a sloping back-rest. A workplace evaluation should help by changing the height and positioning of office equipment or introducing corrective devices to help with great sitting. Jack may require a lumbar roll to get his low back from flexion and a block beside the vehicle's door to stop his knee and cool out of falling outwards to the side all of the time. Denise might need to elevate the height of her monitor to eye level, lower the keyboard height so that her hands are at elbow level, and utilize a postural brace for her shoulder girdle and upper back while she is relearning to sit correctly. Seating wedges are very useful where chairs are too low (which forces you to sit with your knees higher than your hips and sets your lower back to flexion). The wedge is also very handy to fix bucket seats in cars. Sourced From: Sean Fyfe © Green Star Media Ltd 2014 Published by Green Star Media Ltd, Meadow View, Tannery Lane, Bramley, Guildford GU5 0AB, UK Publisher Jonathan A. Pye
Editor Jane Taylor
Designer The Flying Fish Studios Ltd
The information contained in this publication is believed to be correct at the time of going to press. Whilst care has been taken to ensure that the information is accurate, the publisher can accept no responsibility for the consequences of actions based on the advice contained herein.
Stretching & Sports Success Part II6. Types Of StretchingThe reason that flexibility and stretching are confusing issues is partially because there are so many diverse kinds of stretching and exercisers are just at a loss about what type of moves to do and when. With this in mind, this chapter is devoted to setting the record straight so that you understand what kind of stretching is best for your personal circumstances. Don't feel you've got to perform them all -- that's definitely not what is intended. Rather, read the descriptions and then use the methods that are specific for your training and workout goals. Use the right sort of extending at the ideal time and you're much more likely to find benefits from your flexibility training. Static Stretches - Active Vs. PassiveStatic stretches are the most identifiable form of flexibility training and also what most people today think about when you mention extending. For several decades, static stretching was how we all stretched -- before, during and a er exercise. Ere are two major types of static stretches -- active and passive. A passive stretch uses an outside object or power to take you in stretch, for example employing a door frame or partner to elongate your pecs. In a busy stretch, you are using your muscles to maneuver you into a stretched position, e.g. clasping your hands behind your back and pushing your elbows to the rear to stretch your torso. It really doesn't matter too much if you perform passive or active static stretches as the result is the same. It's worth noting, however, that if you are likely to hold a stretch for an extended time period, passive stretches are o en more comfy. Using the above cases, holding a doorway chest stretch for 60 seconds or more will be much simpler and much more comfortable than holding the hands clasped behind the back at a chest stretch for the exact same period. 1. Static MaintenanceIn case your flexibility is already great and you simply want to be certain you don't lose it, for example after a work out to o set adaptive shortening, maintenance stretching is right for you. A maintenance stretch is not meant to enhance your flexibility and, as such, is not held for very long. Maintenance stretches are normally held for between 10 and 15 seconds with no attempt to move deeper than is initially comfortable. Commonly used as a member of a cool down, static stretches help reduce muscle strain and return your muscles for their pre-exercise length. However, the downside, static stretches have a tendency to cause your heartbeat to drop and reduce muscle contractility which may lead to a reduction in force production possible. In other words, static stretching can make you temporally weaker. For all these reasons, static stretches are normally omitted from setups. 2. Static DevelopmentalIf you would like to enhance your flexibility, developmental static stretching is a good choice. Developmental stretches are held for between 30 to 60 minutes or longer and, as the name suggests, you should attempt to increase the thickness of this stretch as time passes. If you stretch a muscle, you reach the natural end point of your muscle's elasticity -- known as the point of bind, or POB for short. Should you stay in the POB for 15 minutes or so, you may feel your muscles relax slightly and you should then have the ability to move into a deeper stretch. Is happens more readily for those who a) unwind and b) do not hold your breath. Continue extending the POB as many days as possible till you get to your true conclusion of scope. Once you are there, continue for a further 15 to 30 minutes to actually maximize your flexibility training. To recap: - Move into POB and hold for 10-15 seconds
- As you feel your muscles relax, move a little deeper to new POB
- Keep your body relaxed and breath steadily
- Repeat steps one to three a couple more times before you reach your true flexibility limitation
- Hold this final place for 15 to 30 minutes
- Slowly ease out of this stretch
As you may see, developmental static stretching can be rather time consuming thus is best reserved for muscles that are really tight. Developmental stretching is best used as part of the cool down or, even if you're serious about improving your flexibility, during committed stretching sessions a er a light warm-up. Just like all types of stretching, don't force either variety of static stretch. If you feel any burning or shaking immediately back off and use a less extreme POB. An Exception To The RuleWhile static stretches are normally reserved for cool downs, tactical use of a select number of static stretches can be used at a warm-up under specific circumstances. As an example, when you've got tight chest muscles you might find it rather difficult to pull a barbell into your sternum when performing barbell bent over rows. In this instance, stretching the pecs before performing an upper/mid-back exercise could be beneficial. Another example: if you've got tight hip flexors, then you may discover that, when squatting, you have a propensity to lean too much forwards which could put an inordinate quantity of stress in your lower spine. Statically extending your hip flexors may help eliminate this issue. Finally, and again using the squat as an example, if you find your heels lift off the ground when squatting, this may suggest tight calf muscles. Stretching your calves before and between sets of squats may stop this potentially dangerous problem. 3. DynamicWhere static stretches are generally best used in down the cool, dynamic stretches are much better suited to warming up. Dynamic stretches are stretches performed on the move and into the uninitiated do not actually look like stretches at all! The beauty of dynamic moves is that they prepare your body for the activities you're going to perform without allowing you to get cold or diminishing the contractility of your own muscles. They also offer an excellent chance to rehearse the motions you are about to perform on your upcoming workout. Dynamic stretches are also quite time efficient and it is possible to have a synergistic impact on most of your major muscles in as few as three exercises although chances are you're going to want to perform more like five or six so that you feel properly warmed up. You'll discover a lot of dynamic stretches in the stretching library in chapter seven. Dynamic stretching uses a happening called reciprocal inhibition -- the exact same thing mentioned back in chapter two. Fundamentally, when one muscle contracts, its opposite number, called the antagonist, should unwind and this allows you to stretch it. For instance, if you bend your elbow, your knee contract and your triceps, located on the back of your upper arm, then should unwind and receive a gentle stretch as your arm reaches full flexion. Is is the very essence of dynamic stretching. By performing specific movements like leg swings, overhead reaches and standing waist spins, you stretch none but two muscles -- you, as you move in one way, which muscle's antagonist as possible return. Is two-for-one stretch is what makes dynamic stretching so time-effective. Unlike stationary stretching, dynamic stretching does little for the resting length of your muscles. It simply takes your muscles into the POB so that they are adequately prepared for your coming workout. When performing dynamic stretches, it is very important you increase your assortment of movement slowly over a collection of 10 to 20 repetitions. Start o by being really careful and conservative and then increase the range of movement as you believe that you're prepared. Also, be sure that every stretch is done rhythmically and with controller. Do not ing your limbs around with complete abandon! Each motion should take a couple of moments to finish and at no point should you feel as though you're bouncing out of the end point of the stretch. Decide on a steady tempo and stick to it for the duration of your set. Make sure you don't do so many repetitions that your dynamic stretches turn into a test of muscle endurance! Is is particularly true of exercises such as lunges and squats -- Both good examples of dynamic moves for the more advanced exerciser. Do as many reps as you need to feel comfortable but no more. Save your energy for your workout! Precede your dynamic moves using a couple of minutes of cardio to ensure your joints and muscles are warm and nice though, again, only do as much as you want to prepare your body to the coming workout. 4. BallisticBallistic stretching is a lot like dynamic stretching, just faster and more volatile. Is increase in motion velocity includes a heightened probability of harm which is why ballistic stretching isn't suggested for beginners or those who don't actually need it. In sports such as kickboxing, sprinting, gymnastics and even fencing, motions are performed a) very quickly and b) via a large selection of movement -- that the very definition of ballistic. Is way that participants in such and similar sports may consist of ballistic stretching as part of the training. Not to do so would invite harm when they practice their preferred sport. For the rest of us, where rapid and large movements aren't the norm, the chance of ballistic stretching far outweighs any possible benefits. Dynamic stretches are fine for the majority of even the most ardent exercisers and provide many of the advantages related to ballistic stretching without the dangers. If you're a sportsman or women who needs to add ballistic stretching in your training, be sure that you always warm up thoroughly before commencing. Increase the range of movement slowly to prepare your muscles to what's to come, start o with dynamic stretches and then, ultimately, advancement to ballistic moves (and even then advance your speed). Exercise some control at the end range of movement to minimize the risk of injury and make sure the motion is coming out of the ideal part of your body -- i.e. do not round your back when doing high front leads as the strain is being taken o your hamstrings and also being placed in your delicate passive lower back ligaments and discs. Ballistic stretching bottom line? Only satisfactorily prepared sportsmen and sportswomen should utilize this advanced kind of flexibility training and then with caution. 5. PNFPNF, short for proprioceptive neuromuscular facilitation, is an effective form of extending that may result in very rapid improvements in flexibility -- almost instantaneous. While the advancements that result from PNF are very rapid and noticeable, they're not permanent so PNF is not a one-shot x for inferior flexibility. But if you need some immediate gratification from your stretching, PNF is for you! PNF functions on the grounds that once a muscle was contracted, it goes to a place- contraction relaxed condition and is much more amenable to being stretched. Basically, by using PNF, you "trick" your muscles into relaxing more quickly than they would normally so you can progress the point of bind or POB into a greater degree and in significantly less time. PNF stretches are best done with a knowledgeable training partner since they may be complicated to do independently but, saying that, many can be performed alone if you're ready to think a little outside the box and also utilize external props like webbing straps to achieve the desired results. This is how you perform a PNF stretch. In this instance, I am describing a supine hamstring stretch but you can apply this methodology to any suitable stretch of your choice. ● Lie on your back with your legs extended and hands resting by your sides. Make sure your legs are relaxed. ● Your partner should raise one leg and rest it on his/her shoulder. Allow them to take you to your comfortable point of bind. ● Hold this position for 10-15 seconds until you feel your hamstrings begin to relax. ● Contract your hamstrings against your partner’s shoulder – your leg should not move up or down but be held in place by your partner. Contract with between 30-50% of your perceived maximal effort for 10 to 15 seconds. ● Inhale deeply and then exhale and relax. Allow your partner to li your leg higher and into a new POB. ● Repeat steps three to five a couple more times until you fail to see any noticeable increases in the range of movement. ● Gently lower your leg to the floor and then perform the same sequence on the opposite limb. Because PNF stretching takes time, it is generally best left for your cool-down and reserved for those muscles that are really tight. PNF is also a great form of stretching to add in standalone flexibility sessions at which time is less of a problem. It is vital that there's good communication between the 'stretch-er' and 'stretch-ee' because overenthusiastic limb misuse could lead to serious injury. If in doubt or if you feel any discomfort, back o immediately. 6. CRACStanding for Contract Relax Antagonist Contract, CRAC is a variation of PNF and for all intents and purposes, synonymous. Using exactly the same contract/relax happening as PNF to encourage a deeper stretch, CRAC adds an extra component to progress the POB farther and potentially faster. As you know, when one muscle contracts, its opposite number must relax to allow motion. CRAC utilizes this mechanism to allow you to move to a deeper post- contraction stretch. CRAC is also an efficient way to develop isometric power and is a helpful strengthening instrument o en used in post-injury rehabilitation. (Isometric contractions are the most powerful of all muscular contractions and result in no Motion as a single muscle group operates against the other.) To illustrate how you can do PNF and CRAC moves independently, this stretching Example uses the doorway chest stretch, which is a excellent way to fix a round- shoulder position while, strengthening the muscles of the mid-upper spine (center trapezius and rhomboids) ● Position yourself in an open doorway. Raise your arms and rest your elbows and forearms against the vertical sides. Your elbows should be roughly level with your shoulders. ● Adopt a staggered stance for stability. ● Keeping your elbows and forearms pressed against the door frame, lean your body between your arms until you feel a stretch across your chest. ● Hold this position for 10-15 seconds until you feel your pecs relax. ● Contract your chest muscles by pressing your elbows and forearms forcefully against the door frame. Do not allow your arms to move. Use between 30-50% of your maximal perceived strength and hold the contraction for 10 to 15 seconds. ● Relax your chest and then use your upper back muscles to pull your elbows further back to increase the stretch in your chest. Lean forwards again so that your arms are resting on the door frame. ● Repeat steps four to six a couple more times until you fail to see any noticeable increases in the range of movement. Like PNF, CRAC is a fairly lengthy process so is best retained to your tighter muscles and utilized in your cool-down or standalone flexibility sessions. It is quite effective for developing your flexibility but, if performed too aggressively or with a spouse who lacks the necessary experience, could lead to injury. While mild distress is acceptable and may even be desired, pain isn't, so make sure you back o if you're feeling anything untoward. 7. Library Of Stretches By Muscle GroupThere are literally hundreds of ways to stretch - some very simple and some really convoluted. The primary point to keep in mind when assessing the worth of every stretch is that, to be effective, you must pull off the ends of the muscle away from each other and do this in a way that puts minimal stress on your joints along with the remainder of the body. By applying these standards, the great number of moves which are possible can easily be whittled down to 50 or so stretches. In this section, you'll find instructions on how best to perform Various great stretches for every one of your major muscle groups. Ere are inactive stretches, dynamic stretches and, where relevant, some which can be performed using PNF and/or CRAC protocol. Out of your personal flexibility evaluation, you must now know what areas of your body are tight and what regions are normal concerning flexibility. Pick developmental static stretches or PNF/CRAC on the tight muscles and utilize maintenance static stretches to your muscles that are more flexible. Perform these stretches as part of your cool down or through standalone flexibility sessions. Remember, however, to maintain dynamic stretches to your setups. If, when performing any of these exercises, then you fail to sense much of a stretch a) test that your limbs are aligned correctly, b) try another stretch for the same muscle and then c) don't worry! It might well be that you're adequately flexible in the muscle in question and then you do not feel a lot of stretch. As mentioned before, all stretches should be preceded by a few minutes of mild cardio to increase core temperature and enhance blood ow though your muscles. GastrocnemiusIs is the larger/upper calf muscle and can be among the most powerful by dimension muscles at the body. As they are so powerful, the gastrocnemius can take a fair bit to stretch, however if it Becomes tight can have an adverse effect on knee health. Its basic function is to stretch your ankle. Standing Calf Stretch● Stand an arm’s length from a wall and place your hands against it at shoulder level ● Take a large step back with one leg and bend the other ● Check that your rear foot is pointing directly forwards ● With your heel on the floor, slide your foot back until you feel a stretch in your calf ● Ease out of the stretch and change legs Calf Stretch off Step● Stand with the balls of both feet on the edge of a sturdy step ● Using your hands for balance, let gravity pull your heels down below the level of your toes ● For a deeper stretch, only place one foot at a time on the edge of the step Supine assisted calf stretch ● Lie on your back with your legs straight ● Ask your partner to raise one leg up to around 45 degrees ● Your partner should then support your leg behind the knee and press on the ball of your foot to ex your ankle towards your shin. is exercise is suitable for PNF/CRAC stretching SoleusYour lower calf muscle which is especially active when your knee is bent. is muscle is not as powerful as the larger gastrocnemius but is equally prone to tightness. The soleus works with the gastrocnemius in ankle extension (correctly called plantar flexion). Standing soleus stretch● Stand as illustrated ● Bend your knees and push them forwards towards the wall ● Use your hands for balance ● If your knees touch the wall, move your feet back slightly to give yourself more room “Sprinter” soleus stretch ● Kneel down on the floor and place the ball of one foot next to your opposite knee ● Put your hands on the floor either side of your leading leg and rest your chest on your thigh ● Rock your weight forwards onto your toe while trying to push your heel down towards the floor. You should look like you are in a kind of the “on your marks” position. ● Hold for the desired duration and then change legs QuadricepsThere are four muscles in the quadriceps – the rectus femoris which exes your hip and extends your knee, and vastus lateralis, vastus intermedius and vastus medialis which all extend your knee. Tight quads can have an adverse effect on knee health as they can cause mis-tracking of your patella. Standing quad stretch● Stand with your feet together ● Bend one leg and grasp your foot in the same side hand. Use your other hand for balance as necessary ● Point your bent knee down at the floor, push your hips slightly forwards and pull your foot into your butt ● Try to keep your knees roughly together at all times Kneeling quad stretch● Stand with your back to a knee-high exercise bench or training partner as illustrated ● Place one foot on the bench and then squat down until your rear knee is resting on the oor ● Move back until your elevated foot is as close to your butt as is comfortable (if using a training partner they must hold your foot at the same height) ● Make sure your front shin is vertical and your torso is upright is is an advanced stretch so exercise caution! Prone assisted quad stretch● Lie on your front with your legs straight and knees together ● Bend one leg to 90 degrees ● Ask your partner to gently press your heel towards your butt ● On completion, relax and change legs Dynamic quad stretch – aka butt kickers● Either while walking or marching on the spot, dynamically bend your legs in an attempt to kick yourself up the butt! ● You can also perform this exercise while jogging ● Avoid the temptation to lean forwards. It is acceptable to clasp your hands behind your butt to provide a easier-to-hit target Hip FlexorsOne of the most commonly tight muscles in the body, the hip flexors, proper name iliopsoas, are placed in a shortened position whenever you sit down and are also very active in running, walking and cycling as well as many ab exercises. Overly tight hip flexors can cause your pelvis to tuck under which reduces your lumbar curve – bad news for your lower back health. Runner’s lunge● Take a large step forwards and then bend your back leg so that your knee is resting on the floor ● Position your front leg so that your shin is vertical ● With your torso upright, slide your rear foot backwards until you feel a stretch in the top/ front of your hip ● Keep your torso upright to maximise the e ect of this exercise Dynamic walking lunges● Take a large step forwards while keeping your torso upright and head up ● Bend your legs and lower your back knee to within an inch/few cm's of the floor ● Push o your back leg and step through into another lunge ● Focus more on the range of movement rather than the number of repetitions you perform Dynamic hip flexor stretch● Stand sideways on to a wall or similar waist-high object. Grasp it for balance ● Swing your inside leg forwards and then backwards from the hip, focusing more on the backward movement ● Establish a nice even rhythm and maintain it for your entire set ● Do not swing too hard or the exercise will become ballistic in nature and therefore more dangerous Ballistic prone hip flexor scorpion stretch● Lie face down on the ground with your arms outstretched and parallel to your shoulders and your legs extended with toes on the ground ● Keeping your chin close to the ground, li one leg and leading with your foot aim to get close to the back of your opposite hand (lift and rotate) ● Take the leg back to the start position and repeat with the other leg HamstringsAnother commonly tight muscle, your hamstrings extend your hip and ex your knee and are a common site for injury. Tight hamstrings, like the hip flexors, can adversely affect the angle of your pelvis and may cause lower back issues. You have three hamstrings; biceps femoris, semimembranosus and semitendinosus. Seated hamstring stretch● Sit on an exercise bench, or other similar height object, with your legs bent and feet at on the floor ● Extend one leg out in front so that your knee is straight and your heel is resting on the oor. Place your hands on your BENT knee ● Keeping your chest up, hinge forwards from your hips until you feel a stretch in your hamstrings ● Do not allow your lower back to become excessively rounded Standing hamstring stretch● Stand up straight with your feet together ● Take a small step backwards with one leg and then bend your rear knee so that your thighs are parallel ● Push your hips back and, with your chest up and lower back slightly arched, hinge forwards. Place your hand on your bent leg for support ● You can also pull your toes up on your leading leg to add a gastrocnemius stretch (as illustrated) but this can detract from your hamstrings if you have tight calves Supine assisted hamstring stretch● Lie on your back with your legs straight ● Get your partner to li one leg whilst pressing down on the other to keep it at ● They can rest your leg on their shoulder at the knee if you are going to hold this position for a long time or you have heavy limbs ● Gradually elevate the leg until you feel a stretch in the back of the leg ● This stretch is suitable for PNF/CRAC Standing dynamic alternating hamstring stretch● Stand with your feet together and your hands by your sides ● Take a step forward and swing one leg straight up, simultaneously reaching to touch your toes with your opposite arm’s hand ● Making no attempt to hold the uppermost position, lower your leg, do a shuffle e step and swing the opposite leg up ● Continue to alternate sides for the duration of your set ● Do not lean forwards, round your back or make this movement so rapid it becomes a ballistic stretch. Try to increase the height of each swing as your muscles loosen up Seated leg cycling ballistic stretch (also targets hip flexors)● Sit on the ground and incline your trunk about 45-degrees. Support your torso with your arms ● Lift your legs o the ground and cycle them in a wide arc ● Keep your toes up as you do so ● Build up your speed Standing leg cycling ballistic stretch (also targets hip flexors)● Stand next to a rail (or suitable alternate stable object) ● Place your hand on the rail at hip-height and li your outside leg’s thigh to a parallel to the ground position ● Drive your thigh down and sweep your heel up close to your butt as you cycle your leg below your body ● Keep your torso elevated and keep the leg sweep and rotation smooth and uid (This is a dynamic stretch, and a great warm-up drill for sprinting and field sports. Build up your speed gradually as your hamstrings will be placed under considerable load, as they work to control the movement of your lower leg as it advances in front of your body. An eccentric, lengthening muscular action is taking place at this point.) Four drill ballistic hamstring stretch● Assume a similar position to the stretch above ● Position your outside foot a couple of inches/cm’s in front of the other ● Keeping your torso upright and braced, pull your heel up to your bottom dynamically (as in the right-hand image above) ● Lower under control and repeat ● You can position your same side hand behind your butt to act as a target (watch your fingers) AdductorsLocated on the inside of your thighs, these muscles draw your leg in towards the midline of your body. e upper part of this muscle group is o en classified as the groin. Injury to this area is common in sports such as football and is commonly referred to as a groin strain. ere are three adductor muscles: adductor longus, adductor brevis and adductor magnus – literally long, short and big. Seated adductor stretch● Sit on the floor, bend your legs and place the soles of your feet together ● Sit up as tall as you can and shu e your feet in towards your groin ● Rest your elbows on your knees and grasp your ankles ● Use your elbows to gently push your knees down and out towards the floor ● If you are unable to sit up tall, select a different adductor stretch is stretch is suitable for PNF/CRAC – either alone or with a partner pressing down on your legs (as illustrated). Half kneeling adductor stretch● Kneel down and lean forwards to place your hands on the floor for support ● Extend one leg straight and out to the side ● Your thighs should be level ● Slide your straight leg away until you feel a stretch in your inner thigh area ● Do not allow your back to become excessively rounded ● Imagine you are trying to push your pelvis down towards the floor Standing dynamic adductor/abductor stretch● Stand facing a wall or similar waist-high barrier and grasp it with both hands for balance (it’s also possible to perform this exercise with your back against a solid object as indicated) ● Swing one leg across your body and then out to the side ● Make sure your hips remain facing the wall/level ● Establish a smooth rhythm and maintain it for your set ● Do not turn this exercise into a ballistic stretch by going too fast AbductorsLocated on the outside of your hip and thigh, the abductor muscles draw your thigh away from the midline of your body. Numerous muscles make up this group, including your gluteus medius, the iliotibial band, tensor fascia lata and some fibers of the gluteus maximus. Tight abductors can cause numerous hip and knee problems, including the common condition runner’s knee. Standing abductor stretch● Stand with your feet together and your hands by your sides ● Cross your left foot in front of your right and plant it firmly on the floor ● Bend your waist to the right – you should feel a mild stretch on the outside of your left hip Gluteus MaximusGluteus maximus, glutes for short, is the biggest and most
powerful muscle in your body and has one main function – extension of your hip. Known as glutes for short – these muscles essentially make up your bottom. Overly tight glutes can a ect your hips and even lower back. Supine glute stretch● Lie on your back with your legs straight and your head resting on the floor ● Bend one leg and reach down to grasp behind and above your knee ● Keeping your upper body on the oor, gently pull your knee towards your chest ● Do not be tempted to li your head towards your knee – it may seem you are stretching further but, in fact, the additional movement comes from rounding your back Supine figure four glute stretch● Lie on your back with your legs bent and feet at on the floor ● Cross your le ankle over your right knee ● Reach down and grasp your left thigh ● Pull your left leg towards you until you feel a mild stretch in your glutes and outer hip ● Do not be tempted to li your head towards your knee – it may seem you are stretching further but, in fact, the additional movement comes from rounding your back ObliquesLocated around your waist, your obliques are responsible for rotating your spine and flexing your spine sideways i.e. side bends. is muscle needs to be flexible for activities such as bowling in cricket. If one side becomes tighter than the other, back pain and rotational postural abnormalities can result. Supine oblique stretch● Lie on your back with your legs straight and your arms extended so you form a T shape ● Bend one leg and place your foot at on the floor ● Reach across and place your opposite hand on your knee ● Pull your knee over and rotate your lower body while keeping your other arm outstretched and your shoulders at on the ground ● Hold this position and allow the weight of your leg, combined with pulling on your knee with your arm, to pull you into a deeper stretch Seated oblique stretch ● Sit on an exercise bench or other suitable object with your legs bent and your feet at on the floor ● Make sure you sit up as tall as possible and with good posture ● Keeping your legs in position, rotate your upper body and try to look behind you ● Grasp the bench to hold yourself in position and increase the stretch as you feel your muscles relax ● Slowly unwind and repeat on the opposite side
is exercise can also be performed in a regular chair using the back rest for extra purchase. Standing dynamic oblique twists ● Stand with your feet hip-width apart and your knees slightly bent ● Keeping your arms relaxed, rotate your upper body so that your arms continue to swing as your torso comes to a stop ● Immediately swing back the other way ● Continue for the desired number of repetitions is exercise is based on one of the movements from tai chi and, as well as dynamically stretching your obliques, provides a nice rotational mobilization of your entire spine. Rectus AbdominusRectus abdominus, or abs for short, is the long at muscle on the front of your abdomen. is muscle is usually tight because of too many crunches and similar exercises. is is then compounded by spending too much time sat hunched over a desk or driving. Too tight abs can e ect posture and cause lower back pain. e main function of this muscle is spinal exion and lateral exion – bending to the side. Prone cobra● Lie on your front with your hands under your shoulders ● Keeping your hips on the floor, push with your arms and raise your upper body off the floor ● Push up to the point just before your hips leave the ground You can either stay in this position for an extended period of time or lower and then repeat for a more dynamic movement. If you want/need to spend an extended time in this position, consider resting on your elbows. Erector SpinaeMade up from seven muscles that run up either side of your spine, the erector spinae group is responsible for extending your spine and lateral exion. Not commonly over- tight in many people, it is still important to stretch this area for no other reason than it feels very nice and relaxing! Kneeling cat and cow dynamic stretch ● Kneel on all fours with your shoulders over your hands and hips over your knees ● Lower your head, tuck your pelvis under you and li the centre of your back up towards the ceiling. Imagine you are trying to touch the sky with your middle vertebrae ● After pausing for a second, li your head and tilt your pelvis upwards as though you are trying to touch the floor with your belly ● Smoothly alternate between these two positions for the desired number of repetitions is stretch is based on a posture from yoga and is excellent for keeping your spine mobile and “ flossing” your spinal cord. Ballistic Torso (and shoulder stretch)● Lie on your back in a crucifix style position with your palms at on the floor ● Bend your knees so that there is a 90-degree angle at your knees ● Rotate your hips (and legs) from left to right, keeping your shoulders down ● Build up your speed as you progress Latissimus DorsiYour latisimus dorsi connects your arms to your torso and is located on the side of your back. When well developed, your lats look like wings. Overly tight lats can gave a negative effect on shoulder health and upper body posture. Standing lat stretch● Stand in front of a sturdy waist-high object such as a squat rack ● Bend your knees slightly, hinge forwards from your hips and, with an outstretched arm, grab the object ● Shift your weight onto your heels, push your hips back and pull your body away from the anchor to extend your shoulder ● From this position, turn your hips away from your extended arm to intensify the stretch ● On completion, relax and change sides Hanging lat stretch● Grab an overhand bar with a shoulder-width overhand grip ● With arms extended, hang from the bar with your feet clear of the ground – bend your knees as necessary In addition to stretching your lats, this exercise also decompresses your spine – great after a heavy set of squats! Dynamic lat and shoulder stretch● Stand with your feet shoulder-width apart and knees slightly bent ● Raise your hands so your palms are facing forwards and you are in a “stick ‘em up” position ● Keeping your shoulders pulled together and avoiding arching your lower back, reach your arms up above your head as though you are performing shoulder presses ● Lower your arms until your hands are close to your shoulders In addition to being an excellent dynamic lat stretch, this exercise warms up your entire shoulder complex and helps increase shoulder and thoracic spine mobility. Pectoralis MajorCommonly abbreviated to pecs and basically your chest, these muscles are often tight in many people – especially those who do lots of press-ups or bench presses. Too tight pecs can cause real problems with shoulder health and also give you poor posture. Doorway pec stretch● Position yourself in an open doorway. Raise your arms and rest your elbows and forearms against the vertical sides. Your elbows should be roughly level with your shoulders ● Adopt a staggered stance for stability ● Keeping your elbows and forearms pressed against the door frame, lean your body between your arms until you feel a stretch across your chest This exercise can also be used for PNF/CRAC. Seated assisted stability ball pec stretch● Sit on the oor with your back resting against a stability ball ● Raise your arms and place your hands on your temples ● Ask your partner (who kneels behind the ball) to grasp your arms at the elbow and gently pull your arms back – the ball should keep your torso upright and shoulders in position This exercise can also be used for PNF/CRAC. Dynamic chest stretch● Stand with your feet shoulder-width apart ● Raise your arms and reach forwards so your hands are together and your arms fully extended ● Pull back as if you are performing a wide grip row. Lead with your elbows and keep your chest up ● Push forwards and return to the start position shrugging your shoulders forwards as you do so ● Repeat using a steady rhythm and altering your line of pull to target any noticeable tight areas In addition to dynamically stretching your chest, this exercise also stretches your upper back and mobilizes your entire shoulder complex. TrapeziusThere are three areas of your trapezius: upper, middle and lower. e lower trapezius is not really a flexibility concern and can be easily stretched simply by shrugging your shoulders upwards. Your middle trapezius is not especially prone to tightness but stretching them feels very nice. e upper traps are a common area for tightness and are a side effect of stress and/or spending too much time hunched over a desk. Tight upper traps can cause headaches. Standing upper trap stretch● Stand with your feet hip-width apart and your knees slightly bent ● Reach up and place one hand on the top of your head and the opposite hand behind your butt to keep your shoulder down and back ● Gently pull your head over to the side to stretch the side of your neck – the lateral aspect of your upper trapezius ● Turn your head slightly in each direction to identify any “hot spots”. If you find any areas that feel especially tight, spend a few extra seconds on them before changing sides and repeating the exercise This exercise can also be performed seated – grasp the underside of your chair to keep your shoulder down. Deltoids Ballistic Stretch● Stand tall ● Take one arm up straight and close to your ear ● Cycle the arm round to describe a large arc ● Try to brush your ear with your upper arm ● Perform 10 revolutions one way and then the other and swap arms ● Increase your speed (There are numerous arm swing combinations – double, single and in opposite directions at the same time. Experiment.) Standing mid trap stretch● Stand with your feet hip-width apart and your knees slightly bent ● Reach forwards and clasp your hands together – raise your hands to shoulder-level ● Shrug your shoulders forwards and imagine you are trying to spread your shoulder blades as far apart as possible ● To stretch your mid/lower back, round your shoulders over and tuck your pelvis under to form a gentle C shape with your spine ForearmsToo much gripping, typing and general tension can make your forearm muscles tight. Overly tight forearms can result in hand, wrist and elbow pain. If you hands naturally gravitate to a clenched position when you relax, chances are you have tight forearms. If you spend a lot of time typing, make sure you stretch these muscles o en to avoid developing a repetitive strain injury (RSI) or carpal tunnel syndrome. “Prayer” forearm stretch● Seated or standing, place the palms of your hands together in front of your chest in the classic “prayer” position ● With your thumbs touching the centre of your chest, slide your hands down your front while ensuring that the heels and palms of your hands stay pressed together ● Li your elbows upwards to maximize the effect of this stretch Kneeling forearm stretch ● Kneel down and place the backs of your hands against your thighs and your finger tips on the floor ● Push your hands down at on the floor ● Lean back slightly while keeping your palms flat – the further you lean back, the deeper the stretch will be You can achieve a similar result by performing this exercise on the edge of an exercise bench. Sourced From: © Green Star Media Ltd 2014 Published by Green Star Media Ltd, Meadow View, Tannery Lane, Bramley, Guildford GU5 0AB, UK Telephone: +44 (0)1483 892894 Publisher: Jonathan A. Pye Editor: John Shepherd Designer: Charlie Thomas The information contained in this publication is believed to be correct at the time of going to press. Whilst care has been taken to ensure that the information is accurate, the publisher can accept no responsibility for the consequences of actions based on the advice contained herein.
Muscle strains are a common injury among athletes, together with the hamstrings being susceptible to injury in sports which involve high speed running. As an example, musculotendon strains accounted for almost half of accidents in the National Football League team throughout pre-season practice, with hamstring strains being the most common and requiring the most time (average of 8.3 days) apart from game. From the Australian Football League, hamstring strains are the most frequent injury with approximately six accidents per club a year, and 33 percent of those being recurrent injuries. The susceptibility of the hamstrings to harm during high speed running is linked to the biomechanical demands put on the muscle, although debate continues regarding whether injury occurs through the stance or swing phase of a gait cycle. This problem is applicable for designing the type of resistance training which may be effective for preventing recurrent or first hamstring injuries, among others. Specifically, injury prevention programs would ideally incorporate aspects (e.g. lower extremity positions, muscle lengths, contraction type) that are most similar to the conditions related to injury, such that the athlete could maximize the gains in functional strength and minimize the risk of future damage or injury.
Chiropractor, Dr. Alexander Jimenez details the relevant anatomy and biomechanics of the hamstring, common mechanisms of injury, the clinical signs and symptoms and management in the kind of surgical repair. IntroductionHamstring injuries in athletes are re-injury and typical to the hamstring is a reasonably frequent occurrence. Orchard and Seward (2002) found that at elite-level Australian Rules football, hamstring injuries were the most common kind of injury requiring time off from competition. Muscle strains are the most frequent, followed by more significant myotendinous junction tears. These respond well to rehab. Total ruptures of the muscle are uncommon as are complete ruptures of the hamstring origin (Steinbruck 1987), and accidents like these can be very painful. Hamstring muscle origin ruptures in the kind of avulsions of the growth plate are more frequent in younger populations due to the immature epiphyseal growth plate (apophysis) found to the ischial tuberosity in older children and adolescents (Wootton et al 1990). Avulsions in adults with ischial tuberosities that are fully-fused have a tendency to be ruptures of the proximal hamstring tendon or complete avulsion fractures of the ischial tuberosity. Prompt diagnosis and proper treatment of ischial tuberosity avulsions/ tendon ruptures is critical due to the residual loss of power persistent in non-operatively treated instances of hamstring ruptures (Birmingham et al 2011). The ongoing complications with chronic non-repaired complete hamstring tendon avulsions are pain, weakness and cramping during locomotion and pain with sitting (Wood et al 2008, Harris et al 2001). As with most tendon avulsions repair leads than delayed repair. Repair within four weeks of injury resulted in better outcome compared with those repaired after four weeks (Harris et al 2011) Relevant Anatomy & BiomechanicsThe hamstring muscles comprise the biceps femoris (long head and short head), semitendinosus and semimembranosus. All muscles (except biceps short head) attach onto the ischial tuberosity. The head biceps starts on the femur along the linea aspera. At the origin, the head attach to the ischial tuberosity and of the semitendinosus and bicep form a conjoined tendon and the semimembranosus with its tendon attaches. Figure 2 above shows the attachments of the two individual heads. At puberty there appears at the ischial tuberosity a secondary ossification centre and this doesn't fuse until the late teens or early twenties. In this time frame between the appearance of the apophysis and its fusion, a force traction on the hamstring may avulse the apophysis as this forms the weak link between the muscle and the bone. After skeletal maturity, injury is more likely to take place at the junction. The hamstring origin is intimately connected to the sciatic nerve's passage during the upper posterior thigh. Serious injury to the muscle that produces a large hematoma may create adhesions in the vicinity of the sciatic nerve that may complicate the athlete's performance when recovered, or the nerve may be injured due to a grip neuritis as the muscle belly retracts away from the nerve (Chakravarthy et al 2005) or due to compression from a tight fibrotic band directly to the ischial tuberosity. Diligent treatment of sciatic nerve mobility is a significant element in hamstring rupture direction (see below in conversation on management). It is not unusual for the hamstring origin rupture to involve only two heads of not all three and the hamstring. These are classified as partial avulsions. It is more common if the avulsion is partial that it involves the conjoined tendon of the biceps femoris and semitendinosis (Heinamen 2013). Mechanism Of Injury (MOI)The hamstrings are vulnerable to trauma due to the anatomical arrangement and on account of the leverage that acts through the hip during functional movements. The most frequent MOI is forced knee extension in a position of hip flexion and as the muscle is placed below a rapid and large eccentric load. The force is directed to the junction. This is sometimes due to a sudden and forceful landing from a jump with the knee locked in extension, or during foot contact in sprinting, or in excessive and uncontrolled hip flexion such as when the leg slips out from underneath the body and moves into hip flexion with the knee extended (forward splits, water skiing and bull riding). However, it is thought that in order for tendons to rupture, a degree of degenerative change needs to be present in the tendon prior to rupture. This has been observed that rupture and supraspinatus tendons that rupture. This possible clarifies why myotendinous ruptures in the hamstrings of young athletes almost never happens, they fail at the growth plate and might also explain the rising frequency at middle aged recreational athletes (Cohen and Bradley 2007). The hallmark of classic tendon degeneration is an anatomical and biochemical change in tendon tissue. Collagen fibers become disorganized, the intracellular matrix changes foci develop in the tendon, hypervascularity of the tendon is present. The forces which create this effect that is degenerative tend to be both compressive and tensile . As the hip is rapidly flexed the force is applied due to rapid eccentric loading on the hamstring tendon. The force is a result of the unique anatomy of the ischial tuberosity bone that 'pushes' into the tendon and makes a compression zone. Due to repeat episodes of tensile and compressive force, the tendon gradually degenerates and may eventually rupture as it's weakened (Docking et al 2013). Signs & SymptomsThe usual mechanism of injury has been described above, and the pain can be severe and debilitating once the hamstring origin ruptures. The athlete describes it as 'being shot by a sniper'. An audible 'pop' may be heard. The athlete will be guarded on the affected limb and will be reluctant to weight bear on a loaded limb. On examination, a palpable defect may be felt below the ischial tuberosity and a loss of the contour of the hamstring may be observed, however these will be dependent on the size of the gluteals and any intervening adipose tissue that may make direct palpation and visualization difficult. A discolouration may be seen throughout the muscle, if the athlete is examined following the incident. The athlete will demonstrate a painful weakness in both knee flexion and hip extension that is isolated. Range of motion is going to be as they'll be unwilling to weight bear pain functionally and restricted they may walk with a limp. Presentation to the practice has been delayed, generally because the athlete assumes the injury is purely muscle-related and will heal, if, then the patient may show atrophy of the hamstring muscle due to disuse. ImagingCT imaging and plain x-rays supply little use unless an avulsion of the hamstring tendon from the ischial tuberosity has happened. Ultrasound imaging may be helpful; however, its sensitivity and specificity has not yet been reported. As the delicate tissue detail is visualized in an MRI, MRI is the investigation of choice in a suspected rectal origin rupture and it can highlight tendon retraction's level in addition to any interference with the nerve. Furthermore, MRI can be used in through all phases of recovery to appraise the therapeutic capacity of the tendon. ManagementThe treatment of hamstring origin injuries is contentious; fix or not fix. A number of standards have been suggested that can help the practitioner decide if the hamstring injury requires surgery (Domb et al 2013): 1. Osseous avulsion with more than 2cm retraction; 2. Complete tears in all 3 tendons with or without retraction; 3. Partial tears that remain symptomatic despite prolonged conservative treatment. However, some and complete incomplete ruptures of the hamstring origin will require treatment in the vast majority of athletes on account of the concerns regarding loss of strength and power. The case for operative management of partial hamstring origin rupture is not as clear-cut. It may be that some of these can rehabilitate well following a partial rupture; however, if pain and dysfunction persist after a lengthy rehabilitation process, then repair of a partial rupture can result in good clinical outcomes (Aldridge et al 2012). However, Lempainen et al (2006) presented a series of partial hamstring ruptures that responded well to surgical intervention. SurgeryThe hamstring is approached with a posterior incision starting at the gluteal fold. The incision may extend over a distance to completely access the hamstring tendon that is retracted. The posterior cutaneous nerve and the sciatic nerve is going to be visualized and any adhesions can carefully be resected (neurolysis). A neurolysis will be necessary if the surgery was delayed due to failure or a delayed surgery following treatment. This will be evacuated, if there is a hematoma observed. The proximal tendon stump on the ischial tuberosity will be found as will the retracted tendon and these will be approximated with the knee in flexion (to decrease the hamstring stretch). They will be repaired with Ethibond sutures and Merselene tapes. This will be anchored tapping screw if the tendon has avulsed of the tuberosity. By flexing the knee to 45 degrees to create tension the integrity of the repair will be tested. This enables the surgeon to check the 'safe' available range of motion intra- operatively so that physiotherapy can start early (at two weeks) in the safe ranges. This will avoid a prolonged immobilisation that's been demonstrated to lead to range and strength loss and significant atrophy in hamstring repairs. Then the demand for a postoperative knee flexion brace is not required, if the injury is reasonably new. However, if the surgery was delayed due to failed conservative management a knee flexion brace post-operative may be required. Some authors have attempted endoscopic repair of the hamstring tendon and state that this procedure offers more benefits like minimal scar tissue, superior visualisation of the hamstring tendon, decreased bleeding and better protection of the neurovascular bundle (Domb et al 2013). Post-Surgical OutcomesAlmost all studies conducted on the outcomes of hamstring tendon repair in return and strength return to function show that it is unreasonable to expect that the athlete returns to full strength in the hamstring following a hamstring tendon. Although the strength of the hamstring is still diminished, the athlete can return typically to a pre-injury amount of competition. Wood et al (2008) found that in those with repaired hamstring tendons, 80% returned to pre-injury heights of sports. What's more, hamstring strength returned to a level of 89% to a mean of 84% and hamstring endurance. Konan and Haddad (2010) found that 90% of the hamstring injuries they tracked returned to pre-injury levels of sport. Isokinetic testing and all reported functional outcome showed that the hamstring strength returned to 83% at six months compared with 56% at the pre-surgery level. Finally, Cohen and Bradley (2007) reported on seven patients who underwent operative repair and found that average time to return to function (and sports) was 8.5 months. To pre-operative levels of function, six of the seven had returned by post-operative six months. References - Aldridge, S.E., Heilpern, G.N., Carmichael, J.R., Sprowson, A.P., Wood, D.G. Incomplete avulsion of the proximal insertion of the hamstring: outcome two years following surgical repair. Journal of Bone and Joint Surgery. 2012. 94(5); p. 660-662.
- Birmingham, P., Muller, M., Wickiewicz, T., Cavanaugh, J., Rodeo, S., Warren, R. Functional outcome after repair of proximal hamstring avulsions. The Journal of Bone and Joint Surgery. 2001. 93-A(19):p. 1819-1826.
- Chakravarthy, J., Ramisetty, N., Pimpalnerker, A., Mohtadi, N. Surgical repair of complete proximal hamstring tendon ruptures in water skiers and bull riders: a case report of four cases and review of the literature. British Journal of Sports Medicine. 2005. 39; p. 569-572.
- Cohen, S., Bradley, J. Acute proximal hamstring rupture. J Am Acad Orthop Surg. 2007. 15(6); p. 350-355.
- Docking, S., Samiric, T., Scase, E. Purdham, C. Cook, J. Relationship between compressive loading and ECM changes in tendons. Muscle Ligaments Tendons J. 2013. 3(1); p. 7-11
- Domb, B.G., Linder, D., Sharp, K.G., Sadik, A., Gerhardt, M.B. Endoscopic repair of proximal hamstring avulsion. Arthrosc Tech. 2013. 2(1); p. e35-e39.
- Harris, J.D., Griesser, M.J., Best, T.M., Ellis, T.J. Treatment of proximal hamstring ruptures: a systematic review. Int Journal of Sports Med. 2011. 32(7); p. 390-495.
- Heinanen, M. Proximal Hamstring Avulsion – Anatomy, Cause of Injury, Surgical treatment and Post-operative Treatment Protocol. Suomen Ortopedia ja Traumatologia. 2013. 36: p. 104-110.
- Konan S, Haddad F. Successful return to high level sports following early surgical repair of complete tears of the proximal hamstring tendons. Int Orthop. 2010; 34:119-23.
- Lempainen, L., Sarimo, J., Heikkila, J., Mattila, K., Orava, S. Surgical treatment of partial tears of the proximal origin of the hamstring muscles. British Journal of Sports Medicine. 2006. 40; p. 688-691.
- Orchard, J. and Seward, H. Epidemiology of injuries in the Australian Football League, seasons 1997–2000. British Journal of Sports Medicine, 2002. 36; p. 39-45.
- Pombo, M., Bradley, J.P. Proximal hamstring avulsion injuries: A technique note on surgical repairs. Sports Health. 2009. 1(3); p. 261-264.
- Steinbruck, K. Epidemiologie von Sportverlezungen. 15-Jahres-Analyse einer Sportsmedizinischen Ambulanz. SportsvertetzSportsch, 1987. 1; p. 2-12.
- Wood, D.G., Packham, I., Trikha, S.P., Linklater, J. Avulsion of the proximal hamstring origin. Journal of Bone Joint Surgery (Am), 2008. 90-A; p. 2365-2374
- Wootton J.R., Cross, M.J., Holt, K.W.G. Avulsionof the ischial apophysis. The case for open reduction and internal fixation. Journal of Bone and Joint Surgery. 1990. 72; p. 625-627
Serratus anterior is an important muscle for the overhead athlete. Dysfunction in this muscle can lead to shoulder injuries such as impingement, rotator cuff breakdown and performance decrements during overhead tasks. Chiropractor, Dr. Alexander Jimenez looks at its anatomy and biomechanics, and highlights some clinically relevant exercises designed to retrain serratus anterior function. Shoulder pain is a common complaint in overhead athletes involved in sports such as swimming, tennis and the throwing sports. Overhead upper extremity movements place incredibly high demands on the shoulder complex, requiring high muscular activation around both the scapula-thoracic joint and glenohumeral joint. Researchers have reported that abnormal biomechanics of the shoulder girdle and repeated overhead movements can lead to injuries in overhead throwing athletes(1). In particular, muscular imbalances around the shoulder complex in the form of altered activation patterns and inherent myofascial restrictions, may lead to diminished scapular control and dyskinesis resulting in glenohumeral joint injuries, such as instability and impingement(2). The serratus anterior (SA) is one of the scapula muscles that provides a link between the shoulder girdle and the trunk and has often be implicated as a dysfunctional muscle in shoulder pathologies(3,4). The SA is a prime mover of the scapula, contributing to the maintenance of normal scapulohumeral rhythm and motion(4). It has large moment arms to produce upward rotation and posterior tilting due to its insertion on the inferior and medial border of the scapula. Poor activation of the SA muscle may result in reduced scapular rotation and protraction, resulting in relative anterior-superior translation of the humeral head in relation to its glenoid articulation, causing subacromial impingement and rotator cuff tears(5). Anatomy & BiomechanicsThe SA is a flat sheet of muscle originating from the lateral surface of the first nine ribs (see Figure 1). It passes posteriorly around the thoracic wall before inserting into the anterior surface of the medial border of the scapula(6). Overall, the main function of the SA is to protract and rotate the scapula, keeping it closely opposed to the thoracic wall allowing optimal positioning of the glenoid fossa for maximum efficiency for upper extremity motion(7). The SA can be broken down into three functional anatomical components(8,9): - The superior component originates from the first and second ribs and inserts into the superior medial angle of the scapula. This component serves as the anchor that allows the scapula to rotate when the arm is lifted overhead. These fibres run parallel to the 1st and 2nd rib;
- The middle component of the SA originates from the second, third and fourth ribs and inserts onto the medial border of the scapula anteriorly (sandwiched between the scapula and ribs). This component is the prime protraction muscle of the scapula;
- The inferior component originates from the fifth to ninth ribs and inserts on the inferior angle of the scapula. The fibres form a ‘quarter fan’ arrangement, inserting onto the inferior border of the scapula. This third portion serves to protract the scapula and rotate the inferior angle upward and laterally. Inman (1944) proposed that the lower part of the serratus anterior is the stabiliser of the inferior border of the scapula, and works with the lower trapezius to create a force couple to upwardly rotate the scapula during overhead movement(10).
The primary functional roles of the SA are to(9): - Upwardly rotate the scapula during
shoulder abduction, particularly from 30 degrees of shoulder abduction onwards; - Stabilise and protract the scapula during shoulder flexion movements;
- Rotate the inferior angle anteriorly (posterior tilt of the scapula);
- Stabilise the scapula against the thorax during forward pushing movements in order to prevent the scapula ‘winging’ (see below);
- Hold the medial border of the scapula firmly against the thorax so that with the hand fixed, it can displace the thorax posteriorly during a push up.
In the athlete, particular specific movements require a high level of function of the SA to achieve either full scapular protraction and/or upward rotation. Examples of athletic endeavours requiring this SA function include: - Throwing a punch in boxing to achieve maximum reach of the arm. Hence the SA is often referred to as the ‘boxers muscle’.
- In the boxer, the SA is needed to brace the scapula on impact with the punch. This allows maximum transfer of force from the lower limbs into the torso then for it to be imparted into the upper limb and punch. If the scapula was to ‘collapse’ into retraction upon impact of the punch, the boxer would then lose power in the punch.
- In swimming, the swimmer needs full upward rotation to achieve maximum reach in the water upon hand entry in freestyle and butterfly.
- The overhead athlete such as a tennis player needs full upward rotation in the act of serving.
- The sweep style rower needs full protraction on the ‘long’ side to achieve necessary reach during the catch phase of the rowing stroke.
- In baseball, the pitcher needs high levels of protraction during the follow through of the baseball pitch. Similarly in the throwing events in athletics.
The SA is innervated by the long thoracic nerve, originating from the anterior rami of the fifth, sixth, and seventh cervical nerves (see Figure 2)(7,8). Branches from the fifth and sixth cervical nerves pass anteriorly through the scalenus medius muscle before joining the seventh cervical nerve branch that courses anteriorly to the scalenus medius. The long thoracic nerve then dives deep to the brachial plexus and the clavicle to pass over the first rib. Here, the nerve enters a fascial sheath and continues to descend along the lateral aspect of the thoracic wall to innervate the SA muscle. SA Dysfunction Associated With Scapula DyskinesisProper positioning of the humerus in the glenoid cavity, known as scapulohumeral rhythm, is critical to the proper function of the glenohumeral joint during overhead motion. A disturbance in normal scapula movement may cause inappropriate positioning of the glenoid relative to the humeral head, resulting in injury such as impingement and instability(2,12,13). Precise timing of muscle activation and adequate levels of muscle recruitment are also needed to position the scapula in the ‘ideal’ position. Small changes of activation in the muscles around the scapula can affect its alignment, as well as the forces involved in upper limb movement(14). One of the primary muscles responsible for maintaining normal rhythm and shoulder motion is the SA(15). Clinically, it has been shown that if a therapist actively repositions a patient’s scapula into an ‘ideal’ posture by reducing the anterior tilt, then it is noticed that impingement pain is reduced, and strength increases in the shoulder during overhead activities(16). The SA is a muscle that will actively work to position the scapula into posterior tilt during overhead activities. Lack of strength or endurance in the SA allows the scapula to rest in a downwardly rotated and anterior tilted position, causing the inferior border to become more prominent. Furthermore, gross pathological inhibition of the SA or an imbalance between the SA and the other protracting muscle, the pectoralis minor, may result in a ‘winging scapula’. Scapular winging may precipitate or contribute to persistent symptoms in patients with orthopaedic shoulder abnormalities(17,18). This scapular winging is best appreciated on watching the scapula posture during a push up exercise. Often if the winging is due to a muscle imbalance and the primary scapula stabiliser is the pectoralis minor, this will usually correct if the patient is asked to ‘plus’ and protract the scapula. If the wing disappears then the cause is most likely muscle imbalance, if it remains then it may be a pathological inhibition of the SA. Examples of this are shown below in figures 3-6. The gross examples of scapular winging can also be due to a pathological lesion to the long thoracic nerve that innervates the SA muscle. For the purposes of this discussion, direct nerve insults to the long thoracic nerve will not be discussed as often these injuries will seriously curtail athletic participation in an athlete. The reader is directed to references 19-23 for a more detailed discussion on these pathological nerve lesions. SA ImportanceThe importance of a conditioned serratus anterior muscle has been highlighted in EMG studies of sports such as swimming(24), throwing(25), and tennis(26). A fatigued serratus anterior muscle will reduce scapular rotation and protraction and allow the humeral head to translate anteriorly and superiorly, possibly leading to secondary impingement and rotator cuff tears(27). More direct studies on the role that SA plays in shoulder pathologies has been studied by other researchers. The pertinent points of some of these studies can be summarised below; 1. When the trapezius and SA EMG is investigated in people suffering from shoulder pathology is compared with those without pathology, it has been found that upper trapezius can show an increased activity during arm elevation and lowering, and that SA shows decreased activation at some elevation angles (usually 70-100 degrees)(28). 2. When the muscle activation patterns of swimmers with shoulder pain is compared to those without, it has been found that middle and lower SA show decreased activity in all phases of swimming motion. This can be a possible cause of the shoulder pain or a consequence of a painful shoulder whereby the swimmer uses compensatory muscle activation patterns(29). 3. Similarly, other researchers have found a ‘latency’ or activation delay in the SA in the shoulders of painful swimmers as they raise their arms in the scapular plane(30). 4. Ludewig and Cook (2000) hypothesised that patients with decreased SA activation are associated with more shoulder pain and/or instability, and that an increase in lower trapezius activity was an attempt to compensate for decreased serratus anterior activation(2). 5. Lin et al (2005) studied subjects with various types of shoulder dysfunction and found decreased serratus anterior activity and increased upper trapezius activity, without a change in lower trapezius activity in injured shoulders when compared to normal subjects(31). Scapula position has also been associated with the ability of the rotator cuff to function. Excessive anterior tilt of the scapula, internal rotation, or excessive elevation of the acromion are factors that decrease the rotator cuff activation and cause an inadequate distribution of tension along the tendons. Such situations impair the optimum length-to-tension ratio of these muscles, leading to a loss of stabilisation and increasing the chance of muscular disruption or degeneration(32). It has been shown that the rotator cuff function improves in the presence of functioning scapula muscles such as the SA and lower trapezius. Exercises For SAA significant amount of research has been conducted on finding the best rehabilitation exercises for the SA. The majority of these studies look at movements such as push ups, push up-plus exercises, cable and dumbbell ‘punch’ type movements. These exercises essentially emulate the function of the SA in its protraction role. Some of the findings of the more noted studies are; - Decker et al (1999) looked at the EMG activity and applied resistance associated with eight scapulohumeral exercises performed below shoulder height that target the SA muscle and how to design a continuum of SA muscle exercises for progressive rehabilitation or training(33). The best exercises according to these researchers are the push ups, dynamic hug, scaption and SA punch exercises.
- Barreto et al (2012) found high levels of activation of the SA in scaption exercises and adequate levels of activation of SA in MMP (modified military press)(34).
- Kim et al (2014) studied the interesting effect of vibration on SA activation and found that the push-up plus exercise performed using the Redcord system with mechanical vibration at 50 Hz increases SA muscle activity(35).
- Park and Yoo (2011) evaluated the effect of unstable surface on the upper and lower parts of the SA, while performing variations of the push-up exercise (push up and push up plus(36). The results indicated that the different parts of SA have distinct functions in the stabilisation process and therefore are recruited differently. The authors concluded that the main role of the lower SA is the fixation of the scapula onto the thoracic wall and therefore recommend performing the push-up plus on an unstable surface as a more effective strategy for the selective mobilisation of this component of the SA.
- Seo et al (2013) also found that the performance of a push up and knee push up on an unstable surface (Swiss ball) increased activation of the SA(37).
Below are some examples of clinically used SA activation exercises that anecdotally seem to recruit SA to high levels of function: SummaryThe serratus anterior (SA) is a muscle that plays an important role in the dynamic movement and control of the scapula during pushing movements and overhead elevation. Specifically it is a protractor, upward rotator, posterior tilt muscle of the scapula and additionally it fixes the scapula against the rib cage during movement. It is an important muscle for the overhead athlete as dysfunction in this muscle can lead to shoulder injuries such as impingement, rotator cuff breakdown and performance decrements during overhead tasks. This article has highlighted some clinically relevant exercises designed to retrain SA function in the athlete with SA dysfunction. References
1. J.Athl. Train. 2007; 42(2):311-319.
2. Phys Ther. 2000;80(3):276–291.
3. J OrthopSports Phys Ther 1999. 29: 574–586
4. J Orthop Sports Phys Ther 1996. 24: 57–65
5. J. Orthop. Sports Phys. Ther. 1994;20(6):307- 318.
6. Drake RL, Vogl W, Mitchell AWM. Gray’s anatomy for students. Philadelphia: Elsevier Inc; 2005. p. 633–47.
7. Clin Orthop Relat Res 1999. 368:17–27.
8. J BoneJoint Surg 1979;61:825–32
9. Simons et al (1999) Travell and Simons’ Myofascial Pain and Dysfunction. Volume 1 Upper Half of the Body (2nd edition). Williams and Wilkins. Baltimore.
10. J Bone Joint Surgery. 1944. 26(1); 1-30.
11. Am J Sports Med 2004; 32:1063–76.
12. J Orthop Sports Phys Ther 1993. 18: 427–432
13. Kibler WB: Normal shoulder mechanics and function. Instr Course Lect 46: 39–42, 1997
14. Am J Sports Med. 2003;31(4):542-9
15. Phys Ther 1994. 75: 194–202
16. Journal of orthopaedic & sports physical therapy. 2008. 38(1). 4-11 17. Contemp Orthop 1991. 22: 525–532
18. Physiol Ther. 2007;30(1):69-75
19. J Shoulder Elbow Surg 2000;9:31–5
20. J Shoudler Elbow Surg 1998;7:458–61
21. Curr Rev Musculoskelet Med 2008. 1:1–11
22. Chirurgie de la main 30 2011. 90–96
23. J. Bone & Joint Surg 1955. 37-A:567-574
24. Am J Sports Med 1991. 19: 569–576
25. J Bone Joint Surg 1988. 70A: 220–226
26. Am J Sports Med 1988. 16: 481–485
27. J Orthop Sports Phys Ther 1994. 20: 307–318
28. Am J Phys Med 1977;56(5):223–40
29. Am J Sports Med1991;19(6):577–82
30. Int J Sports Med 1997;18(8):618–24
31. J Electromyogr Kinesiol. 2005;15(6):576–586
32. Arch Phys Med Rehabil. 2002;83(1):60-9
33. Am J Sports Med 1999. Vol. 27, No. 6. 784-791
34. ConScientiae Saúde 2012. 11 (4) 660-667
35. J. Phys. Ther 2014. Sci. 26: 1275–1276
36. J Electromyogr Kinesiol. 2011 Oct;21(5):861-7
37. J Phys Ther Sci. 2013 Jul;25(7):833-7
Chiropractor Dr. Alexander Jimenez brings insights and explores the causes of cervicogenic dizziness in athletes, how to diagnose and effective treatment options. Dizziness is a very common complaint in clinical practice, affecting approximately 20-30% of the general population(1). It can manifest as faintness, unsteadiness, a perception of spinning, and disorientation(2). The mechanisms causing these symptoms are multiple, and can involve several different organ systems. In particular, dizziness can be experienced from disturbances of the ear, nose and throat; cardiovascular system; and central nervous system (CNS)(1,3). More commonly in sport however, is the association of dizziness in 20-58% of athletes who sustain a traumatic cervical flexion-extension injury or ‘whiplash’ injury(1,2,4). This can occur due to dysfunction in the upper cervical spine and sensorimotor control disturbances(1,5). This specific type of dizziness is referred to as cervicogenic dizziness (CGD)(2). PresentationTable 1 gives an idea of how to distinguish dizziness with cervicogenic origin from that of other causes. In addition, common distinguishing features of CGD include associated neck pain, restricted cervico- thoracic range of motion, and headaches(4,6). Furthermore, hypertonicity to dorsal soft tissue (particularly suboccipital musculature) and positive pain provocation with palpation to cervical zygapophyseal joints are likely(6). Further disturbances with cervical joint positional sense, postural stability, and oculomotor control, such as altered smooth pursuit and saccadic eye movements, can also present with this disorder(5). The proposed mechanism for the above- mentioned characteristics are a result of changes to excitation levels of cervical somatosensory receptors. This is caused by neck pain or trauma, and leads to a sensory mismatch between vestibular and cervical input(2,7). Literature supports the presence of a strong connection between cervical dorsal roots and the vestibular nuclei (see Figure2) particularly at levels C2 and C3 (3,4). The cervical afferents are also involved in three reflexes influencing head, eye, and postural stability/proprioception: the cervico-collic reflex, the cervico-ocular reflex, and the tonic neck reflex(5). In addition, there is an abundance of mechanoreceptors in the ‘y-muscle’ spindles of the deep segmental upper cervical muscles, which if sensitised by trauma, leads to alterations of proprioceptive signalling to the CNS (Figure 1)(1,8). With this in mind, it is understandable that injury or trauma of the neck may be associated with a sense of dizziness or disequilibrium. DiagnosisAs a result of the previously mentioned competing pathologies, it can be difficult to diagnose the primary cause of dizziness. Obtaining a thorough history from a patient presenting with dizziness is therefore critical to making a decision regarding appropriate care(2,4,5,8). To entertain a diagnosis of CGD, the therapist must be able to correlate the onset and diagnosis of the dizziness symptoms with the neck pain or dysfunction (ie with cervical movements(4). Commonly, the most provocative cervical movement is extension; however, CGD can be reproduced with rotation or (more rarely) flexion(7). Table 2 lists co-existing symptoms that should be explored further because they are suggestive of CNS or inner ear (vestibular) pathology. Such symptoms would require further investigation and would not be appropriate for physiotherapy treatment(4). Another pathology which can cause dizziness and unsteadiness, and which should not be misdiagnosed is damage to the vertebral artery or vertebrobasilar arterial injury. This can be present following head and neck trauma(4,5). If there is any suspicion of vascular involvement, a clinical framework has been proposed providing an accurate guideline for assessment and management(9). Likewise, it is worth noting that dizziness can be caused by elevated anxiety and medication intake as well(5). The purpose of this scale is to identify difficulties that someone may be experiencing because of dizziness. Although this assessment is not specific to athletes, it can be helpful as a valid and reliable outcome measure(5,7,10). Other measurable outcomes for symptoms can include a 5-point scale for intensity of dizziness (0=no, 1=mild, 2=moderate, 3=severe, and 4=very severe(6). Similarly, frequency of dizziness can be measured on a 6-point scale (0=no dizziness, 1=dizziness less than once per month, 2=1-4 episodes of dizziness per month, 3=1-4 episodes per week, 4=once daily, and 5=more than once per day or constant)(7). AssessmentPain provocation and disruptions to cervico-thoracic range of movement can be assessed using a neuromusculoskeletal objective assessment, while the effect on CGD symptoms is monitored. To gauge any additional sensorimotor control disturbances however, clinical assessment of cervical joint position sense (Figure 2), oculomotor control, and postural instability or balance/ proprioception can be very useful(1,2,4,5). Oculomotor Control AssessmentThis includes gaze stability (the ability to maintain gaze of a target while the head is moving), smooth pursuit (eyes follow a target whilst keeping the head still), saccadic eye movements (eyes fixed on a target that is moved quickly), and eye/head coordination (maintaining gaze when both the head and eyes are moving in between two targets – leading with the eyes first). Symptom provocation is a positive test, as well as, noting any abnormal coordination of the task(5). Similarly, these tests can be used for rehabilitation, and with appropriate adaptation, can be made more functional to sporting tasks. TreatmentResearchers have argued that once a confident diagnosis has been achieved, management of CGD should be the same as for cervical pain, supporting the role of manual therapy for long-term benefits(1-4,6-8,10). Following trauma, it is thought that type 1 cervical articular mechanoreceptor and proprioceptors from dysfunctional joints results in a loss of normal afferent input. This leads to aberrant information being sent to the vestibular nuclei, thus formulating symptoms similar to vestibular disturbances, such as dizziness(3). With this in mind, cervical spine mobilisation techniques (sustained natural apophyseal glides, and Maitland mobilisations) have been shown to be effective in restoring normal movement of the zygapophyseal joints. The benefits include a reduction in pain and muscle hypertonicity, which helps re-establish normal proprioceptive and biomechanical functioning to the cervical spine(1,3,10). If these techniques described above are successful then a self-SNAG (as described in issue 159) can be recommended for the patient to try at home using a towel or belt/ strap. In general, it has been proposed that these techniques should be utilised over a course of four to six sessions, which should produce a long-term reduction in symptoms(3,7,10). Combining these manual techniques with sensorimotor control rehabilitation, as described previously, is recommended by the majority of literature(1,5,6,8);however, remains inconclusive in a minority of research(2). SummaryCGD is a diagnosis characterised by dizziness and disequilibrium, which is associated with neck pain, most commonly following neck trauma, such as forced cervical flexion-extension mechanisms in sport. The diagnosis relies on the basis of history and examination, and should prioritise the exclusion of other possible causes of dizziness, including involvement of the CNS, cardiovascular, and vestibular systems. Physiotherapy intervention is not appropriate if there is any suspicion of these systems being the source of symptoms. In this instance, onward referral to a clinical specialist should take precedence. When diagnosed correctly, there is good support for the use of manual therapy techniques to produce a long-term reduction in symptoms. Given the prevalence of sensorimotor control disturbances associated with dysfunction to the upper cervical spine, the addition of sports-specific rehabilitation focusing on regaining this control can be clinically justified. References
1. Pain Phys. 2015. 18: 583-595
2. Chiro & Man Th. 2011. 19-21
3. Man Th. 2005. 10: 4-13
4. JOSPT 2000. 30(12): 755-766
5. Man Th. 2008. 13: 2-11
6. Dis & Rehab. 2007. 29(15): 1193-1205
7. Man Th. 2008. 1-11
8. Arch Phys Med Rehabil. 1996. 77: 874-882
9. Manual Th. 2014. 19: 222-228
10. Phys Th. 2014. 94(4): 466-476
11. JOSPT. 2010. 40(4): 225-229
All marathon runners eventually slow down. But, a new study finds that whether a runner is average or elite, or whether they are a man or a woman, may determine at what age and how much their pace will decline.
The researchers reviewed 2001-2016 data from three of the largest U.S. marathons — Boston, Chicago and New York City.
“We found that marathon performance decline begins at about 35 years old,” said study lead author Dr. Gerald Zavorsky, of Georgia State University. “For top runners, we determined the slowdown is about 2 minutes per year beginning at age 35 for men. And for women, it’s actually a little bit statistically faster of a slowdown, around 2 minutes and 30 seconds per year beginning at the age of 35,” Zavorsky said in a university news release.
Athletes depend on their excellent, strength, flexibility and mobility to be able to perform effectively in their specific sport or physical activity. They undergo rigorous training in order to prepare for competitive seasons. While many athletes understand and use preventive measures to avoid experiencing an injury or developing a condition, the constant utilization of the different structures of the body can gradually cause the degeneration of the tissues, eventually resulting in an unexpected injury. Many athletes commonly experience sports injuries, however, one type of injury can cause tremendous hardships for the affected athlete: a torn meniscus. Within an incidence ratio of 60 to 70 for each 100,000 visits, meniscal tears of the knee are a common diagnosis among many sports injury scenarios. Meniscal tears have accumulated great amounts of lost time from physical activity and even employment, which is why understanding the risk factors for meniscal tears is essential, allowing for a quicker and more accurate diagnosis of this type of sports injury. Lesions to the meniscus frequently occur in sport settings where tremendous dynamic demands are placed against the knee during specific movements. Moreover, meniscal tears may also occur during workplace environments where repetitive, constant motions can develop complications. Basic activities, such as standing, lifting, squatting, kneeling and sitting, are believed to increase the chances of damage to the meniscus. The time between ACL, or anterior cruciate ligament, ruptures and surgical reconstruction procedures have also been acknowledged as a risk factor for meniscal lesions. Numerous elements contributing to this type of injury have been recognized, however, there’s limited research to support them.
|


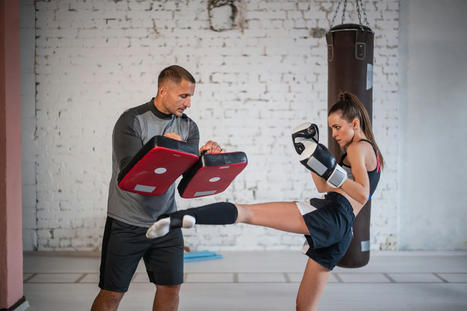


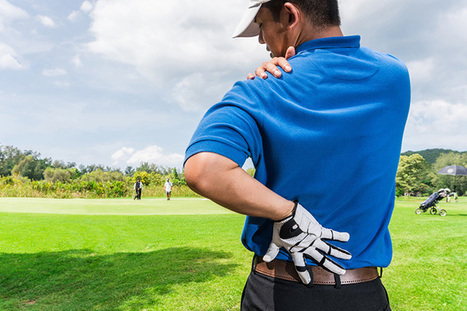


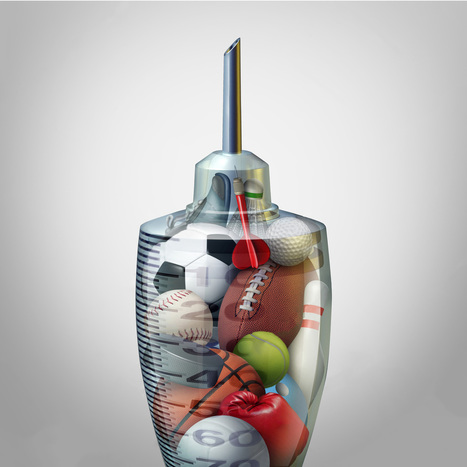


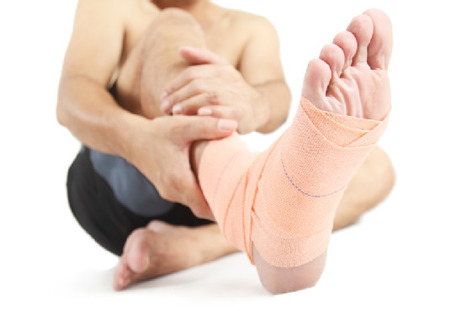


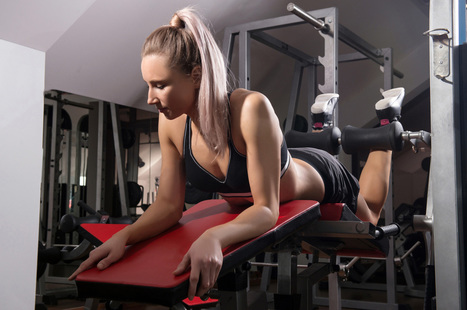


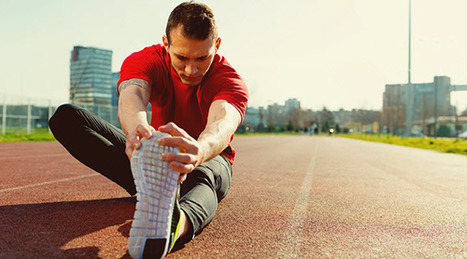


Recovering from a foot injury? Learn how to recover properly and understand the lengths of the healing process. For answers to any questions you may have, please call Dr. Jimenez at 915-850-0900 or 915-412-6677