From Keyestudio Wiki Jump to: navigation, search Contents 1 Description 2 Specification 3 Pin Interfaces 4 Specialized Functions of Some Pins: 5 Windows System 5.1 Installing Arduino IDE 5.2 Installing driver 5.3 Arduino IDE Setting 5.4 Start your first program 6 MAC System 6.1 Install Arduino IDE on MAC System 6.2 Download the Driver of CP2102 6.3 How to Install the Driver of CP2102 6.4 Arduino IDE Setting 7 Resources Description The processor core of Keyestudio V4.0 development board is ATMEGA328P-PU , fully compatible with ARDUINO UNO REV3. It has 14 digital input/output pins(of which 6 can be used as PWM outputs), 6 analog inputs, a 16 MHz crystal oscillator, a USB connection, a power jack, 1 ICSP header, and a reset button. The built-in ICSP port can burn the firmware for ATMEGA328P-PU directly. We can plug in power by USB wire, DC head and Vin GND pins. Specification Microcontroller: ATMEGA328P-PU USB serial chip:CP2102 Operating Voltage: 5V Input Voltage (recommended):DC 7-12V Digital I/O Pins: 14 (D0-13) PWM Digital I/O Pins:6 (D3 D5 D6 D9 D10 D11) Analog Input Pins: 6(A0-A5) DC Current per I/O Pin: 20 mA DC Current for 3.3V Pin: 50 mA Flash Memory: 32 KB (ATMEGA328P-PU) of which 0.5 KB used by bootloader SRAM:2 KB (ATMEGA328P-PU) EEPROM: 1 KB (ATMEGA328P-PU) Clock Speed:16 MHz LED_BUILTIN:D13 Pin Interfaces 1 ICSP (In-Circuit Serial Programming) Header the AVR, an Arduino micro-program header consisting of MOSI, MISO, SCK, RESET, VCC, and GND. It is often called the SPI (serial peripheral interface) and can be considered an "extension" of the output. In fact, slave the output devices to the SPI bus host. When connecting to PC, program the firmware to ATMEGA328P-PU. 2 Power LED Indicator Powering the Arduino, LED on means that your circuit board is correctly powered on. If LED is off, connection is wrong. 3 Digital I/O Arduino MEGA has 14 digital input/output pins (of which 6 can be used as PWM outputs).These pins can be configured as digital input pin to read the logic value (0 or 1). Or used as digital output pin to drive different modules like LED, relay, etc. Using pinMode(), digitalWrite(), and digitalRead() functions. 4 GND GND 5 AREF Reference voltage (0-5V) for analog inputs. Used with analogReference(). Configures the reference voltage used for analog input (i.e. the value used as the top of the input range). 6 RESET Button You can reset your Arduino board 6 SDA IIC communication pin 7 SCL IIC communication pin 8 RESET Button You can reset your Arduino board, 9 D13 LED There is a built-in LED driven by digital pin 13. When the pin is HIGH value, the LED is on, when the pin is LOW, it's off. 10 USB Connection Arduino board can be powered via USB connector. All you needed to do is connecting the USB port to PC using a USB cable. 11 CP2102 USB serial chip, translate the USB signal of computer into serial signal 12 TX LED Onboard you can find the label: TX (transmit) When Arduino board communicates via serial port, send the message, TX led flashes. 13 RX LED Onboard you can find the label: RX(receive ) When Arduino board communicates via serial port, receive the message, RX led flashes. 14 Crystal Oscillator How does Arduino calculate time? by using a crystal oscillator. The number printed on the top of the Arduino crystal is 16.000H9H. It tells us that the frequency is 16,000,000 Hertz or 16MHz. 15 Voltage Regulator To control the voltage provided to the Arduino board, as well as to stabilize the DC voltage used by the processor and other components. Convert an external input DC7-12V voltage into DC 5V, then switch DC 5V to the processor and other components. 16 DC Power Jack Arduino board can be supplied with an external power DC7-12V from the DC power jack. 17 Microcontroller Each Arduino board has its own microcontroller. You can regard it as the brain of your board. The main IC (integrated circuit) on the Arduino is slightly different from the panel pair. Microcontrollers are usually from ATMEL. Before you load a new program on the Arduino IDE, you must know what IC is on your board. This information can be checked at the top of IC. 18 IOREF This pin on the board provides the voltage reference with which the microcontroller operates. A properly configured shield can read the IOREF pin voltage and select the appropriate power source or enable voltage translators on the outputs for working with the 5V or 3.3V. 19 RESET Header Connect an external button to reset the board. The function is the same as reset button. 20 Power Pin 3V3 A 3.3 volt supply generated by the on-board regulator. Maximum current draw is 50 mA. 21 Power Pin 3V3 Provides 5V output voltage 22 Vin You can supply an external power input DC7-12V through this pin to Arduino board. 23 Power Pin 3V3 Onboard has 6 analog inputs, labeled A0 to A5. Specialized Functions of Some Pins: Serial Communication: D0 (RX) and D1 (TX) PWM Pins (Pulse-Width Modulation): D3 D5 D6 D9 D10 D11 External Interrupts: D2 (interrupt 0), D3 (interrupt 1) SPI communication: D10 (SS), D13 (SCK), D11 (MOSI), D12 (MISO). These pins support SPI communication using theSPI library. The SPI pins are also broken out on the ICSP header, which is physically compatible with the Arduino Uno. IIC communication: A4 (SDA); A5 (SCL). Support TWI communication using the Wire library. Windows System Installing Arduino IDE When getting this control board, we need to install Arduino IDE Enter the website https://www.arduino.cc/, click and Select the version you want to download, the latest version could be downloaded. Alternatively, you could select previous release. In this project, we use 1.8.12 version. Click to view the below page Click to download an installer of Arduino 1.8.12 version,which needs to be installed manually. When you tap ,a zip file of Arduino 1.8.12 version will be directly downloaded, and you only need to unzip it to finish installation. Click icon to download Arduino IDE. Installing driver Let’s install the driver of keyestudio V4.0 development board. The USB-TTL chip on V4.0 development board adopts CP2102 serial chip. The driver program of this chip is included in Arduino 1.8 version and above, which is convenient. Plug on USB port of board, the computer can recognize the hardware and automatically install the driver of CP2102. Note: If the version of Arduino IDE you download is below 1.8, you need to download the driver of CP2102. Download the driver of CP2102: https://fs.keyestudio.com/CP2102-WIN If install unsuccessfully, or you intend to install manually, open the device manager of computer. Right click Computer----- Properties----- Device Manager. There is a yellow exclamation mark on the page, which implies installing the driver of CP2102 unsuccessfully. Then we double click the hardware and update the driver. Click “OK” to enter the following page, click “browse my computer for updated driver software”, find out the installed or downloaded ARDUINO software. As shown below: There is a DRIVERS folder in Arduino software installed package(), open driver folder and you can see the driver of CP210X series chips. We click “Browse”, then find out the driver folder, or you could enter “driver” to search in rectangular box, then click “next”, the driver will be installed successfully. (I place Arduino software folder on the desktop, you could follow my way) Open device manager, we will find the yellow exclamation mark disappear. The driver of CP2102 is installed successfully. Arduino IDE Setting Click icon,open Arduino IDE. To avoid the errors when uploading the program to the board, you need to select the correct Arduino board that matches the board connected to your computer. Then come back to the Arduino software, you should click Tools→Board, select the board. (as shown below) Then select the correct COM port (you can see the corresponding COM port after the driver is successfully installed) Before uploading the program to the board, let’s demonstrate the function of each symbol in the Arduino IDE toolbar. A- Used to verify whether there is any compiling mistakes or not. B- Used to upload the sketch to your Arduino board. C- Used to create shortcut window of a new sketch. D- Used to directly open an example sketch. E- Used to save the sketch. F- Used to send the serial data received from board to the serial monitor. Start your first program Open the file to select Example, choose BLINK from BASIC, as shown below: Set board and COM port, the corresponding board and COM port are shown on the lower right of IDE. Click to start compiling the program, check errors. Click to upload the program, upload successfully. Upload the program successfully, the onboard LED lights on for 1s, lights off for 1s. Congratulation, you finish the first program. MAC System Install Arduino IDE on MAC System The installation instruction is as same as the chapter 5.1, as shown below: Download the Driver of CP2102 https://fs.keyestudio.com/CP2102-MAC How to Install the Driver of CP2102 The following link is for your reference: https://wiki.keyestudio.com/How_to_Install_the_Driver_of_CP2102_on_MAC_System Arduino IDE Setting The setting method is as same as the chapter 5.3 except from COM port, as shown below. Resources https://fs.keyestudio.com/KS0497 Retrieved from "http://wiki.keyestudio.com/index.php?title=KS0497_Keyestudio_V4.0_Development_Board(Compatible_With_Arduino_Uno)&oldid=33751";
This is one of my news digests. If you like my editorial choices, there are more to be found by clicking on the "dear reader" link, and on my name above. Enjoy !
Takeoff projects help students complete their academic projects. Register at takeoff projects today to find and learn about different interesting big data projects and grab the best jobs. Get started right now.
Participa en nuestro Taller Gratuito de Electrónica Aplicada con Arduino y conoce cómo será nuestro curso.
📅 Lunes 6 de abril - Día del taller Gratuito 🕗 8:00 p.m. en punto ⏰ La sala se abrirá 15 minutos antes para ingresar con calma 💻 Modalidad: Virtual en vivo (Google Meet)
En este taller gratuito: ✅ Explicaremos la metodología de enseñanza ✅ Mostraremos los programas usados para el curso (tinkercad, proteus, Arduino IDE) ✅ Detallaremos los horarios ✅ Resolveremos todas tus dudas en vivo
🎓 Información sobre el Curso de Electrónica Aplicada con Arduino 📅 Inicio: Sábado 11 de abril 🕒 Horario: 3:00 p.m. – 7:00 p.m. 📚 Duración: 5 sesiones (4 horas c/u) 🎓 Certificado: 40 horas académicas
✨ Aprenderás electrónica, programación Arduino, sensores, simulación y proyectos STEAM.
📦 Incluye kit, materiales, asesoría y curso 100% práctico.
Join us for a deep dive into the modern era of Java education. We’re moving beyond boilerplate and "Hello World" in the terminal to explore how Java 25—with its streamlined syntax and high-performance JIT—is transforming the classroom through hardware and interactive notebooks.
Get creative with this multi-sensor setup for a fun decorative Easter project! This video showcases how a button controls various patterns on an LED light strip, while an IR sensor allows you to change the RGB color. It's a fantastic DIY electronics project that brings a touch of magic to your Easter decor.
-- Amazon Affiliate links -- Arduino Starter kits: Sunfounder Uno R4 Minima Ultimate Sensor kit: https://amzn.to/48bjJWg ELEGOO Uno R3 Most Complete Starter kit: https://amzn.to/4rYCt2i
There were a plethora of tiny, local ISPs in the days of dial-up internet. Along with the big providers, many cities would have more than one. Some of those have survived broadband, but none of them w...
Learn how to make an Automatic Smart Barrier with Traffic Light using Arduino in this simple DIY electronics project. 🚦🤖 This project demonstrates how Arduino can be used to automate a barrier gate and control a traffic light system for vehicles.
The automatic smart barrier detects vehicles and controls the barrier while the traffic light indicates stop and go signals. This type of system is commonly used in parking gates, toll gates, and railway crossings.
🔧 What you will learn in this video: • How an Arduino automatic barrier system works • How a traffic light control system operates • How to build a simple smart barrier using Arduino • Basic automation using Arduino for beginners
This Arduino project is perfect for students, beginners, and electronics enthusiasts looking for creative DIY automation projects.
Subscribe for more Arduino projects, DIY electronics, smart automation circuits, and engineering mini projects. 🚀
ESP8266MOD vs ESP8266EX explained in a clear and practical way. Learn the key differences, specifications, applications, and which ESP8266 module is better for IoT, WiFi projects, and embedded system development.
The Smart Attendance System is an Arduino-based project designed to automate the attendance process using RFID technology. In this system, each student is provided with an RFID card. When the card is scanned near the RFID reader, the system reads the unique ID (UID) and marks the attendance automatically.
The project reduces manual work, saves time, and avoids proxy attendance. An LCD display shows messages like “Attendance Marked” or “Invalid Card”, and a buzzer/LED provides instant indication for successful or unsuccessful scans.
This project was developed for the ATL Marathon to demonstrate the practical use of embedded systems and IoT concepts in schools. It promotes smart classroom solutions and efficient digital record management.
I made a Smart Automatic Door using Arduino Uno. This DIY project automatically opens and closes the door when someone comes near the sensor. It is a simple and beginner-friendly Arduino project using ultrasonic sensor and servo motor. This project is perfect for home automation and smart door systems. Watch the final test of the Arduino automatic door project. If you like DIY electronics and Arduino projects, don’t forget to like and subscribe.
arduino automatic door smart door using arduino arduino projects arduino uno projects automatic door project diy arduino projects smart home arduino arduino ultrasonic sensor project servo motor arduino project beginner arduino project arduino smart door system arduino door opener home automation arduino
Dive into the world of AI and technology by learning how to construct your own voice assistant using Raspberry Pi. This step-by-step guide simplifies complex concepts, making it accessible for both beginners and tech enthusiasts eager to explore DIY electronics projects.
Thanks for watching! consider subscribing if you found this helpful!
Also guys, the links aren't clickable since my YouTube account verification is under process. Until then I want you guys to copy and paste the links on any web browser so that you can access the code and video.
Watch this simple setup bring motion to life—perfect for beginners getting into electronics or anyone who loves building cool things. Small code, big results.
arduino project, electronics, arduino projects, smart home, smart lock, access control, diy lock, home automation, smart home automation, smart home gadgets, keyless entry, arduino lock, smart home ideas, best smart lock, best smart lock for home, home automation ideas, smart locks, Electrical Mandir, home security, home security system, keypad lock, smart door lock, rfid lock, best smart locks, diy smart lock, Rfid smart door lock, Keypad door lock
(TrendHunter.com) The Poor Man’s Polaroid is a DIY instant camera project created by maker Boxart that replaces traditional instant film with thermal receipt paper. The Poor Man’s Polaroid uses a Raspberry Pi...
The Raspberry Pi 500 Plus is a modern all-in-one keyboard computer inspired by classic machines like the Amiga and BBC Micro. In this video I see how far that inspiration can go by turning it into the ultimate Amiga using the latest version of PiMiga, one of the most complete Amiga environments available for the Raspberry Pi. From Workbench and classic software to games and modern enhancements, I’ll show how easy it is to transform a tiny computer into a surprisingly powerful Amiga setup.
0:00 Intro 0:24 PiMiga Introduction 01:42 Download & Setup PiMiga 02:44 Sponsor Message 04:54 Raspberry Pi 500 Plus Tour 06:14 Installing PiMiga 07:06 PiMiga First Run & Tour 09:15 Playing Amiga Games on Raspberry Pi 17:06 Amiga Demo Scene Titles 21:41 Classic Mac Emulation on Raspberry Pi 23:33 Atari ST Emulation on Raspberry Pi 24:47 ScummVM 25:33 SNES Emulation 26:55 Arcade Emulation MAME 28:18 Amiga Applications 31:22 Conclusion
**Sources used in this video (with permission or under fair use):
In this demo, I show how I took my company, AlephZero’s radar-based remote breathing monitoring IP and ported the core demo onto a Raspberry Pi running the DreamRF Infineon-based radar through the DreamHat+ Radar platform.
The demo shows real-time remote breathing extraction at roughly 1.5 to 1.6 meters away. As I breathe, the system tracks the breathing waveform, estimates breathing rate in BPM, reports the target range, and computes a post-processing breathing SNR. I also change my position by moving the chair backward and forward to show how quickly the system responds to range shifts and target motion within the sensing volume.
To further stress the demo, I intentionally stop breathing for a moment and then resume, showing how the algorithm reacts to the disappearance and return of the chest micro-motion signal. The result is a practical example of how radar can isolate and enhance very small physiological motion, retaining strong breathing observability even out to around 2 meters.
This demo is a simple but powerful illustration of embedded radar sensing on low-cost hardware: real-time respiration monitoring, fast adaptation to position changes, and meaningful signal enhancement on the edge using a Raspberry Pi-based radar platform.
1.Design and Development of an IoT-Enabled Multi-Factor Smart Locker Security System with Intruder Photo Alert. 2.IoT-Based Smart Locker Security System with Biometric Authentication and OTP Verification. 3.Intelligent Multi-Layer Locker Security System using Raspberry Pi Pico and ESP32-CAM. 4.Hybrid Biometric and OTP Based Smart Locker with Real-Time Intrusion Monitoring. 5.Advanced Smart Locker Security System with GSM SMS and Telegram Intruder Notification. 6.IoT-Driven Digital Locker with Multi-Factor Authentication and Image Surveillance. 7.Design of a Secure Embedded Locker System with Biometric and OTP Access Control. 8.Development of a Smart IoT Locker with Fingerprint Authentication and Intruder Detection. 9.Secure Smart Locker System with GSM Alert and Real-Time Camera Surveillance. 10.An Intelligent Locker Security Architecture using Raspberry Pi Pico and ESP32-CAM. 11.Next-Generation Smart Locker with Multi-Factor Authentication and Intruder Capture. 12.IoT-Enabled Smart Vault System with Biometric Access and Remote Alert. 13.Embedded Smart Locker with Fingerprint Authentication and GSM Notification. 14.AIoT-Based Secure Locker System with OTP Verification and Intruder Photo Alert. 15.Smart Anti-Theft Locker with Biometric Authentication and Telegram Notification. 16.IoT Surveillance Locker with Real-Time Intrusion Detection and SMS Alert. 17.Multi-Authentication Smart Locker using Fingerprint, OTP, and Camera Monitoring. 18.Secure IoT Locker System with GSM Communication and Image Alert. 19.Smart Access Control Locker using Raspberry Pi Pico and ESP32-CAM. 20.Advanced Embedded Locker Security with Intruder Image Capture System. 21.Design and Implementation of a Multi-Factor IoT Locker Security System. 22.IoT-Based Embedded Locker with Biometric Authentication and Remote Monitoring. 23.Secure Access Control Framework for Smart Lockers using IoT Technologies. 24.Development of an Embedded Smart Locker with Real-Time Intrusion Alert. 25.Biometric and OTP Enabled Secure Locker with GSM and Camera Surveillance. 26.IoT-Integrated Digital Locker System with Multi-Layer Authentication. 27.Design of an Intelligent Smart Locker using Raspberry Pi Pico. 28.Development of an IoT Surveillance Locker with Intruder Detection. 29.A Multi-Factor Authentication System for Secure Digital Lockers. 30.Smart IoT Locker with Biometric Identification and Remote Alert Mechanism. 31.Smart Guardian Locker with Biometric and OTP Security. 32.Triple-Shield Smart Locker Security System. 33.Smart Anti-Theft Locker with Intruder Photo Capture. 34.SecureX Smart Locker with Multi-Layer Authentication. 35.Digital Security Locker with Fingerprint and Mobile Alert. 36.IoT Smart Safe Locker with Real-Time Intruder Detection. 37.Next-Gen Smart Locker with Camera-Based Intrusion Alert. 38.Smart Digital Locker with Biometric and OTP Protection. 39.Intelligent Security Locker with SMS and Camera Alerts. 40.Ultra-Secure Smart Locker with Biometric Authentication.
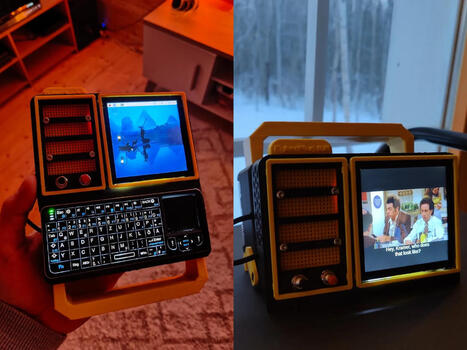
https://www.youtube.com/watch?v=PBpG40nH68s Most portable computers are sealed boxes, which is exactly what makes them frustrating for anyone who wants to experiment with electronics.You can run code on a laptop, but try wiring a temperature sensor or an infrared transmitter directly to it, and you'll...
To get content containing either thought or leadership enter:
To get content containing both thought and leadership enter:
To get content containing the expression thought leadership enter:
You can enter several keywords and you can refine them whenever you want. Our suggestion engine uses more signals but entering a few keywords here will rapidly give you great content to curate.


 Your new post is loading...