Integrated Wireless Power Li-Ion Charger Receiver, Qi (WPC) Compliant
Texas Instruments has launched a pair of ICs designed to simplify wireless power solutions for mobile devices, consisting of a single-chip wireless power receiver with integrated battery charger and a ‘free-position’ transmitter that enlarges the charging area by a factor of four.
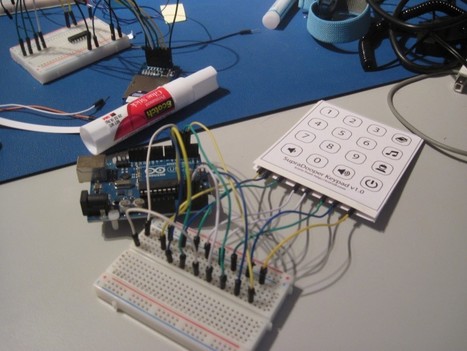
I decided to make my own Membrane Keypad. There are a few tutorials on building membrane keypads. Most of the DIY keypads I’ve found don’t seem like they would be all that reliable nor resilient. I’m not looking for something to last forever but it should last long enough to warrant the 30 minutes of work needed to make it.
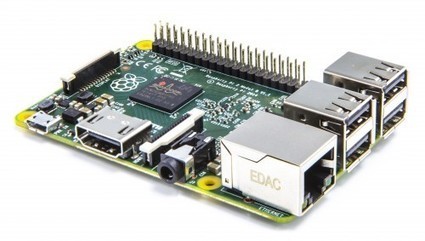
Raspberry Pi 2 is now on sale for $35 (the same price as the existing Model B+), featuring:
A 900MHz quad-core ARM Cortex-A7 CPU (~6x performance) 1GB LPDDR2 SDRAM (2x memory) Complete compatibility with Raspberry Pi 1 Because it has an ARMv7 processor, it can run the full range of ARM GNU/Linux distributions, including Snappy Ubuntu Core, as well as Microsoft Windows 10.
In this video I'll show you how to get started with the ESP8266; wiring it up, flashing FW, and establishing a TCP connection to a data server so you can post/retrieve data to/from your microcontroller.
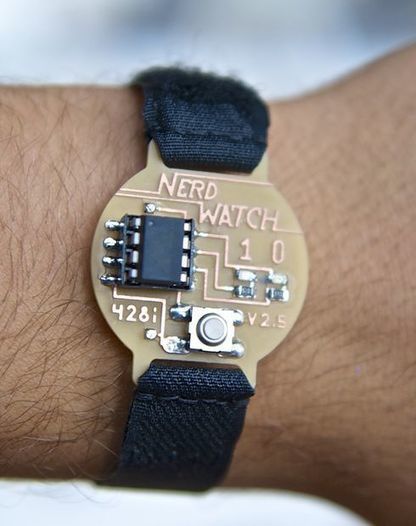
I found a little heart rate sensor @ ICstation. It is a clone of the open hardware pulse sensor. The sensor is well documented, and it comes with Arduino and Processing example code. To try it out I connected the sensor to an ATmega328 running at 3.3V and loaded the example Arduino code. I could now see my heart beat on the Arduino serial monitor
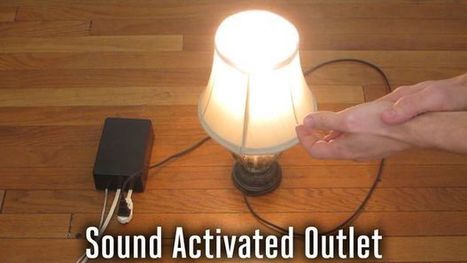
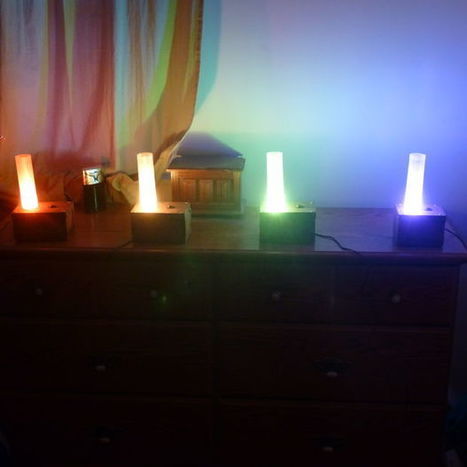
The Clapper was a popular gadget in the 80's and 90's. It let you turn appliances on and off just by clapping. This can be pretty useful, but it has some limitations. First there is the problem of loud noises accidentally turning the lights off. Also, you can't control multiple outlets independently of each other.
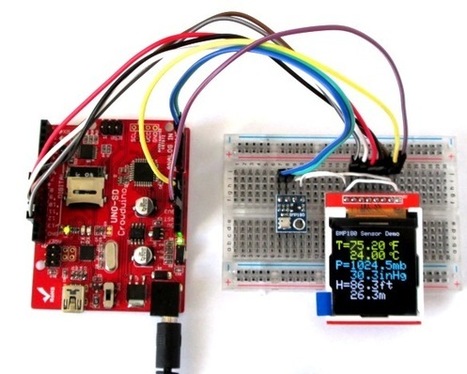
The BMP180 is a new generation digital barometric pressure and temperature sensor from Bosch Sensortec. In this tutorial, we will briefly review this device and describe how to interface it with an Arduino Uno board for measuring the surrounding temperature and pressure. We will also discuss about retrieving the sensor altitude from its pressure readings.
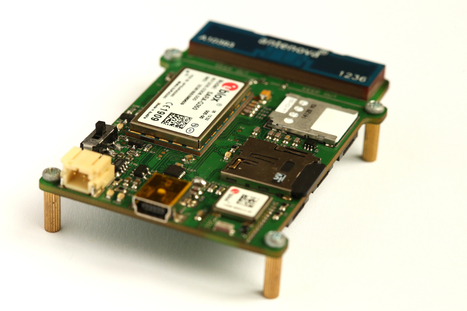
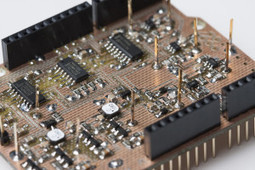
I have been able to put together and complete the testing of the first prototype of my very own location based development board. So lets talk about what you’re looking at. The board is a 4 layer PCB of dimensions 50 x 68 mm. The populated board has a maximum thickness of 9 mm. I considered using a 2 layer board, but the ground planes would not have been large enough and the substrate was too thick for the micro strip trace to the antenna to be of a realistic width. The microcontroller is running an Arduino Bootloader and the board is pictured on 7mm standoffs that are attached using M2 screws.
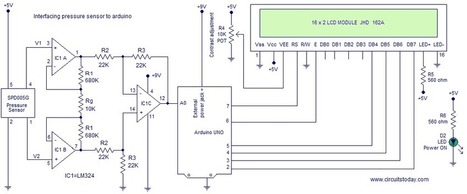
This article is about interfacing pressure sensor to arduino. The pressure sensor used here is SPD005G from Smartec . SPD (Smart Pressure Device) is a series of silicon based pressure sensors suitable for industrial as well as house hold applications. These sensors are generally available in plastic inline or dual inline packaging. SPD sensors are generally available in two operation modes namely gauge type and absolute type. In gauge type the pressure is measured with respect to the atmospheric pressure. There is a small vent on the package for getting contact with the atmosphere. In absolute type, the pressure is measured with respect to vacuum. A small vacuum chamber is incorporated into the package during fabrication. Typical applications of SPD005G are medical systems, BP monitoring, air conditioning systems, process control, hand held pressure sensors etc.
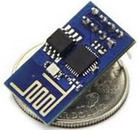
This article describes the ESP-01, fitted with LUA firmware that is able to converse with a serial terminal in a high level language, store programs and data, turn things on and off in a package that costs almost nothing. The possibilities for ridiculously cheap remote temperature sensors and more are finally here. The software is new, the hardware is relatively new – and we need people working on software to make remote access easy. No guarantees here as I have only tested (and reported on) some of the features. Am important fix that made this practical to use only came through in the early hours of this morning – there will be bugs but at least it’s a starting point – all you have to lose is a little time.
Today we are going to design a LEGO compatible case for the Arduino Micro to be used together with the Arduino based LEGO power function IR-receiver mentioned in this Tutorial.
Drums Anywhere is the simplest solution to making a great drum beat at short notice. Using two simple 3D-printed boxes that you can attach to any stick-like object, you can strike any surface to instantly output the sound of drums through your speakers. Using a clap sound for one box, and a snare drum sound for the other, Drums Anywhere can output the drum sound you want, even with accurate amplitude corresponding to the force of the hit!!
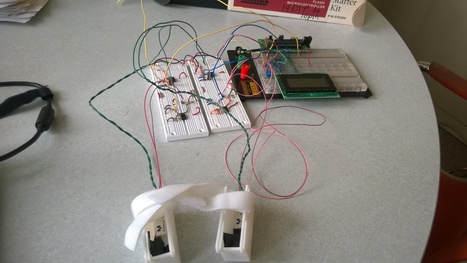
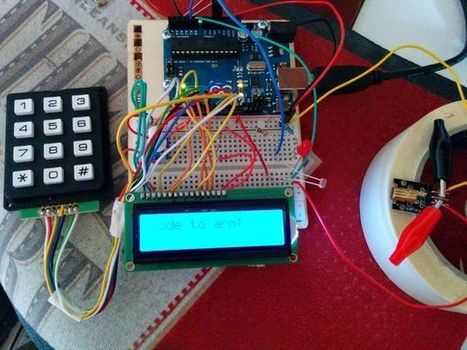
Arduino - I'm using an Arduino Uno a 3 x 4 keypad a 16 x 2 LCD screen a laser module/sensor a light dependent resistor (LDR) a buzzer 3 x 220 ohm resistors 1 x 10K resistor 1 x 10k potentiometer (optional, it's to adjust the LCD screen brightness) an LED and a ton of wires!
For the first time, you can program your LightBlue Bean from Windows!
The LightBlue Bean is Punch Through Design’s newest addition to the Internet of Things. Bean connects your physical devices to the digital world. With the Bean Loader for Windows, you can verify and upload Arduino sketches to your Bean straight from your Windows desktop. Features Program your Bean wirelessly via Bluetooth Low Energy Rename and blink your Beans from inside the Bean Loader Configure your Bean as an iBeacon Protect your Bean using pairing pin security View, send, and log Bean serial communications Update your Bean to the latest firmware Display readings from the on-board accelerometer and temperature sensor
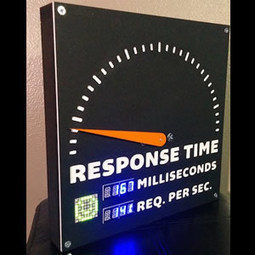
The whole idea was to create a giant meter to show website response time almost like a speedometer would. The result is something that's both fun to watch and provides a meaningful 'heartbeat' of current status. After several revisions and different designs along the way, I ended up with what you see here.
This video shows how to set up an Arduino, Stepper motors, and a GRBL Shield to create an inexpensive but powerful DIY CNC system!
The GRBL Shield is a great way to use G-Code to create an Arduino-based CNC machine, but setting up the software and wiring the hardware can be confusing! This video walks through every step of the process!
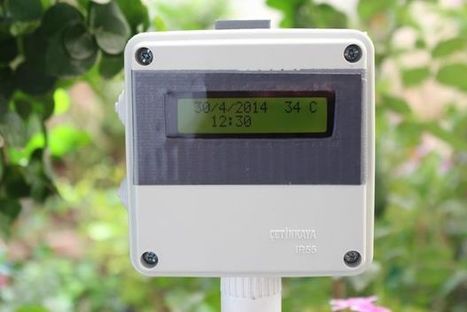
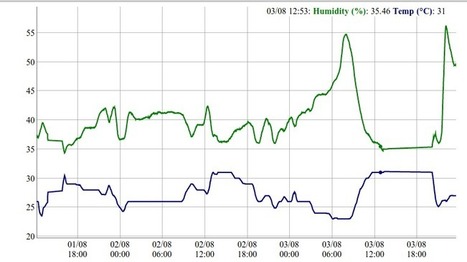
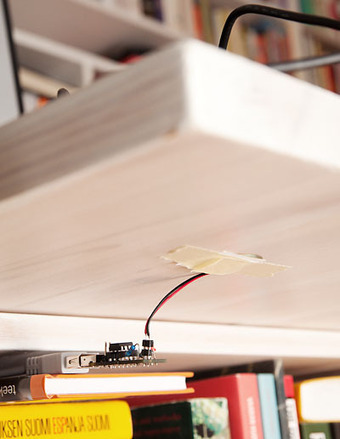
A temperature data logger, is a portable measurement device that is able to recording temperature over a defined period of time automatically. The data can be retrieved and viewed after it has been recorded. In this device, the temperature will record every one minutes in CSV file.
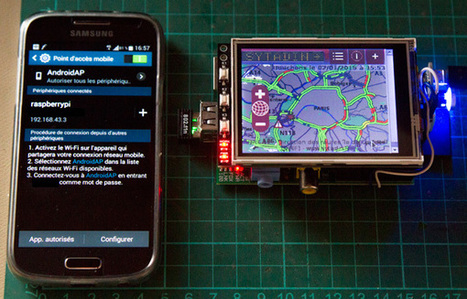
The idea behind this project is connect some sensors to the Raspberry Pi and put the information available on demand via Twitter requests and put sensor history data online on the web
Today’s post is something I’ve prepared for a long time. Hardware-wise it’s a simple thing – ATtiny45 emulating a PS/2 device, sending a keypress when three knocks are detected in the attached piezoelectric sensor (or piezo buzzer as they are also called). But if your computer can boot on PS/2 keyboard input and you have your computer stowed somewhere hard to reach (or just want to impress your friends), it’s a pretty neat little gadget!
To get content containing either thought or leadership enter:
To get content containing both thought and leadership enter:
To get content containing the expression thought leadership enter:
You can enter several keywords and you can refine them whenever you want. Our suggestion engine uses more signals but entering a few keywords here will rapidly give you great content to curate.


 Your new post is loading...