21st Century Learning and Teaching
592.4K views | +9 today
Follow
21st Century Learning and Teaching
Related articles to 21st Century Learning and Teaching as also tools...
Curated by Gust MEES
Your new post is loading...

Popular Tags

Current selected tag: 'Coding'. Clear
Scooped by Gust MEES
June 6, 2018 11:15 AM
Scoop.it!

Convert Sound Files in Audacity | Microcontroller Compatible Audio File Conversion | Adafruit Learning System | #Coding #Maker #MakerED #MakerSpaces

Convert Sound Files in Audacity by Mike Barela
Small microcontroller audio projects are designed to play very specific types of audio files. If your music sample is in MP3 format, or 44KHz .wav or if you have grabbed a sample from a source (or the Internet) and do not know how it was encoded, you'll want to convert it to the right format.

This way you will get the best sounding audio, and it'll make using audio with your code painless!

This page will show how to convert your sound file(s) into PCM 16-bit Mono WAV files at 22KHz sample rate, which is usually best for the current crop of microcontrollers which take WAV files and play them on a speaker.

Currently, we are recommending two ways to convert the files: via use of the program Audacity or via iTunes. Other software may do similar conversions, just remember the parameters above when you do the conversion.


Learn more / En savoir plus / Mehr erfahren:


https://www.scoop.it/t/21st-century-learning-and-teaching/?&tag=ARDUINO


https://www.scoop.it/t/21st-century-learning-and-teaching/?&tag=Coding


Gust MEES's insight:

Convert Sound Files in Audacity by Mike Barela
Small microcontroller audio projects are designed to play very specific types of audio files. If your music sample is in MP3 format, or 44KHz .wav or if you have grabbed a sample from a source (or the Internet) and do not know how it was encoded, you'll want to convert it to the right format.

This way you will get the best sounding audio, and it'll make using audio with your code painless!

This page will show how to convert your sound file(s) into PCM 16-bit Mono WAV files at 22KHz sample rate, which is usually best for the current crop of microcontrollers which take WAV files and play them on a speaker.

Currently, we are recommending two ways to convert the files: via use of the program Audacity or via iTunes. Other software may do similar conversions, just remember the parameters above when you do the conversion.


Learn more / En savoir plus / Mehr erfahren:


https://www.scoop.it/t/21st-century-learning-and-teaching/?&tag=ARDUINO


https://www.scoop.it/t/21st-century-learning-and-teaching/?&tag=Coding


No comment yet.
Scooped by Gust MEES
June 2, 2018 9:18 AM
Scoop.it!

Arduino Servo Motor Interfacing Tutorial | #Coding #Maker #MakerED #MakerSpaces

Arduino Servo Motor Interfacing Tutorial | #Coding #Maker #MakerED #MakerSpaces | 21st Century Learning and Teaching | Scoop.it

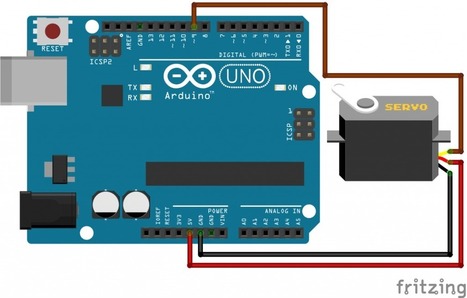
Servo Motor has an advantage over normal DC motor because it can move shaft very precisely even at a particular angle. It is very useful in embedded and electronics applications for controlling the robotic arm, sensor or moving object connected to its shaft at a certain angle. It has integrated gears and circuit that providing feedback system.

In this tutorial, an RC hobby servo is directly connected to the arduino board. Servo motor current consumption is very high so some time arduino can’t drive it. A standard servo can be positioned at a different angle from 0 to 180 degree. We can move the servo at a particular angle by doing the servo programming.


Learn more / En savoir plus / Mehr erfahren:


https://www.scoop.it/t/21st-century-learning-and-teaching/?&tag=ARDUINO


https://www.scoop.it/t/21st-century-learning-and-teaching/?&tag=Coding


https://www.scoop.it/t/21st-century-learning-and-teaching/?&tag=Servo+motors


Gust MEES's insight:

Servo Motor has an advantage over normal DC motor because it can move shaft very precisely even at a particular angle. It is very useful in embedded and electronics applications for controlling the robotic arm, sensor or moving object connected to its shaft at a certain angle. It has integrated gears and circuit that providing feedback system.

In this tutorial, an RC hobby servo is directly connected to the arduino board. Servo motor current consumption is very high so some time arduino can’t drive it. A standard servo can be positioned at a different angle from 0 to 180 degree. We can move the servo at a particular angle by doing the servo programming.


Learn more / En savoir plus / Mehr erfahren:


https://www.scoop.it/t/21st-century-learning-and-teaching/?&tag=ARDUINO


https://www.scoop.it/t/21st-century-learning-and-teaching/?&tag=Coding


https://www.scoop.it/t/21st-century-learning-and-teaching/?&tag=Servo+motors


No comment yet.
Scooped by Gust MEES
May 28, 2018 6:14 PM
Scoop.it!

Triggering a servo using an HC-SR04 distance sensor and an Arduino | #Coding #Maker #MakerED #MakerSpaces

Triggering a servo using an HC-SR04 distance sensor and an Arduino | #Coding #Maker #MakerED #MakerSpaces | 21st Century Learning and Teaching | Scoop.it

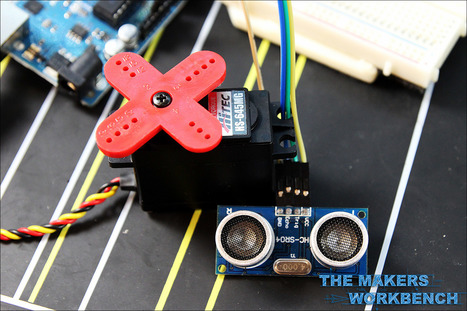
Much like my previous Ultrasonic Sensor tutorial, the Young Makers need to be able to trigger an event when someone walks past a display. In their case, they need to make an element on a poster move when someone walks within three feet of the ultrasonic sensor.


Learn more / En savoir plus / Mehr erfahren:


https://www.scoop.it/t/21st-century-learning-and-teaching/?&tag=ARDUINO


https://www.scoop.it/t/21st-century-learning-and-teaching/?&tag=Coding


https://www.scoop.it/t/21st-century-learning-and-teaching/?&tag=Servo+motors


Gust MEES's insight:

Much like my previous Ultrasonic Sensor tutorial, the Young Makers need to be able to trigger an event when someone walks past a display. In their case, they need to make an element on a poster move when someone walks within three feet of the ultrasonic sensor.


Learn more / En savoir plus / Mehr erfahren:


https://www.scoop.it/t/21st-century-learning-and-teaching/?&tag=ARDUINO


https://www.scoop.it/t/21st-century-learning-and-teaching/?&tag=Coding


https://www.scoop.it/t/21st-century-learning-and-teaching/?&tag=Servo+motors


No comment yet.
Scooped by Gust MEES
May 23, 2018 8:14 PM
Scoop.it!

WTV020-SD sound MODULE with Arduino and example code

WTV020-SD sound MODULE with Arduino and example code | 21st Century Learning and Teaching | Scoop.it

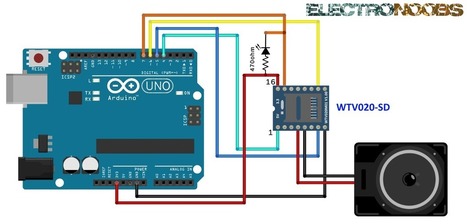
We are going to use a WTV020-SD module to play some ad4 sound files. To control the module we will use an arduino. The steps are: 

- First connect the module to the arduino.
- Prepare the SD card
- Convert wav files to ad4 format and copy example files to the SD
- Inport wtV020 library in Arduino IDE and upload an example code 
- Make a small amplifying circuit


Learn more / En savoir plus / Mehr erfahren:


https://www.scoop.it/t/21st-century-learning-and-teaching/?&tag=ARDUINO


https://www.scoop.it/t/21st-century-learning-and-teaching/?&tag=Music


Gust MEES's insight:

We are going to use a WTV020-SD module to play some ad4 sound files. To control the module we will use an arduino. The steps are: 

- First connect the module to the arduino.
- Prepare the SD card
- Convert wav files to ad4 format and copy example files to the SD
- Inport wtV020 library in Arduino IDE and upload an example code 
- Make a small amplifying circuit


Learn more / En savoir plus / Mehr erfahren:


https://www.scoop.it/t/21st-century-learning-and-teaching/?&tag=ARDUINO


https://www.scoop.it/t/21st-century-learning-and-teaching/?&tag=Music


No comment yet.
Scooped by Gust MEES
May 21, 2018 12:30 PM
Scoop.it!

Archimedes: The AI Robot Owl | #Coding #Maker #MakerED #MakerSpaces #RaspberryPI

Archimedes: The AI Robot Owl | #Coding #Maker #MakerED #MakerSpaces #RaspberryPI | 21st Century Learning and Teaching | Scoop.it

ABOUT THIS PROJECT


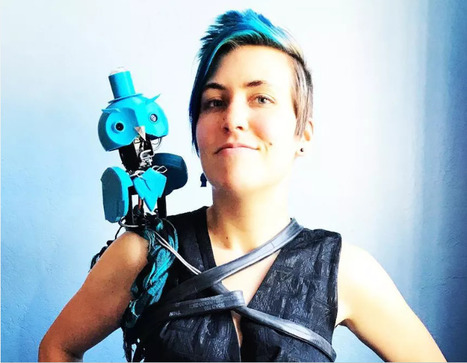
This is a robotic owl that looks around for cool people, and can tell whether you're happy or upset. If you're excited enough, he will eventually let you take a sticker (or other small giveaway). He's named Archimedes, after Merlin's familiar in TheOnceandFutureKing. Of course, it's also reminiscent of the cyborg owl in Blade Runner.

First up, if you don't know the Google AIY Vision Kit, check out the details here! This is the basis for the robot's smarts. The code for this project is coming soon.

It started when we were invited to contribute something to the Google booth at Bay Area Maker Faire. I took a really, really long time to figure out what to build—what it would look like, how it would animate, how it would dispense the stickers... in the end, I went with this cute and fairly challenging design.

This robot is versatile enough that I can bring it along to different events, such as the CODAME Artobots Festival and the Arm/Hackster Asia Tour (since the Raspberry Pi runs on an Arm chip, the Broadcom BCM2835). In other words, I can justify spending this much time on one project because I can re-use and iterate upon it. I'm also excited to have a sidekick in the office :)


Learn more / En savoir plus / Mehr erfahren:


https://www.scoop.it/t/21st-century-learning-and-teaching/?&tag=Coding


https://www.scoop.it/t/21st-century-learning-and-teaching/?&tag=Raspberry+Pi


Gust MEES's insight:

ABOUT THIS PROJECT


This is a robotic owl that looks around for cool people, and can tell whether you're happy or upset. If you're excited enough, he will eventually let you take a sticker (or other small giveaway). He's named Archimedes, after Merlin's familiar in TheOnceandFutureKing. Of course, it's also reminiscent of the cyborg owl in Blade Runner.

First up, if you don't know the Google AIY Vision Kit, check out the details here! This is the basis for the robot's smarts. The code for this project is coming soon.

It started when we were invited to contribute something to the Google booth at Bay Area Maker Faire. I took a really, really long time to figure out what to build—what it would look like, how it would animate, how it would dispense the stickers... in the end, I went with this cute and fairly challenging design.

This robot is versatile enough that I can bring it along to different events, such as the CODAME Artobots Festival and the Arm/Hackster Asia Tour (since the Raspberry Pi runs on an Arm chip, the Broadcom BCM2835). In other words, I can justify spending this much time on one project because I can re-use and iterate upon it. I'm also excited to have a sidekick in the office :)


Learn more / En savoir plus / Mehr erfahren:


https://www.scoop.it/t/21st-century-learning-and-teaching/?&tag=Coding


https://www.scoop.it/t/21st-century-learning-and-teaching/?&tag=Raspberry+Pi


No comment yet.
Scooped by Gust MEES
May 17, 2018 3:17 PM
Scoop.it!

OLED_I2C Library for Arduino | #Coding #Maker #MakerED #MakerSpaces #LEARNingByDoing

OLED_I2C Library for Arduino | #Coding #Maker #MakerED #MakerSpaces #LEARNingByDoing | 21st Century Learning and Teaching | Scoop.it

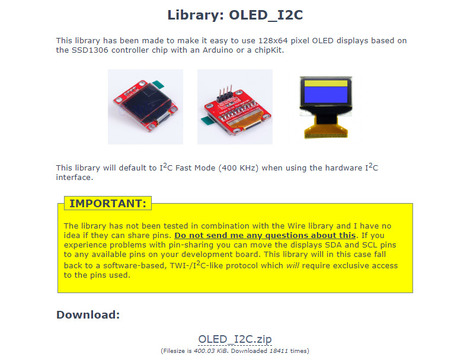
Some Sketches require the OLED_I2C Library, here you can download it as a ZIP-File and include it through the Arduino IDE:


1) Click on "Sketch"

2) Click on "Include Library"

3) Click on "Add ZIP.Library..."


Have FUN and enjoy Coding!


Learn more / En savoir plus / Mehr erfahren:


https://www.scoop.it/t/21st-century-learning-and-teaching/?&tag=ARDUINO


https://www.scoop.it/t/21st-century-learning-and-teaching/?&tag=OLED


Gust MEES's insight:

Some Sketches require the OLED_I2C Library, here you can download it as a ZIP-File and include it through the Arduino IDE:


1) Click on "Sketch"

2) Click on "Include Library"

3) Click on "Add ZIP.Library..."


Have FUN and enjoy Coding!


Learn more / En savoir plus / Mehr erfahren:


https://www.scoop.it/t/21st-century-learning-and-teaching/?&tag=ARDUINO


https://www.scoop.it/t/21st-century-learning-and-teaching/?&tag=OLED


No comment yet.
Scooped by Gust MEES
May 17, 2018 10:49 AM
Scoop.it!

Arduino OLED SSD1306 Voltage Meter | #Coding #Maker #MakerED #MakerSpaces #LEARNingByDoing

Arduino OLED SSD1306 Voltage Meter | #Coding #Maker #MakerED #MakerSpaces #LEARNingByDoing | 21st Century Learning and Teaching | Scoop.it

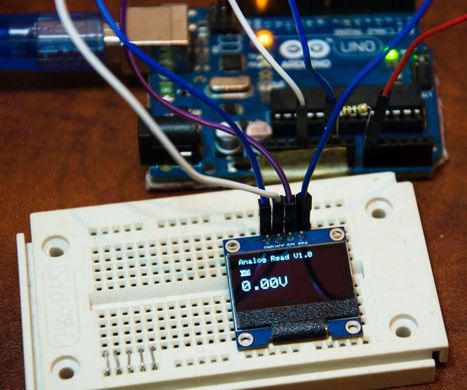
Arduino OLED Voltage Meter is a simple code that i wrote to read analog input and convert in to voltage and show up on OLED Display this device can be use to check...


Learn more / En savoir plus / Mehr erfahren:


https://www.scoop.it/t/21st-century-learning-and-teaching/?&tag=ARDUINO


https://www.scoop.it/t/21st-century-learning-and-teaching/?&tag=OLED


Gust MEES's insight:

Arduino OLED Voltage Meter is a simple code that i wrote to read analog input and convert in to voltage and show up on OLED Display this device can be use to check...


Learn more / En savoir plus / Mehr erfahren:


https://www.scoop.it/t/21st-century-learning-and-teaching/?&tag=ARDUINO


https://www.scoop.it/t/21st-century-learning-and-teaching/?&tag=OLED


No comment yet.
Scooped by Gust MEES
May 14, 2018 6:30 PM
Scoop.it!

OLEDMeter - SH1106 I2C OLED Analog VU Meter - YouTube | #Coding #Maker #MakerED #MakerSpaces #LEARNingByDoing

This is a working example of my OLEDMeter animation. This is a fairly accurate imitation of an Analog VU Meter. I think it even looks better than the original VU meters from the 60s and 70s. All I need now is a 2nd SH1106 for the left and right channels.


Learn more / En savoir plus / Mehr erfahren:


https://www.scoop.it/t/21st-century-learning-and-teaching/?&tag=ARDUINO


https://www.scoop.it/t/21st-century-learning-and-teaching/?&tag=OLED


Gust MEES's insight:

This is a working example of my OLEDMeter animation. This is a fairly accurate imitation of an Analog VU Meter. I think it even looks better than the original VU meters from the 60s and 70s. All I need now is a 2nd SH1106 for the left and right channels.


Learn more / En savoir plus / Mehr erfahren:


https://www.scoop.it/t/21st-century-learning-and-teaching/?&tag=ARDUINO


https://www.scoop.it/t/21st-century-learning-and-teaching/?&tag=OLED


No comment yet.
Scooped by Gust MEES
May 13, 2018 8:59 AM
Scoop.it!

Arduino Playground - I2cScanner | #Coding #OLEDs #Maker #MakerED #MakerSpaces #LEARNingByDoing

Arduino Playground - I2cScanner | #Coding #OLEDs #Maker #MakerED #MakerSpaces #LEARNingByDoing | 21st Century Learning and Teaching | Scoop.it

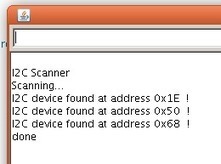
This very simple sketch scans the I2C-bus for devices. If a device is found, it is reported to the Arduino serial monitor.

This sketch is the first step to get the I2C communication working.

The sketch shows the 7-bit addresses of the found devices as hexadecimal values. That value can be used for the "Wire.begin" function which uses the 7-bit address. Some datasheets use the 8-bit address and some example sketches use decimal addresses.


Learn more / En savoir plus / Mehr erfahren:


https://www.scoop.it/t/21st-century-learning-and-teaching/?&tag=ARDUINO


https://www.scoop.it/t/21st-century-learning-and-teaching/?&tag=OLED


Gust MEES's insight:

This very simple sketch scans the I2C-bus for devices. If a device is found, it is reported to the Arduino serial monitor.

This sketch is the first step to get the I2C communication working.

The sketch shows the 7-bit addresses of the found devices as hexadecimal values. That value can be used for the "Wire.begin" function which uses the 7-bit address. Some datasheets use the 8-bit address and some example sketches use decimal addresses.


Learn more / En savoir plus / Mehr erfahren:


https://www.scoop.it/t/21st-century-learning-and-teaching/?&tag=ARDUINO


https://www.scoop.it/t/21st-century-learning-and-teaching/?&tag=OLED


westlak evision's comment, May 15, 2018 2:35 AM
good
Scooped by Gust MEES
May 12, 2018 9:52 AM
Scoop.it!

Arduino Blog » Arduino goes to college with the new Arduino Engineering Kit! | #Coding #Maker #MakerED #MakerSpaces #LEARNingByDoing

Arduino Blog » Arduino goes to college with the new Arduino Engineering Kit! | #Coding #Maker #MakerED #MakerSpaces #LEARNingByDoing | 21st Century Learning and Teaching | Scoop.it

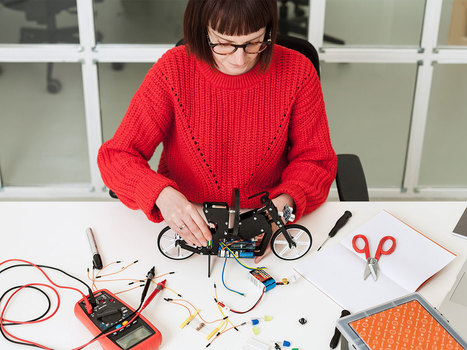
We’re excited to announce the Arduino Engineering Kit, the first product released as a result of our new partnership with MathWorks, to reinforce the importance of Arduino at the university level in the fields of engineering, Internet of Things, and robotics.

The Arduino Engineering Kit, which will be available for purchase starting today on the Arduino online store, consists of three cutting-edge, Arduino-based projects and will teach students how to build modern electronic devices – challenging them intellectually and helping them develop physical engineering skills that will better prepare them to enter the commercial market following graduation. In addition to the hardware, after registering online, students and educators will have access to a dedicated e-learning platform and other learning materials.


The kit also includes a one-year individual license for MATLAB and Simulink, providing the user with hands-on experience in system modeling and embedded algorithm development.


Learn more / En savoir plus / Mehr erfahren:


https://www.scoop.it/t/21st-century-learning-and-teaching/?&tag=ARDUINO


Gust MEES's insight:

We’re excited to announce the Arduino Engineering Kit, the first product released as a result of our new partnership with MathWorks, to reinforce the importance of Arduino at the university level in the fields of engineering, Internet of Things, and robotics.

The Arduino Engineering Kit, which will be available for purchase starting today on the Arduino online store, consists of three cutting-edge, Arduino-based projects and will teach students how to build modern electronic devices – challenging them intellectually and helping them develop physical engineering skills that will better prepare them to enter the commercial market following graduation. In addition to the hardware, after registering online, students and educators will have access to a dedicated e-learning platform and other learning materials.


The kit also includes a one-year individual license for MATLAB and Simulink, providing the user with hands-on experience in system modeling and embedded algorithm development.


Learn more / En savoir plus / Mehr erfahren:


https://www.scoop.it/t/21st-century-learning-and-teaching/?&tag=ARDUINO


No comment yet.
Scooped by Gust MEES
May 11, 2018 4:32 PM
Scoop.it!

Overview | Monochrome OLED Breakouts | Adafruit Learning System | #Coding #Maker #MakerED #MakerSpaces #LEARNingByDoing 

Overview | Monochrome OLED Breakouts | Adafruit Learning System | #Coding #Maker #MakerED #MakerSpaces #LEARNingByDoing  | 21st Century Learning and Teaching | Scoop.it

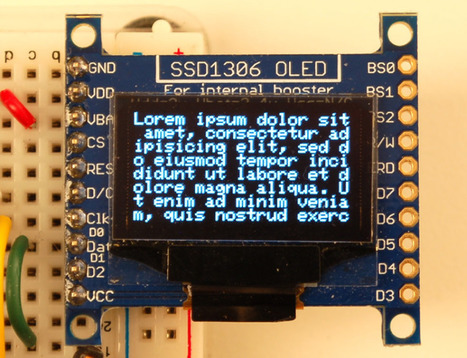
This is a quick tutorial for our 128x64 and 128x32 pixel monochrome OLED displays. These displays are small, only about 1" diagonal, but very readable due to the high contrast of an OLED display. Each OLED display is made of 128x64 or 128x32 individual white OLEDs, each one is turned on or off by the controller chip. Because the display makes its own light, no backlight is required. This reduces the power required to run the OLED and is why the display has such high contrast; we really like this miniature display for its crispness!


Learn more / En savoir plus / Mehr erfahren:


https://www.scoop.it/t/21st-century-learning-and-teaching/?&tag=ARDUINO


https://www.scoop.it/t/21st-century-learning-and-teaching/?&tag=OLED


Gust MEES's insight:

This is a quick tutorial for our 128x64 and 128x32 pixel monochrome OLED displays. These displays are small, only about 1" diagonal, but very readable due to the high contrast of an OLED display. Each OLED display is made of 128x64 or 128x32 individual white OLEDs, each one is turned on or off by the controller chip. Because the display makes its own light, no backlight is required. This reduces the power required to run the OLED and is why the display has such high contrast; we really like this miniature display for its crispness!


Learn more / En savoir plus / Mehr erfahren:


https://www.scoop.it/t/21st-century-learning-and-teaching/?&tag=ARDUINO


https://www.scoop.it/t/21st-century-learning-and-teaching/?&tag=OLED


No comment yet.
Scooped by Gust MEES
May 11, 2018 6:08 AM
Scoop.it!

First Steps with the Arduino-UNO R3 | Maker, MakerED, Coding | Useful help-tools | #LEARNingByDoing with #FUN

First Steps with the Arduino-UNO R3 | Maker, MakerED, Coding | Useful help-tools | #LEARNingByDoing with #FUN | 21st Century Learning and Teaching | Scoop.it

SO, after that one has becoming a little bit familiar with all that new stuff one has lived already some experience and one is asking if there aren’t any helping tools and devices to make life much easier… YES, and there are some very interesting prototype shields, board holders and breadboard jumper in different lengths…


Learn more / En savoir plus / Mehr erfahren:


https://www.scoop.it/t/21st-century-learning-and-teaching/?&tag=ARDUINO


https://www.scoop.it/t/21st-century-learning-and-teaching/?&tag=OLED


Gust MEES's insight:

SO, after that one has becoming a little bit familiar with all that new stuff one has lived already some experience and one is asking if there aren’t any helping tools and devices to make life much easier… YES, and there are some very interesting prototype shields, board holders and breadboard jumper in different lengths…


Learn more / En savoir plus / Mehr erfahren:


https://www.scoop.it/t/21st-century-learning-and-teaching/?&tag=ARDUINO


https://www.scoop.it/t/21st-century-learning-and-teaching/?&tag=OLED


No comment yet.
Scooped by Gust MEES
May 9, 2018 5:12 PM
Scoop.it!

Interfacing 0.96″ OLED Display with Arduino UNO | #Coding #Maker #MakerED #MakerSpaces 

Interfacing 0.96″ OLED Display with Arduino UNO | #Coding #Maker #MakerED #MakerSpaces  | 21st Century Learning and Teaching | Scoop.it

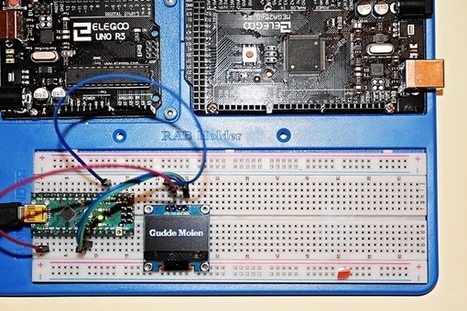
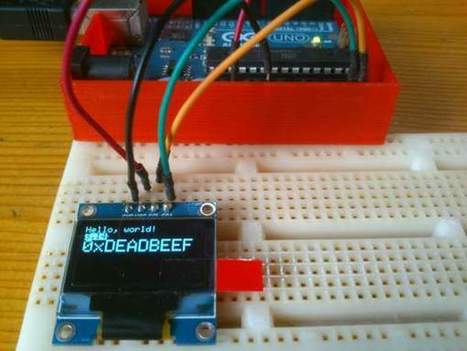
Time to interface a 0.96″ graphical OLED I2C Display with a Arduino Uno! This tiny OLED Display is useful in displaying various data from sensors, graphics and many more. In this tutorial, I’ll be showing you how you can use 2 different libraries to interface a I2C OLED Display with the Arduino Uno, therefore you have an option to choose either 1 of the library to use.


Learn more / En savoir plus / Mehr erfahren:


https://www.scoop.it/t/21st-century-learning-and-teaching/?&tag=ARDUINO


https://www.scoop.it/t/21st-century-learning-and-teaching/?&tag=OLED


Gust MEES's insight:

Time to interface a 0.96″ graphical OLED I2C Display with a Arduino Uno! This tiny OLED Display is useful in displaying various data from sensors, graphics and many more. In this tutorial, I’ll be showing you how you can use 2 different libraries to interface a I2C OLED Display with the Arduino Uno, therefore you have an option to choose either 1 of the library to use.


Learn more / En savoir plus / Mehr erfahren:


https://www.scoop.it/t/21st-century-learning-and-teaching/?&tag=ARDUINO


https://www.scoop.it/t/21st-century-learning-and-teaching/?&tag=OLED


No comment yet.
Scooped by Gust MEES
June 5, 2018 4:35 PM
Scoop.it!

A Flexible Arduino Prototype | #Coding #Maker #MakerED #MakerSpaces #NextFlex

A Flexible Arduino Prototype | #Coding #Maker #MakerED #MakerSpaces #NextFlex | 21st Century Learning and Teaching | Scoop.it

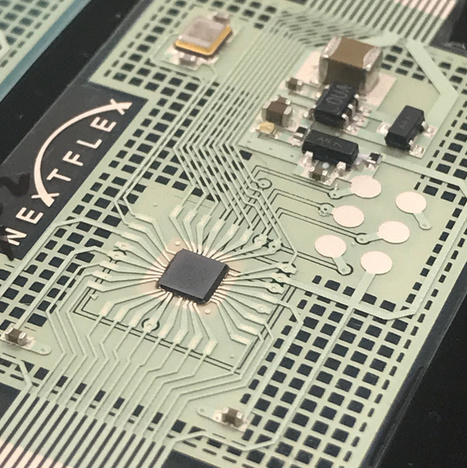
We recently visited NextFlex, the flexible electronics manufacturing institute in Silicon Valley, where they developed a flexible prototype based on the Arduino Mini. Their mission is to make flexible electronics mainstream, opening up all kinds of new applications.

How did you make the flexible Arduino prototype?
Some of the equipment we use is familiar. For example, automated screen printers and industrial inkjet printers. We used them to print the circuit on a 1mm thick flexible plastic ‘board’ (known as the substrate).

We then took the microcontroller silicon die, which is usually inside a chip package, and connected it directly to the substrate. For this, we used our production-level assembly equipment for precision adhesive dispense, die, and component attach.

Using these techniques, we’re able to create flexible wire connections with a resolution of 50um (that’s 0.005 cm, roughly the thickness of a human hair).


Learn more / En savoir plus / Mehr erfahren:


https://www.scoop.it/t/21st-century-learning-and-teaching/?&tag=ARDUINO


Gust MEES's insight:

We recently visited NextFlex, the flexible electronics manufacturing institute in Silicon Valley, where they developed a flexible prototype based on the Arduino Mini. Their mission is to make flexible electronics mainstream, opening up all kinds of new applications.

How did you make the flexible Arduino prototype?
Some of the equipment we use is familiar. For example, automated screen printers and industrial inkjet printers. We used them to print the circuit on a 1mm thick flexible plastic ‘board’ (known as the substrate).

We then took the microcontroller silicon die, which is usually inside a chip package, and connected it directly to the substrate. For this, we used our production-level assembly equipment for precision adhesive dispense, die, and component attach.

Using these techniques, we’re able to create flexible wire connections with a resolution of 50um (that’s 0.005 cm, roughly the thickness of a human hair).


Learn more / En savoir plus / Mehr erfahren:


https://www.scoop.it/t/21st-century-learning-and-teaching/?&tag=ARDUINO


No comment yet.
Scooped by Gust MEES
May 30, 2018 8:26 AM
Scoop.it!

Multiple Blinking LEDs on the Arduino | #Coding #Maker #MakerED #MakerSpaces

Multiple Blinking LEDs on the Arduino | #Coding #Maker #MakerED #MakerSpaces | 21st Century Learning and Teaching | Scoop.it

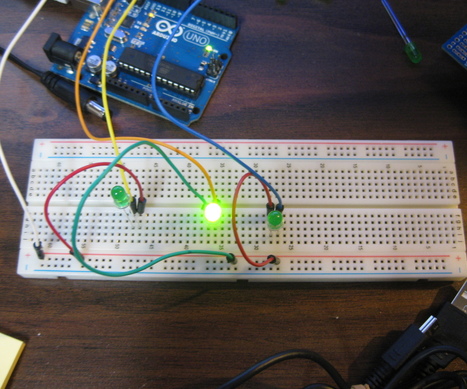
In this tutorial I will show you how to make multiple LEDs blink with Arduino.  You will need three LEDs, jumper wires, breadboard, and Arduino.


Learn more / En savoir plus / Mehr erfahren:


https://www.scoop.it/t/21st-century-learning-and-teaching/?&tag=ARDUINO


Gust MEES's insight:

In this tutorial I will show you how to make multiple LEDs blink with Arduino.  You will need three LEDs, jumper wires, breadboard, and Arduino.


Learn more / En savoir plus / Mehr erfahren:


https://www.scoop.it/t/21st-century-learning-and-teaching/?&tag=ARDUINO


No comment yet.
Scooped by Gust MEES
May 28, 2018 5:17 PM
Scoop.it!

Arduino + 2 Servos + Thumbstick (joystick) | #Coding #Maker #MakerED #MakerSpaces

Arduino + 2 Servos + Thumbstick (joystick) | #Coding #Maker #MakerED #MakerSpaces | 21st Century Learning and Teaching | Scoop.it

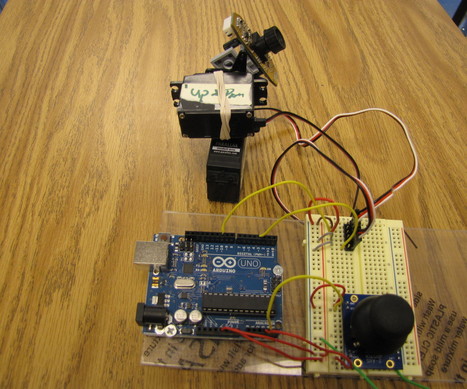
This time I will help you move the same 2 servos with a thumbstick. And again I have surf the internet to see If there are tutorials that clear to understand specially for the beginner Arduino user and, I have not found one.


To move 2 servos with the thumbstick is way easier and painless than using the mouse. And the reason for this is that some times the processing software does not work correct or there is a conflict between the arduino software and the processing software.


Learn more / En savoir plus / Mehr erfahren:


https://www.scoop.it/t/21st-century-learning-and-teaching/?&tag=Servo+motors


https://www.scoop.it/t/21st-century-learning-and-teaching/?&tag=ARDUINO


Gust MEES's insight:

This time I will help you move the same 2 servos with a thumbstick. And again I have surf the internet to see If there are tutorials that clear to understand specially for the beginner Arduino user and, I have not found one.


To move 2 servos with the thumbstick is way easier and painless than using the mouse. And the reason for this is that some times the processing software does not work correct or there is a conflict between the arduino software and the processing software.


Learn more / En savoir plus / Mehr erfahren:


https://www.scoop.it/t/21st-century-learning-and-teaching/?&tag=Servo+motors


https://www.scoop.it/t/21st-century-learning-and-teaching/?&tag=ARDUINO


No comment yet.
Scooped by Gust MEES
May 23, 2018 5:34 PM
Scoop.it!

MP3 player using Arduino and DFPlayer mini | #Coding #Maker #MakerED #MakerSpaces

MP3 player using Arduino and DFPlayer mini | #Coding #Maker #MakerED #MakerSpaces | 21st Century Learning and Teaching | Scoop.it

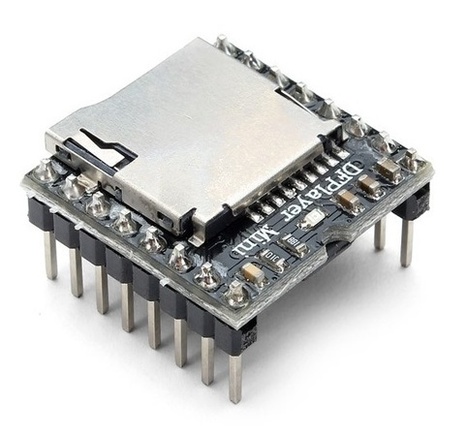
Today, we will build an mp3 player using an Arduino and the DFPlayer mini MP3 module.

The DFplayer mini is a small, low-cost mp3 module with a simplified audio output that can be connected directly to a speaker or an earphone jack. The module can be used as a stand-alone module with attached battery, speaker, and push buttons or used in combination with a microcontroller or development board like the Arduino, enabled for RX/TX (Serial) communication, thus through simple serial commands we can play music and perform other functions like playing the next and previous song, shuffle, pause the song currently being played etc.


The module comes with an SDcard slot and supports both FAT16, FAT32 file system.


Learn more / En savoir plus / Mehr erfahren:


https://www.scoop.it/t/21st-century-learning-and-teaching/?&tag=ARDUINO


https://www.scoop.it/t/21st-century-learning-and-teaching/?&tag=Music


Gust MEES's insight:

Today, we will build an mp3 player using an Arduino and the DFPlayer mini MP3 module.

The DFplayer mini is a small, low-cost mp3 module with a simplified audio output that can be connected directly to a speaker or an earphone jack. The module can be used as a stand-alone module with attached battery, speaker, and push buttons or used in combination with a microcontroller or development board like the Arduino, enabled for RX/TX (Serial) communication, thus through simple serial commands we can play music and perform other functions like playing the next and previous song, shuffle, pause the song currently being played etc.


The module comes with an SDcard slot and supports both FAT16, FAT32 file system.


Learn more / En savoir plus / Mehr erfahren:


https://www.scoop.it/t/21st-century-learning-and-teaching/?&tag=ARDUINO


https://www.scoop.it/t/21st-century-learning-and-teaching/?&tag=Music


No comment yet.
Scooped by Gust MEES
May 18, 2018 4:23 AM
Scoop.it!

Fun Ideas That Keep Kids Learning Even After School's Out | #Coding: #LEARNingByDoing with #FUN

Fun Ideas That Keep Kids Learning Even After School's Out | #Coding: #LEARNingByDoing with #FUN | 21st Century Learning and Teaching | Scoop.it

Learning to Code


So, you like video games? Do you know that actual humans make video games with some type of computer code? It's true. But even better, kids can write programs too. It might seem scary to get started, but it's really not too bad. If you want to get started, I am going to recommend code.org. There are plenty of learning guides that are appropriate for a variety of ages. Oh, and it's free and online.

Even the lowest level activities are very complete—they even include ideas about functions and debugging. It's the best way to get a general idea of computer programming before moving on to a particular language.

If you want to be more creative with your programming, there is also Scratch (scratch.mit.edu). Scratch is a graphical (and free) programming language that focuses on the control of animated sprites. It's pretty easy to pick up and it's built so that you can share programs and modify others.

Finally, there is one more set of coding activities—physical programming. Physical programming takes some type of code but adds onto it some actual object that the code can control. If that sounds awesome, it's only because it is. There are two physical programming platforms that I have worked with before—Raspberry Pi and Arduino. Although these devices are not free, they aren't super expensive either. Both platforms have tons of great projects that kids (or adults) can work on.


Example: https://projects.raspberrypi.org/en/ and https://create.arduino.cc/projecthub


Learn more / En savoir plus / Mehr erfahren:


https://www.scoop.it/t/21st-century-learning-and-teaching/?&tag=ARDUINO


Gust MEES's insight:

Learning to Code


So, you like video games? Do you know that actual humans make video games with some type of computer code? It's true. But even better, kids can write programs too. It might seem scary to get started, but it's really not too bad. If you want to get started, I am going to recommend code.org. There are plenty of learning guides that are appropriate for a variety of ages. Oh, and it's free and online.

Even the lowest level activities are very complete—they even include ideas about functions and debugging. It's the best way to get a general idea of computer programming before moving on to a particular language.

If you want to be more creative with your programming, there is also Scratch (scratch.mit.edu). Scratch is a graphical (and free) programming language that focuses on the control of animated sprites. It's pretty easy to pick up and it's built so that you can share programs and modify others.

Finally, there is one more set of coding activities—physical programming. Physical programming takes some type of code but adds onto it some actual object that the code can control. If that sounds awesome, it's only because it is. There are two physical programming platforms that I have worked with before—Raspberry Pi and Arduino. Although these devices are not free, they aren't super expensive either. Both platforms have tons of great projects that kids (or adults) can work on.


Example: https://projects.raspberrypi.org/en/ and https://create.arduino.cc/projecthub


Learn more / En savoir plus / Mehr erfahren:


https://www.scoop.it/t/21st-century-learning-and-teaching/?&tag=ARDUINO


No comment yet.
Scooped by Gust MEES
May 17, 2018 11:09 AM
Scoop.it!

Building a Capacitive Proximity Sensor with Arduino, using Electric Paint | #Coding #Maker #MakerED #MakerSpaces #LEARNingByDoing

Building a Capacitive Proximity Sensor with Arduino, using Electric Paint | #Coding #Maker #MakerED #MakerSpaces #LEARNingByDoing | 21st Century Learning and Teaching | Scoop.it

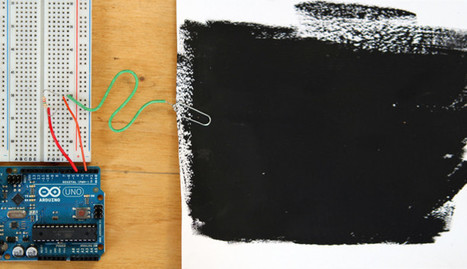
Make a simple capacitance sensor using a pad of Electric Paint, an Arduino and a resistor. This sensor can detect the presence of a person.


Learn more / En savoir plus / Mehr erfahren:


https://www.scoop.it/t/21st-century-learning-and-teaching/?&tag=ARDUINO


Gust MEES's insight:

Make a simple capacitance sensor using a pad of Electric Paint, an Arduino and a resistor. This sensor can detect the presence of a person.


Learn more / En savoir plus / Mehr erfahren:


https://www.scoop.it/t/21st-century-learning-and-teaching/?&tag=ARDUINO


No comment yet.
Scooped by Gust MEES
May 16, 2018 11:54 AM
Scoop.it!

IoT Made Simple: Home Weather Station with NodeMCU and OLED | #Coding #Maker #MakerED #MakerSpaces #LEARNingByDoing

Weather station displaying indoor temp/hum, as well as climate conditions and present day/3-day forecast. Find this and other hardware projects on Hackster.io.


Learn more / En savoir plus / Mehr erfahren:


https://www.scoop.it/t/21st-century-learning-and-teaching/?&tag=ARDUINO


https://www.scoop.it/t/21st-century-learning-and-teaching/?&tag=OLED


Gust MEES's insight:

Weather station displaying indoor temp/hum, as well as climate conditions and present day/3-day forecast. Find this and other hardware projects on Hackster.io.


Learn more / En savoir plus / Mehr erfahren:


https://www.scoop.it/t/21st-century-learning-and-teaching/?&tag=ARDUINO


https://www.scoop.it/t/21st-century-learning-and-teaching/?&tag=OLED


No comment yet.
Scooped by Gust MEES
May 13, 2018 5:06 PM
Scoop.it!

Bitmaps & Code | OLED SlideShow | Steampunk Cameo Necklace with OLED Display | Adafruit Learning System | #Coding #Maker #MakerED #MakerSpaces

Bitmaps & Code | OLED SlideShow | Steampunk Cameo Necklace with OLED Display | Adafruit Learning System | #Coding #Maker #MakerED #MakerSpaces | 21st Century Learning and Teaching | Scoop.it

Bitmaps & Code by Leslie Birch


Time to create two image files and convert them into a code the OLED can understand.

Use Photoshop or another imaging program to create two cameo profile pics and turn them into bitmaps (.bmp). They should be monologue and 128x64 pixels. Notice I had my images each facing another direction.


Download LCD Image Converter and run.


Choose New Image and create a name. Then hit enter.
Now choose Image and Import. Select the file.
Now choose Options and Conversion, then Prepare. The followiing should be checked: Type:  Monochrome, Threshold Dither, Main Scan Direction: Left to Right, Line Scan Direction: Forward 
Now select Image. Make sure Select to Rows is checked. 8-Bit and Little Endian.


Hit OK, then File, Convert. Name the file. Now do the same process for your other file. The completed files will contain a series of code that you need to cut and paste into the project code to replace the files I provided. It will look something like this, only longer. Note that you don't need the beginning name, just the brackets and what is contained within them...


Learn more / En savoir plus / Mehr erfahren:


https://www.scoop.it/t/21st-century-learning-and-teaching/?&tag=ARDUINO


https://www.scoop.it/t/21st-century-learning-and-teaching/?&tag=OLED


Gust MEES's insight:

Bitmaps & Code by Leslie Birch


Time to create two image files and convert them into a code the OLED can understand.

Use Photoshop or another imaging program to create two cameo profile pics and turn them into bitmaps (.bmp). They should be monologue and 128x64 pixels. Notice I had my images each facing another direction.


Download LCD Image Converter and run.


Choose New Image and create a name. Then hit enter.
Now choose Image and Import. Select the file.
Now choose Options and Conversion, then Prepare. The followiing should be checked: Type:  Monochrome, Threshold Dither, Main Scan Direction: Left to Right, Line Scan Direction: Forward 
Now select Image. Make sure Select to Rows is checked. 8-Bit and Little Endian.


Hit OK, then File, Convert. Name the file. Now do the same process for your other file. The completed files will contain a series of code that you need to cut and paste into the project code to replace the files I provided. It will look something like this, only longer. Note that you don't need the beginning name, just the brackets and what is contained within them...


Learn more / En savoir plus / Mehr erfahren:


https://www.scoop.it/t/21st-century-learning-and-teaching/?&tag=ARDUINO


https://www.scoop.it/t/21st-century-learning-and-teaching/?&tag=OLED


No comment yet.
Scooped by Gust MEES
May 13, 2018 8:39 AM
Scoop.it!

Convert audio to WAV  | #Music #Converter #Maker #MakerED #MakerSpaces 

Convert audio to WAV  | #Music #Converter #Maker #MakerED #MakerSpaces  | 21st Century Learning and Teaching | Scoop.it

Convert your audio like music to the WAV format with this free online WAV converter. Upload your audio file and the conversion will start immediately. You can also extract the audio track of a file to WAV if you upload a video.


Learn more / En savoir plus / Mehr erfahren.


https://www.scoop.it/t/21st-century-learning-and-teaching/?&tag=Music


Gust MEES's insight:

Convert your audio like music to the WAV format with this free online WAV converter. Upload your audio file and the conversion will start immediately. You can also extract the audio track of a file to WAV if you upload a video.


Learn more / En savoir plus / Mehr erfahren.


https://www.scoop.it/t/21st-century-learning-and-teaching/?&tag=Music


No comment yet.
Scooped by Gust MEES
May 12, 2018 8:13 AM
Scoop.it!

Simple Arduino Audio/Music Player with SD Card | #Coding #Maker #MakerED #MakerSpaces #LEARNingByDoing

Simple Arduino Audio/Music Player with SD Card | #Coding #Maker #MakerED #MakerSpaces #LEARNingByDoing | 21st Century Learning and Teaching | Scoop.it

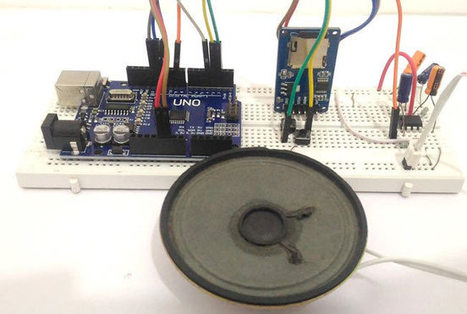
Adding sounds or music to our project will always make it looks cool and sounds much more attractive. Especially if you are using an Arduino and you have lots of pins free, you can easily add sound effects to your project by just investing in an extra SD card module and a normal speaker. In this article I will show you how easy it is to Play music/add sound effects using your Arduino Board.  


Thanks to the Arduino community who have developed some libraries to build this in a fast and easy way. We have also used IC LM386 here for amplification and noise reduction purpose.


[Gust MEES] GREAT music quality!!


Learn more / En savoir plus / Mehr erfahren:


https://www.scoop.it/t/21st-century-learning-and-teaching/?&tag=ARDUINO


https://www.scoop.it/t/21st-century-learning-and-teaching/?&tag=SDCard


Gust MEES's insight:

Adding sounds or music to our project will always make it looks cool and sounds much more attractive. Especially if you are using an Arduino and you have lots of pins free, you can easily add sound effects to your project by just investing in an extra SD card module and a normal speaker. In this article I will show you how easy it is to Play music/add sound effects using your Arduino Board.  


Thanks to the Arduino community who have developed some libraries to build this in a fast and easy way. We have also used IC LM386 here for amplification and noise reduction purpose.


[Gust MEES] GREAT music quality!!


Learn more / En savoir plus / Mehr erfahren:


https://www.scoop.it/t/21st-century-learning-and-teaching/?&tag=ARDUINO


https://www.scoop.it/t/21st-century-learning-and-teaching/?&tag=SDCard


No comment yet.
Scooped by Gust MEES
May 11, 2018 4:23 PM
Scoop.it!

Arduino SSD1306 128x64 OLED SPI - Bitmap Display - YouTube | #Coding #Maker #MakerED #MakerSpaces 

How to display bitmap wit Arduino.

Used librarys:
https://github.com/adafruit/Adafruit-...
https://github.com/adafruit/Adafruit_...

Bitmap converter...


Learn more / En savoir plus / Mehr erfahren:


https://www.scoop.it/t/21st-century-learning-and-teaching/?&tag=ARDUINO


https://www.scoop.it/t/21st-century-learning-and-teaching/?&tag=OLED


Gust MEES's insight:

How to display bitmap wit Arduino.

Used librarys:
https://github.com/adafruit/Adafruit-...
https://github.com/adafruit/Adafruit_...

Bitmap converter...


Learn more / En savoir plus / Mehr erfahren:


https://www.scoop.it/t/21st-century-learning-and-teaching/?&tag=ARDUINO


https://www.scoop.it/t/21st-century-learning-and-teaching/?&tag=OLED


No comment yet.
Scooped by Gust MEES
May 10, 2018 6:35 PM
Scoop.it!

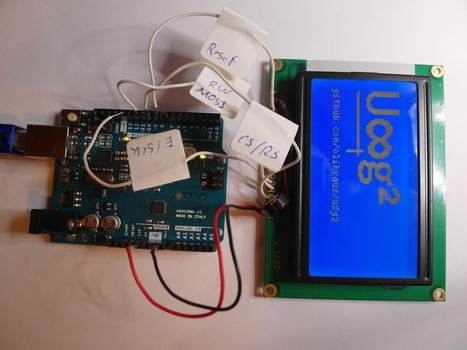
How to connect a display to U8g2 Library? | olikraus/u8g2 Wiki | #OLEDs #Coding #Arduino #Maker #MakerED #MakerSpaces

How to connect a display to U8g2 Library? | olikraus/u8g2 Wiki | #OLEDs #Coding #Arduino #Maker #MakerED #MakerSpaces | 21st Century Learning and Teaching | Scoop.it

GitHub is where people build software. More than 27 million people use GitHub to discover, fork, and contribute to over 80 million projects.


Learn more / En savoir plus / Mehr erfahren:


https://www.scoop.it/t/21st-century-learning-and-teaching/?&tag=ARDUINO


https://www.scoop.it/t/21st-century-learning-and-teaching/?&tag=OLED


Gust MEES's insight:

GitHub is where people build software. More than 27 million people use GitHub to discover, fork, and contribute to over 80 million projects.


Learn more / En savoir plus / Mehr erfahren:


https://www.scoop.it/t/21st-century-learning-and-teaching/?&tag=ARDUINO


https://www.scoop.it/t/21st-century-learning-and-teaching/?&tag=OLED


WidMan UlcuAngo's curator insight, May 10, 2018 7:44 PM
Share your insight