Your new post is loading...

|
Scooped by
mickael grad
August 29, 2014 7:19 AM
|
Resolve iOS update and restore errors
When you're updating or restoring your iPhone, iPad, or iPod touch in iTunes, you might see this message: "The iPhone [device name] could not be restored. An unknown error occurred [error number]." Here's how to resolve specific iOS update and restore errors. ResolutionTry these steps first Use the basic troubleshooting steps to resolve most update and restore issues. Try these steps next If you tried the basic steps and still see the error message, find your error number and follow the advanced steps below. 1, 2, 3, 4, 6, 9, 10, 11, 12, 13, 14, 16, 17, 20, 21, 23, 26, 27, 28, 29, 34, 35, 36, 37, 40, 1000, 1002, 1004, 1011, 1012, 1013, 1014, 1015 1600, 1601, 1602, 1603, 1604, 1611, 1638, 1643-1650, 1667, 1669 2001, 2002, 2005, 2006, 2009, 3002, 3004, 3013, 3014, 3015, 3194, 3200 Resolve network errors Related errors: 17, 1004, 1013, 1638, 3014, 3194, 3000, 3002, 3004, 3013, 3014, 3015, 3194, 3200, or "There was a problem downloading the software," or say the "device isn't eligible for the requested build.". These alerts mean that your computer is either having difficulty contacting the Apple update server or communicating with your device. Check your computer for software or settings that might cause communication issues between your computer and Apple or between your computer and your device. Check your security software Related errors: 2, 4, 6, 9, 1000, 1611, 9006. Sometimes security software can prevent your device from communicating with either the Apple update server or with your device. Check your security software and settings to make sure that they aren't preventing a connection to the Apple servers. Check your USB connectionsRelated errors: 13, 14, 1600, 1601, 1602, 1603, 1604, 1611, 1643-1650, 2000, 2001, 2002, 2005, 2006, 2009, 4005, 4013, 4014, or “invalid response." If the USB connection between your device and computer is interrupted, you may be unable to update or restore. To narrow down the issue, you can also change up your hardware: - Use the USB cable that came with your device, or a different Apple USB cable.
- Plug your cable into a different USB port directly on your computer. Don't plug it into your keyboard.
- Try a different computer.
- If necessary, resolve any further issues with the USB connection, then with your security software.
If you're still seeing the error message, check for hardware issues by following the next section. Check for hardware issuesRelated errors: 1, 3, 10, 11, 12, 13, 14, 16, 20, 21, 23, 26, 27, 28, 29, 34, 35, 36, 37, 40, 1000, 1002, 1004, 1011, 1012, 1014, 1667, or 1669. These errors mean that your device or computer may have a hardware issue that's preventing the update or restore from completing. - Check that your security software and settings aren't preventing your device from communicating with the Apple update server.
- Then try to restore your iOS device two more times while connected with a cable, computer, and network you know are good.
- Confirm that your security software and settings are allowing communication between your device and update servers.
- If you still see the error message when you update or restore, contact Apple support.
Check for outdated or modified software Related errors: 1015, “The required resource can't be found.” You might see these error messages if any of these are true: - Your device has a beta version of iOS.
- You're trying to install an earlier version of iOS (downgrading).
- Your device has unauthorized modifications to iOS, also called "jailbreaking."
Use recovery mode to restore your device to the latest version of iOS.
|
|
Scooped by
mickael grad
August 4, 2014 7:07 AM
|
iOS 7.1.1 IPSW Direct Download Links
|
|
Scooped by
mickael grad
April 8, 2013 6:22 PM
|
At answer.techbuddiesonline.com we provide solutions for all the technical issues. Post a question regarding the problem you are facing and we will post the solution.
|
|
Scooped by
mickael grad
March 20, 2013 11:01 AM
|
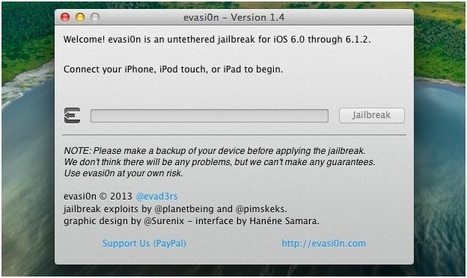
Jailbreak iOS 6.1.2 with Evasi0n 1.4
|
|
Rescooped by
mickael grad
from Support for Brother Printer
March 18, 2013 4:16 PM
|
brother provides a broad range of products, including portable scanners, sewing machines, typewriters, fax machines and printers. Brother offers various styles of color printers and black and white laser printers for corporate and home use. As you troubleshoot your Brother laser printer, you not only learn more about your printer, but you can save money in repairs. Read More... Paper Loading Problems Reduce the amount of paper you have in your printer's paper tray if your printer has problems loading paper. Make certain you keep the paper straight in the tray. Try removing the stack of paper, turning the stack over, then putting it back in the paper tray.
Fix a paper jam in tray 1 and tray 2 of your Brother printer by removing the tray. Pull the jammed paper out slowly using both of your hands. Turn the dial clockwise on the right side of your printer next to the paper, if you have problems pulling out a small piece of paper. Place paper under the maximum paper mark, which looks like an upside-down triangle, then slide the paper guides to the paper size while pressing the blue release lever. Return the paper tray firmly into your printer, then open and close the front printer cover to continue printing.Check to see if you have the cable connected to your printer, if it will not print. Also, make certain you have the correct printer driver selected in your printer software. Rear Paper Jam Open the front cover on your Brother printer by pressing the cover release button on the right side. Remove the drum unit assembly, which includes the toner cartridge by pulling towards you. Place the drum unit assembly carefully on paper towels or cloth in case you spill some toner. Avoid touching any of the electrodes on the assembly because this can damage your printer with static electricity.
Pull the jammed paper out of the front of your printer slowly using both hands.
Open the output tray in the back of your printer, then push the blue tabs down on the left side and the right. Push the levers in on both sides and open the jam clear cover.
Pull out the jammed paper, then close the jam clear cover and the output tray. Reinsert the drum unit assembly by pressing it firmly into your printer. Close the front cover of your Brother printer, then continue printing. Print Problems Use a USB interface cable or parallel interface cable for your Brother printer up to a length of 6 feet. If your cable exceeds 6 feet, your printer can print garbage data unexpectedly.
Check and make certain you selected the correct printer driver as your default printer if you notice garbage printing.
Connect your printer directly to your computer, if you see your printer printing garbage. This can happen when you have your printer connected to an interface-switching device or a port shared with a scanner or storage device, such as an external hard drive.
Read More... any Kind of Pogo Game Problems Call Us +1-855-517-2433 (Toll Free)
|
|
Rescooped by
mickael grad
from Canon Technical Support
March 18, 2013 4:02 PM
|
Canon Printer Error Code byInk Fill on Thursday, June 24, 2010 at 4:27am · Procedure to reset Printer canon MP140, MP 145and Canon MP160 with Error Code Message for Printer Canon MP140, MP145 and Canon MP160, you can find error code message the end of this post: 1) With the printer powered off but connected to a power source, press the Power button while pressing and holding the Stop/ Reset button. 2) When the Power is lit, press the Stop/Reset button two times while pressing and holding the Power button.3) When releasing the Power button and the Stop / Reset button (regardless of order), the printer will move into a service mode. (Waiting for menu selection) 4) When the on/off lights in green, press the Stop/Reset button the specified number of time(s) according to the function listed in the table below.(Each time the Stop/Reset button is pressed, the LED lights alternately in orange and green, starting with orange.)note: press 4 times for waste ink counter reset. The number of the Reset button pressing LED Function Remarks 0 time Green Power off 1 time Orange Service pattern print 2 times Green EEPROM print 3 times Orange EEPROM reset 4 times Green Waste ink counter reset 5) Unplug cable power. (for MP145 / MP150) 6) Turn Off Power. (for MP160) Error Code : E2-2 = No paper (ASF) E3-3 = Paper jam E4 = No ink E5-5 = The ink cartridges are not installed or a non-supported ink cartridge is installed, or the ink cartridges are not installed properly E8 = Waste ink absorber full, or platen waste ink absorber full E9 = The connected digital camera / video camera does not support Camera Direct Printing E14 = The Ink cartridges whose destination are wrong E15 = Ink cartridge is not installed E16 – Ink remaining is unknown E16 -E19 = Failed to scan head alignment sheet E22 = Carriage error E23 = Paper feed error E24 = Purge unit error E25 = ASF(cam) sensor error E26 = Internal temperature rise error E27 = Waste ink absorber full or platen waste ink absorber full E28 = Ink cartridge temperature rise error - E29 = EEPROM error E33 = Paper feed position error E35 15 = USB Host VBUD overcurrent error – USB E37 17 = Abnormal motor driver error E40 20 = Other hardware error E42 22 = Scanner error Read More... Call Us +1-855-517-2433 (Toll Free)
|
|
Scooped by
mickael grad
January 28, 2013 4:14 PM
|
how to unlock carrier lock in iphone 4s (Only applicable to non USA users) 1st step:
Option is to call your network provider n they will charge u n unlock it
2nd step:
You can get it unlock through 3rd party software means jailbreak but it will void your warranty and u will not be able to upgrade any new io's updates
3rd Step:
can use gevey sim to unlock it,with this ur warranty remains but you can do any further ios updates.
If you still have a question post on answer.techbuddiesonline.com
|
|
Scooped by
mickael grad
October 8, 2012 4:43 PM
|
iPhone & iPodAll iPhones are powered by a battery, and run from a hard drive. When the hard drive is processing information then it will spin, using power from the battery. This is applicable to all the iPod and iPhone models, including Touch, Nano and Classic. If you are finding that your power is going to quickly on your iPhone or iPod then you can benefit from following some of the very simple tips below.
Using the backlight effectively
Set your backlight to register for just a few seconds after usage. There is no need to have your backlight on for 30 seconds after you put the phone down, so adjust this one straight away. You can do this immediately by selecting the backlight timer from the iPod / i Phone menu settings. There are options for you to choose exactly how long you want your backlight to stay on for, and you can even remove in daylight altogether if not needed. You will be amazed how much battery you save by doing this. Far too often the main reason for quick battery loss is due to the backlight timer being on for too long.
Understanding the Cache
Every iPod and iPhone has a cache. This is the memory chip that holds sections of information, for example music which is then processed through the hard drive. If you are clever and use smaller files that are more efficient with the cache then your hard drive will not need to work so hard to process the information - therefore resulting in saved energy.
Do NOT use .WAV or .AIFF music formatts
These files are far too large, and will normally result in your iphone skipping tracks and get your hard drive spinning frantically. If you avoid these then youwill have more free space, and better efficiency when playing music - therefore saving battery.
Locking your i Phone / i Pod
Do not underestimate how much power can be saved by using the sleep and wake buttons. Make sure that you lock your device every time that you are not using it. As with the back light you can go into the menu setting and if desired you are able to make these functions work automatically by selecting auto lock and choosing the length of time your phone should not be in use before changing to sleep mode. It is recommended that you do this as soon as possible.
Listening to Music Efficiently
Now that you know what files not to use when playing music (AIFF and WAV), you can continue to be more efficient! How many times have you been listening to music with your headphones only to remove then for a few minutes because someone enters a room and starts a conversation with you. Now, how many times have you removed the headphones and not thought to hit the "PAUSE" button to stop the track. By hitting the pause button you can save so much battery, especially if you are working in a busy office where you are being approached on a regular basis.
Get yourself some good headphones so that you do not need to set the volume to maximum.
Controlling Your iPhone iPod
How many times have you got your phone out of your pocket only to see that it has amazingly managed to switch itself on and start surfing the web excitedly without you even telling it to! Don't worry this applies to pretty much everybody. The iPod and iPhone give you excellent opportunities to lock and hold your screens for a reason - it stops this happening! Flip your hold button the classic and nano models into locked position to stop yourself from accidently knocking the buttons - avoid your phone browsing the web on its own accord!
Setting up Good Playlists
Playlists are usually created and then when it comes to playing them we find ourselves skipping through lots of songs in order to get to 1 that we want to hear. Most of the time half the songs on your playlists will not even get played! Take into consideration that skipping tracks and stopping songs etc takes uo much more battery as the hard drive is being stopped and started and does not process the information continuously. Make sure that your playlists are good so that you can avoid skipping away, and attract battery saving!
iPhone & iPod Apps
Don't leave your apps running in the background and always make sure that they are switched on when you have finished using your device. Apps can use a considerable amount of the battery and space on your iphone / ipod. Call Apple Support +1-855-517-2433 (Toll Free)
|
|
Rescooped by
mickael grad
from Canon Phone number
October 2, 2012 10:05 AM
|
Canon printer preference / properties for windows
Accessing the Driver Version (Windows)
Access the Printing Preferences / Properties by opening the Printer Properties.
For Windows 7
Click the 'Start' button from the bottom left of the Windows screen, and then click on 'Devices and Printers'.
Click your right mouse button on the listing for your printer, and then select 'Printing Preferences' from the menu that appears.
For Windows Vista
Click / Select the 'Start' from the bottom left of the Windows screen, 'Control Panel', 'Hardware and Sound', and then click on 'Printers'. Note: If you are in 'Classic' view, click 'Printers' directly from the 'Control Panel'.
Click your right mouse button on the listing for your printer, and then select 'Preferences' from the menu that appears. Show all ( )
Call us +1-855-517-2433 (Toll Free)
Via peter smith
|
|
Scooped by
mickael grad
October 2, 2012 2:32 AM
|
Q: What does the new Maps app lose compared with the old one?
A: The number one thing is Google's database. Apple Maps sources its location information from Yelp, which so far is less reliable than Google's offering. For example, in his iPhone 5 review, CNET's Scott Stein found that a search for coffee showed him only Starbucks and not a locally owned shop across the street. Also, a search for Mac repair did not turn up a business that has always showed on Google Maps. This issue should get better, but for now it's pretty bad. Losing Google's database also means you lose Street View. Related stories
- Turn-by-turn Field Test: Apple Maps vs. Google Maps
- Local search Field Test: Apple Maps vs. Google Maps
- Getting to know Maps on iOS 6
- Apple's Maps app slammed over missing cities and other mistakes
- Apple seeking developers to fix iOS maps
- Five free and mostly free iPhone navigation apps
Also, you totally lose mass transit directions, which always existed on Google Maps. Though there is a button with a tiny bus icon, it shows only a list of third-party transit apps (so why include the button at all?). If you already own such an app it will appear at the top of the list, and when pressed, kick you out to that app. Otherwise, you'll be directed to the iTunes App Store to download a title. That's not really helpful for a few reasons.
First off, switching to a third-party app for transit directions takes you out of the mapping feature. That means a lot of switching back and forth between the transit instructions and the map of the surrounding area (Google Maps had it all on one screen). Also, the third-party apps don't always tell how to get to the transit stop and then on to your final destination. Again, Google Maps told you the whole story.
Granted, only people who take transit will care about this feature. But the point is that Apple has removed a useful feature that you formerly got for free. Some of the third-party options are great, and they may even be better than Google Maps, but you now have to jump through an extra hoop. And more importantly, some of those other apps will cost you.
Read More...
Call Us +1-855-517-2433 (Toll Free)
|
|
|
Scooped by
mickael grad
August 5, 2014 7:50 AM
|
Download iOS Firmware File For iPhone
Where To Download iPhone Firmware Files FromBelow are the direct links for the iOS firmware updates that have been released for the iPhone by Apple so far: Note: If you’re downloading the firmware file using Safari then ensure that auto unzip feature is disabled or use Chrome or Firefox. Direct download links for the latest verison of iOS firmware file for iPhone: iOS 7.1.2 (iPhone 4 GSM): iPhone3,1_7.1.2_11D257_Restore.ipsw iOS 7.1.2 (iPhone 4 8GB): iPhone3,2_7.1.2_11D257_Restore.ipsw iOS 7.1.2 (iPhone 4 CDMA): iPhone3,3_7.1.2_11D257_Restore.ipsw iOS 7.1.2 (iPhone 4S): iPhone4,1_7.1.2_11D257_Restore.ipsw iOS 7.1.2 (iPhone 5 GSM): iPhone5,1_7.1.2_11D257_Restore.ipsw iOS 7.1.2 (iPhone 5 GSM+CDMA): iPhone5,2_7.1.2_11D257_Restore.ipsw iOS 7.1.2 (iPhone 5c GSM): iPhone5,3_7.1.2_11D257_Restore.ipsw iOS 7.1.2 (iPhone 5c GSM+CDMA): iPhone5,4_7.1.2_11D257_Restore.ipsw iOS 7.1.2 (iPhone 5s GSM): iPhone6,1_7.1.2_11D257_Restore.ipsw iOS 7.1.2 (iPhone 5s GSM+CDMA): iPhone6,2_7.1.2_11D257_Restore.ipsw Direct download links for all the iOS software updates released for iPhone: 1.0.0 (iPhone 2G): iPhone1,1_1.0_1A543a_Restore.ipsw 1.0.1 (iPhone 2G): iPhone1,1_1.0.1_1C25_Restore.ipsw 1.0.2 (iPhone 2G): iPhone1,1_1.0.2_1C28_Restore.ipsw 1.1.1 (iPhone 2G): iPhone1,1_1.1.1_3A109a_Restore.ipsw 1.1.2 (iPhone 2G): iPhone1,1_1.1.2_3B48b_Restore.ipsw 1.1.3 (iPhone 2G): iPhone1,1_1.1.3_4A93_Restore.ipsw 1.1.4 (iPhone 2G): iPhone1,1_1.1.4_4A102_Restore.ipsw 2.0.0 (iPhone 2G): iPhone1,1_2.0_5A347_Restore.ipsw 2.0.0 (iPhone 3G): iPhone1,2_2.0_5A347_Restore.ipsw 2.0.1 (iPhone 2G): iPhone1,1_2.0.1_5B108_Restore.ipsw 2.0.1 (iPhone 3G): iPhone1,2_2.0.1_5B108_Restore.ipsw 2.0.2 (iPhone 2G): iPhone1,1_2.0.2_5C1_Restore.ipsw 2.0.2 (iPhone 3G): iPhone1,2_2.0.2_5C1_Restore.ipsw 2.1.0 (iPhone 2G): iPhone1,1_2.1_5F136_Restore.ipsw 2.1.0 (iPhone 3G): iPhone1,2_2.1_5F136_Restore.ipsw 2.2.0 (iPhone 2G): iPhone1,1_2.2_5G77_Restore.ipsw 2.2.0 (iPhone 3G): iPhone1,2_2.2_5G77_Restore.ipsw 2.2.1 (iPhone 2G): iPhone1,1_2.2.1_5H1_Restore.ipsw 2.2.1 (iPhone 3G): iPhone1,2_2.2.1_5H11_Restore.ipsw 3.0.0 (iPhone 2G): iPhone1,1_3.0_7A341_Restore.ipsw 3.0.0 (iPhone 3G): iPhone1,2_3.0_7A341_Restore.ipsw 3.0.0 (iPhone 3GS): iPhone2,1_3.0_7A341_Restore.ipsw 3.0.1 (iPhone 2G): iPhone1,1_3.0.1_7A400_Restore.ipsw 3.0.1 (iPhone 3G): iPhone1,2_3.0.1_7A400_Restore.ipsw 3.0.1 (iPhone 3GS): iPhone2,1_3.0.1_7A400_Restore.ipsw 3.1.0 (iPhone 2G): iPhone1,1_3.1_7C144_Restore.ipsw 3.1.0 (iPhone 3G): iPhone1,2_3.1_7C144_Restore.ipsw 3.1.0 (iPhone 3GS): iPhone2,1_3.1_7C144_Restore.ipsw 3.1.2 (iPhone 2G): iPhone1,1_3.1.2_7D11_Restore.ipsw 3.1.2 (iPhone 3G): iPhone1,2_3.1.2_7D11_Restore.ipsw 3.1.2 (iPhone 3GS): iPhone2,1_3.1.2_7D11_Restore.ipsw 3.1.3 (iPhone 2G): iPhone1,1_3.1.3_7E18_Restore.ipsw 3.1.3 (iPhone 3G): iPhone1,2_3.1.3_7E18_Restore.ipsw 3.1.3 (iPhone 3GS): iPhone2,1_3.1.3_7E18_Restore.ipsw 4.0.0 (iPhone 3G): iPhone1,2_4.0_8A2y3_Restore.ipsw 4.0.0 (iPhone 3GS): iPhone2,1_4.0_8A293_Restore.ipsw 4.0.0 (iPhone 4): iPhone3,1_4.0_8A293_Restore.ipsw 4.0.1 (iPhone 3G): iPhone1,2_4.0.1_8A306_Restore.ipsw 4.0.1 (iPhone 3GS): iPhone2,1_4.0.1_8A306_Restore.ipsw 4.0.1 (iPhone 4): iPhone3,1_4.0.1_8A306_Restore.ipsw 4.0.2 (iPhone 3G): iPhone1,2_4.0.2_8A400_Restore.ipsw 4.0.2 (iPhone 3GS): iPhone2,1_4.0.2_8A400_Restore.ipsw 4.0.2 (iPhone 4): iPhone3,1_4.0.2_8A400_Restore.ipsw 4.1.0 (iPhone 3G): iPhone1,2_4.1_8B117_Restore.ipsw 4.1.0 (iPhone 3GS): iPhone2,1_4.1_8B117_Restore.ipsw 4.1.0 (iPhone 4): iPhone3,1_4.1_8B117_Restore.ipsw 4.2.1 (iPhone 3G): iPhone1,2_4.2.1_8C148_Restore.ipsw 4.2.1 (iPhone 3GS): iPhone2,1_4.2.1_8C148a_Restore.ipsw 4.2.1 (iPhone 4): iPhone3,1_4.2.1_8C148_Restore.ipsw 4.2.6 (iPhone 4 CDMA): iPhone3,3_4.2.10_8E600_Restore.ipsw 4.3.0 (iPhone 3GS): iPhone2,1_4.3_8F190_Restore.ipsw 4.3.0 (iPhone 4 GSM): iPhone3,1_4.3_8F190_Restore.ipsw 4.3.1 (iPhone 3GS): iPhone2,1_4.3.1_8G4_Restore.ipsw 4.3.1 (iPhone 4 GSM): iPhone3,1_4.3.1_8G4_Restore.ipsw 4.3.2 (iPhone 3GS): iPhone2,1_4.3.2_8H7_Restore.ipsw 4.3.2 (iPhone 4 GSM): iPhone3,1_4.3.2_8H7_Restore.ipsw 4.2.7 (iPhone 4 CDMA): iPhone3,3_4.2.7_8E303_Restore.ipsw 4.2.8 (iPhone 4 CDMA): iPhone3,3_4.2.8_8E401_Restore.ipsw 4.3.3 (iPhone 3GS): iPhone2,1_4.3.3_8J2_Restore.ipsw 4.3.3 (iPhone 4 GSM): iPhone3,1_4.3.3_8J2_Restore.ipsw 4.2.9 (iPhone 4 CDMA): iPhone3,3_4.2.9_8E501_Restore.ipsw 4.3.4 (iPhone 3GS): iPhone2,1_4.3.4_8K2_Restore.ipsw 4.3.4 (iPhone 4 GSM): iPhone3,1_4.3.4_8K2_Restore.ipsw 4.2.10 (iPhone 4 CDMA): iPhone3,3_4.2.10_8E600_Restore.ipsw 4.3.5 (iPhone 3GS): iPhone2,1_4.3.5_8L1_Restore.ipsw 4.3.5 (iPhone 4 GSM): iPhone3,1_4.3.5_8L1_Restore.ipsw 5.0 (iPhone 3GS): iPhone2,1_5.0_9A334_Restore.ipsw 5.0 (iPhone 4 GSM): iPhone3,1_5.0_9A334_Restore.ipsw 5.0 (iPhone 4 CDMA): iPhone3,3_5.0_9A334_Restore.ipsw 5.0 (iPhone 4S): iPhone4,1_5.0_9A334_Restore.ipsw 5.0.1 (iPhone 3GS): iPhone2,1_5.0.1_9A405_Restore.ipsw 5.0.1 (iPhone 4 GSM): iPhone3,1_5.0.1_9A405_Restore.ipsw 5.0.1 (iPhone 4 CDMA): iPhone3,3_5.0.1_9A405_Restore.ipsw 5.0.1 (iPhone 4S): iPhone4,1_5.0.1_9A405_Restore.ipsw 5.0.1 (iPhone 4S) [9A406]: iPhone4,1_5.0.1_9A406_Restore.ipsw 5.1.0 (iPhone 3GS): iPhone2,1_5.1_9B176_Restore.ipsw 5.1.0 (iPhone 4 GSM): iPhone3,1_5.1_9B176_Restore.ipsw 5.1.0 (iPhone 4 CDMA): iPhone3,3_5.1_9B176_Restore.ipsw 5.1.0 (iPhone 4S): iPhone4,1_5.1_9B179_Restore.ipsw 5.1.1 (iPhone 3GS): iPhone2,1_5.1.1_9B206_Restore.ipsw 5.1.1 (iPhone 4 GSM): iPhone3,1_5.1.1_9B206_Restore.ipsw 5.1.1 (iPhone 4 GSM Build 9B208): iPhone3,1_5.1.1_9B208_Restore.ipsw 5.1.1 (iPhone 4 CDMA): iPhone3,3_5.1.1_9B206_Restore.ipsw 5.1.1 (iPhone 4S): iPhone4,1_5.1.1_9B206_Restore.ipsw 6.0.0 (iPhone 3GS): iPhone2,1_6.0_10A403_Restore.ipsw 6.0.0 (iPhone 4 GSM): iPhone3,1_6.0_10A403_Restore.ipsw 6.0.0 (iPhone 4 GSM Rev A): iPhone3,2_6.0_10A403_Restore.ipsw 6.0.0 (iPhone 4 CDMA): iPhone3,3_6.0_10A403_Restore.ipsw 6.0.0 (iPhone 4S): iPhone4,1_6.0_10A403_Restore.ipsw 6.0.0 (iPhone 5 GSM): iPhone5,1_6.0_10A405_Restore.ipsw 6.0.0 (iPhone 5 CDMA): iPhone5,2_6.0_10A405_Restore.ipsw 6.0.1 (iPhone 3GS): iPhone2,1_6.0.1_10A523_Restore.ipsw 6.0.1 (iPhone 4 GSM): iPhone3,1_6.0.1_10A523_Restore.ipsw 6.0.1 (iPhone 4 CDMA): iPhone3,3_6.0.1_10A523_Restore.ipsw 6.0.1 (iPhone 4S): iPhone4,1_6.0.1_10A523_Restore.ipsw 6.0.1 (iPhone 5 GSM): iPhone5,1_6.0.1_10A525_Restore.ipsw 6.0.1 (iPhone 5 CDMA): iPhone5,2_6.0.1_10A525_Restore.ipsw 6.0.2 (iPhone 5 GSM): iPhone5,1_6.0.2_10A551_Restore.ipsw 6.0.2 (iPhone 5 CDMA): iPhone5,2_6.0.2_10A551_Restore.ipsw 6.1 (iPhone 3GS): iPhone2,1_6.1_10B141_Restore.ipsw 6.1 (iPhone 4 GSM): iPhone3,1_6.1_10B144_Restore.ipsw 6.1 (iPhone 4 CDMA): iPhone3,3_6.1_10B141_Restore.ipsw 6.1 (iPhone 4S): iPhone4,1_6.1_10B142_Restore.ipsw 6.1 (iPhone 5 GSM): iPhone5,1_6.1_10B143_Restore.ipsw 6.1 (iPhone 5 CDMA): iPhone5,2_6.1_10B143_Restore.ipsw 6.1.1 (iPhone 4S) - iPhone4,1_6.1.1_10B145_Restore.ipsw 6.1.2 (iPhone 3GS): iPhone2,1_6.1.2_10B146_Restore.ipsw 6.1.2 (iPhone 4 GSM): iPhone3,1_6.1.2_10B146_Restore.ipsw 6.1.2 (iPhone 4 CDMA): iPhone3,3_6.1.2_10B146_Restore.ipsw 6.1.2 (iPhone 4S): iPhone4,1_6.1.2_10B146_Restore.ipsw 6.1.2 (iPhone 5 GSM): iPhone5,1_6.1.2_10B146_Restore.ipsw 6.1.2 (iPhone 5 CDMA): iPod5,1_6.1.2_10B146_Restore.ipsw 6.1.3 (iPhone 3GS): iPhone2,1_6.1.3_10B329_Restore.ipsw 6.1.3 (iPhone 4 GSM): iPhone3,1_6.1.3_10B329_Restore.ipsw 6.1.3 (iPhone 4 CDMA): iPhone3,3_6.1.3_10B329_Restore.ipsw 6.1.3 (iPhone 4S): iPhone4,1_6.1.3_10B329_Restore.ipsw 6.1.3 (iPhone 5 GSM): iPhone5,1_6.1.3_10B329_Restore.ipsw 6.1.3 (iPhone 5 CDMA): iPhone5,2_6.1.3_10B329_Restore.ipsw 6.1.4 (iPhone 5 GSM): iPhone5,1_6.1.4_10B350_Restore.ipsw 6.1.4 (iPhone 5 CDMA): iPhone5,2_6.1.4_10B350_Restore.ipsw 7.0 (iPhone 4 GSM): iPhone3,1_7.0_11A465_Restore.ipsw 7.0 (iPhone 4 CDMA): iPhone3,3_7.0_11A465_Restore.ipsw 7.0 (iPhone 4S): iPhone4,1_7.0_11A465_Restore.ipsw 7.0 (iPhone 5 GSM): iPhone5,1_7.0_11A465_Restore.ipsw 7.0 (iPhone 5 CDMA): iPhone5,2_7.0_11A465_Restore.ipsw 7.0.1 (iPhone 5c GSM): iPhone5,3_7.0.1_11A470a_Restore.ipsw 7.0.1 (iPhone 5c CDMA): iPhone5,4_7.0.1_11A470a_Restore.ipsw 7.0.1 (iPhone 5s GSM): iPhone6,1_7.0.1_11A470a_Restore.ipsw 7.0.1 (iPhone 5s CDMA): iPhone6,2_7.0.1_11A470a_Restore.ipsw 7.0.2 (iPhone 4 GSM): iPhone3,1_7.0.2_11A501_Restore.ipsw 7.0.2 (iPhone 4 CDMA): iPhone3,3_7.0.2_11A501_Restore.ipsw 7.0.2 (iPhone 4S): iPhone4,1_7.0.2_11A501_Restore.ipsw 7.0.2 (iPhone 5 GSM): iPhone5,1_7.0.2_11A501_Restore.ipsw 7.0.2 (iPhone 5 CDMA): iPhone5,2_7.0.2_11A501_Restore.ipsw 7.0.2 (iPhone 5c GSM): iPhone5,3_7.0.2_11A501_Restore.ipsw 7.0.2 (iPhone 5c CDMA): iPhone5,4_7.0.2_11A501_Restore.ipsw 7.0.2 (iPhone 5s GSM): iPhone6,1_7.0.2_11A501_Restore.ipsw 7.0.2 (iPhone 5s CDMA): iPhone6,2_7.0.2_11A501_Restore.ipsw 7.0.3 (iPhone 4 GSM): iPhone3,1_7.0.3_11B511_Restore.ipsw 7.0.3 (iPhone 4 8GB): iPhone3,2_7.0.3_11B511_Restore.ipsw 7.0.3 (iPhone 4 CDMA): iPhone3,3_7.0.3_11B511_Restore.ipsw 7.0.3 (iPhone 4S): iPhone4,1_7.0.3_11B511_Restore.ipsw 7.0.3 (iPhone 5 GSM): iPhone5,1_7.0.3_11B511_Restore.ipsw 7.0.3 (iPhone 5 GSM+CDMA): iPhone5,2_7.0.3_11B511_Restore.ipsw 7.0.3 (iPhone 5c GSM): iPhone5,3_7.0.3_11B511_Restore.ipsw 7.0.3 (iPhone 5c GSM+CDMA): iPhone5,4_7.0.3_11B511_Restore.ipsw 7.0.3 (iPhone 5s GSM): iPhone6,1_7.0.3_11B511_Restore.ipsw 7.0.3 (iPhone 5s GSM+CDMA): iPhone6,2_7.0.3_11B511_Restore.ipsw 7.0.4 (iPhone 4 GSM): iPhone3,1_7.0.4_11B554a_Restore.ipsw 7.0.4 (iPhone 4 8GB): iPhone3,2_7.0.4_11B554a_Restore.ipsw 7.0.4 (iPhone 4 CDMA): iPhone3,3_7.0.4_11B554a_Restore.ipsw 7.0.4 (iPhone 4S): iPhone4,1_7.0.4_11B554a_Restore.ipsw 7.0.4 (iPhone 5 GSM): iPhone5,1_7.0.4_11B554a_Restore.ipsw 7.0.4 (iPhone 5 GSM+CDMA): iPhone5,2_7.0.4_11B554a_Restore.ipsw 7.0.4 (iPhone 5c GSM): iPhone5,3_7.0.4_11B554a_Restore.ipsw 7.0.4 (iPhone 5c GSM+CDMA): iPhone5,4_7.0.4_11B554a_Restore.ipsw 7.0.4 (iPhone 5s GSM): iPhone6,1_7.0.4_11B554a_Restore.ipsw 7.0.4 (iPhone 5s GSM+CDMA): iPhone6,2_7.0.4_11B554a_Restore.ipsw 7.0.5 (iPhone 5c GSM+CDMA): iPhone5,4_7.0.5_11B601_Restore.ipsw 7.0.5 (iPhone 5s GSM+CDMA): iPhone6,2_7.0.5_11B601_Restore.ipsw 6.1.6 (iPhone 3GS): iPhone2,1_6.1.6_10B500_Restore.ipsw 7.0.6 (iPhone 4 GSM): iPhone3,1_7.0.6_11B651_Restore.ipsw 7.0.6 (iPhone 4 8GB): iPhone3,2_7.0.6_11B651_Restore.ipsw 7.0.6 (iPhone 4 CDMA): iPhone3,3_7.0.6_11B651_Restore.ipsw 7.0.6 (iPhone 4S): iPhone4,1_7.0.6_11B651_Restore.ipsw 7.0.6 (iPhone 5 GSM): iPhone5,1_7.0.6_11B651_Restore.ipsw 7.0.6 (iPhone 5 GSM+CDMA): iPhone5,2_7.0.6_11B651_Restore.ipsw 7.0.6 (iPhone 5c GSM): iPhone5,3_7.0.6_11B651_Restore.ipsw 7.0.6 (iPhone 5c GSM+CDMA): iPhone5,4_7.0.6_11B651_Restore.ipsw 7.0.6 (iPhone 5s GSM): iPhone6,1_7.0.6_11B651_Restore.ipsw 7.0.6 (iPhone 5s GSM+CDMA): iPhone6,2_7.0.6_11B651_Restore.ipsw iOS 7.1 (iPhone 4 GSM): iPhone3,1_7.1_11D169_Restore.ipsw iOS 7.1 (iPhone 4 8GB): iPhone3,2_7.1_11D169_Restore.ipsw iOS 7.1 (iPhone 4 CDMA): iPhone3,3_7.1_11D167_Restore.ipsw iOS 7.1 (iPhone 4S): iPhone4,1_7.1_11D167_Restore.ipsw iOS 7.1 (iPhone 5 GSM): iPhone5,1_7.1_11D167_Restore.ipsw iOS 7.1 (iPhone 5 GSM+CDMA): iPhone5,2_7.1_11D167_Restore.ipsw iOS 7.1 (iPhone 5c GSM): iPhone5,3_7.1_11D167_Restore.ipsw iOS 7.1 (iPhone 5c GSM+CDMA): iPhone5,4_7.1_11D167_Restore.ipsw iOS 7.1 (iPhone 5s GSM): iPhone6,1_7.1_11D167_Restore.ipsw iOS 7.1 (iPhone 5s GSM+CDMA): iPhone6,2_7.1_11D167_Restore.ipsw iOS 7.1.1 (iPhone 4 GSM): iPhone3,1_7.1.1_11D201_Restore.ipsw iOS 7.1.1 (iPhone 4 8GB): iPhone3,2_7.1.1_11D201_Restore.ipsw iOS 7.1.1 (iPhone 4 CDMA): iPhone3,3_7.1.1_11D201_Restore.ipsw iOS 7.1.1 (iPhone 4S): iPhone4,1_7.1.1_11D201_Restore.ipsw iOS 7.1.1 (iPhone 5 GSM): iPhone5,1_7.1.1_11D201_Restore.ipsw iOS 7.1.1 (iPhone 5 GSM+CDMA): iPhone5,2_7.1.1_11D201_Restore.ipsw iOS 7.1.1 (iPhone 5c GSM): iPhone5,3_7.1.1_11D201_Restore.ipsw iOS 7.1.1 (iPhone 5c GSM+CDMA): iPhone5,4_7.1.1_11D201_Restore.ipsw iOS 7.1.1 (iPhone 5s GSM): iPhone6,1_7.1.1_11D201_Restore.ipsw iOS 7.1.1 (iPhone 5s GSM+CDMA): iPhone6,2_7.1.1_11D201_Restore.ipsw iOS 7.1.2 (iPhone 4 GSM): iPhone3,1_7.1.2_11D257_Restore.ipsw iOS 7.1.2 (iPhone 4 8GB): iPhone3,2_7.1.2_11D257_Restore.ipsw iOS 7.1.2 (iPhone 4 CDMA): iPhone3,3_7.1.2_11D257_Restore.ipsw iOS 7.1.2 (iPhone 4S): iPhone4,1_7.1.2_11D257_Restore.ipsw iOS 7.1.2 (iPhone 5 GSM): iPhone5,1_7.1.2_11D257_Restore.ipsw iOS 7.1.2 (iPhone 5 GSM+CDMA): iPhone5,2_7.1.2_11D257_Restore.ipsw iOS 7.1.2 (iPhone 5c GSM): iPhone5,3_7.1.2_11D257_Restore.ipsw iOS 7.1.2 (iPhone 5c GSM+CDMA): iPhone5,4_7.1.2_11D257_Restore.ipsw iOS 7.1.2 (iPhone 5s GSM): iPhone6,1_7.1.2_11D257_Restore.ipsw iOS 7.1.2 (iPhone 5s GSM+CDMA): iPhone6,2_7.1.2_11D257_Restore.ipsw
|
|
Scooped by
mickael grad
May 13, 2014 5:01 PM
|
|
|
Rescooped by
mickael grad
from Apple Support
March 20, 2013 11:02 AM
|
Jailbreak iOS 6.1.2 with Evasi0n 1.4
|
|
Scooped by
mickael grad
March 19, 2013 6:02 PM
|
Automatically Stream Photos from iPhone to a Mac Screen Saver with Photo Stream
The latest versions of iPhoto (11+) and OS X (Mountain Lion+) support Photo Stream screen savers, this means you can have your Mac display a screen saver show that automatically updates the stream of photos based on pictures that are taken on the go with an iPhone, without ever having to manually copy pictures over to the computer or set them into folders like the old fashioned way..
|
|
Scooped by
mickael grad
March 18, 2013 4:07 PM
|
Option 1
Back Up and try rebuild the library: hold down the command and option (or alt) keys while launching iPhoto. Use the resulting dialogue to rebuild. Choose to Rebuild iPhoto Library Database from automatic backup.
If that fails:
Option 2
Download iPhoto Library Manager and use its rebuild function. This will create a new library based on data in the albumdata.xml file. Not everything will be brought over - no slideshows, books or calendars, for instance - but it should get all your albums and keywords back.
Because this process creates an entirely new library and leaves your old one untouched, it is non-destructive, and if you're not happy with the results you can simply return to your old one.
|
|
Scooped by
mickael grad
January 28, 2013 4:16 PM
|
Issues updating or restoring iPhone 3Gs,4G,4Gs,5G
|
|
Scooped by
mickael grad
January 28, 2013 4:13 PM
|
It will work for iPhone / iPad / iPad (all models)
|
|
Rescooped by
mickael grad
from Canon Phone number
October 8, 2012 4:25 PM
|
Canon printer preference / properties for windows
Accessing the Driver Version (Windows)
Access the Printing Preferences / Properties by opening the Printer Properties.
For Windows 7
Click the 'Start' button from the bottom left of the Windows screen, and then click on 'Devices and Printers'.
Click your right mouse button on the listing for your printer, and then select 'Printing Preferences' from the menu that appears.
For Windows Vista
Click / Select the 'Start' from the bottom left of the Windows screen, 'Control Panel', 'Hardware and Sound', and then click on 'Printers'. Note: If you are in 'Classic' view, click 'Printers' directly from the 'Control Panel'.
Click your right mouse button on the listing for your printer, and then select 'Preferences' from the menu that appears. Show all ( )
Call us +1-855-517-2433 (Toll Free)
Via peter smith
|
|
Scooped by
mickael grad
October 2, 2012 2:37 AM
|
iOS 6 is just a day old, but users are griping about Apple's new homegrown apps. Techbuddies tells you what's happening and how it affects you.
Welcome to Apple's maps
It's only been a day since iOS 6 went live, but the world has sounded with a Greek chorus of complaints over the new Maps app made by Apple.
In case you don't already know, iOS 6 makes a big change in your iPhone, iPad, and iPod Touch's mapping features. It removes the Google Maps app that you've long used and replaces it with Apple's home-baked mapping service. At first, you may not notice the change since the app's icon, and much of the interface looks almost the same. Once you try to use it, though, you'll see differences straightaway.Maps woes in Apple iOS 6: How bad? (pictures)
Scroll Left Scroll Right
In our initial anecdotal testing for CNET's iPhone 5 and iOS 6 reviews, we noticed both good and bad points. On the upside, we welcomed the new turn-by-turn directions and the 3D flyover feature was lovely. Yet, we also found that search results weren't quite as robust and transit directions weren't an option at all.
It was a decent effort for a first pass, but now that Apple Maps are being crowd-tested by millions of new iOS 6 users around the world, problems are becoming more apparent. Put simply: there's plenty of icing, but the cake ain't finished baking. So where does that leave existing iOS users who want to upgrade to iOS 6 -- and prospective iPhone 5 buyers who will get it by default? In this FAQ, CNET will tell you everything that you need to know.
Q: What does the new Maps app add that the old Google app did not?
A: Most importantly, turn-by-turn directions. Up until now, you had to reply on third-party apps for that feature. Some are free, but the better ones could cost up to $40 or more. And as Android users will tell you, it's been a free integrated feature on their phones for years. So that's a big plus.
For iPhone 4S, iPhone 5, and the new iPad, iOS 6 also adds 3D views and a flyover feature (with the latter it's like you're zooming over a city in a low-flying airplane). Both features are more entertaining than useful, but they pack a pretty big wow factor, at least for the first few minutes (see below).
Other little touches include the capability to physically reorient the map with two fingers and see reviews of points of interest.
Q: What does the new Maps app lose compared with the old one?
A: The number one thing is Google's database. Apple Maps sources its location information from Yelp, which so far is less reliable than Google's offering. For example, in his iPhone 5 review, CNET's Scott Stein found that a search for coffee showed him only Starbucks and not a locally owned shop across the street. Also, a search for Mac repair did not turn up a business that has always showed on Google Maps. This issue should get better, but for now it's pretty bad. Losing Google's database also means you lose Street View.
Related stories
- Turn-by-turn Field Test: Apple Maps vs. Google Maps
- Local search Field Test: Apple Maps vs. Google Maps
- Getting to know Maps on iOS 6
- Apple's Maps app slammed over missing cities and other mistakes
- Apple seeking developers to fix iOS maps
- Five free and mostly free iPhone navigation apps
Also, you totally lose mass transit directions, which always existed on Google Maps. Though there is a button with a tiny bus icon, it shows only a list of third-party transit apps (so why include the button at all?). If you already own such an app it will appear at the top of the list, and when pressed, kick you out to that app. Otherwise, you'll be directed to the iTunes App Store to download a title. That's not really helpful for a few reasons.
First off, switching to a third-party app for transit directions takes you out of the mapping feature. That means a lot of switching back and forth between the transit instructions and the map of the surrounding area (Google Maps had it all on one screen). Also, the third-party apps don't always tell how to get to the transit stop and then on to your final destination. Again, Google Maps told you the whole story.
Granted, only people who take transit will care about this feature. But the point is that Apple has removed a useful feature that you formerly got for free. Some of the third-party options are great, and they may even be better than Google Maps, but you now have to jump through an extra hoop. And more importantly, some of those other apps will cost you.
Q: Can I go back to the old Maps app? A: Sort of. At this point, a real Google Maps app like you used to have is not available. But as Matt Elliott explains here, you can point your iPhone's browser to maps.google.com and get that same mapping information, complete with business listings, directions, public transit data, and even bike routes. What you're missing is street view and use of the compass to help direct you. Read More... Call Us +1-855-517-2433 (Toll Free)
|