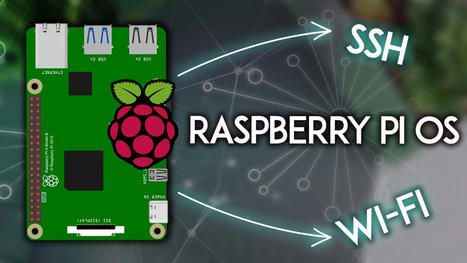
Learn how to SSH into your Raspberry Pi from your local computer to control your Pi from a distance.
Get Started for FREE
Sign up with Facebook Sign up with X
I don't have a Facebook or a X account


 Your new post is loading...
 Your new post is loading...
Your new post is loading...
Learn how to SSH into your Raspberry Pi from your local computer to control your Pi from a distance. 
No comment yet.
Sign up to comment
This video describes about how to SSH and VNC into the well known single board computer known as Raspberry pi. This video will complete guidance to the process.
A quick guide for beginners for using PuTTY or WinSCP to connect directly to a Raspberry Pi via SSH. Ideal for tweaking Octoprint, setting up Klipper or other Pi related projects.
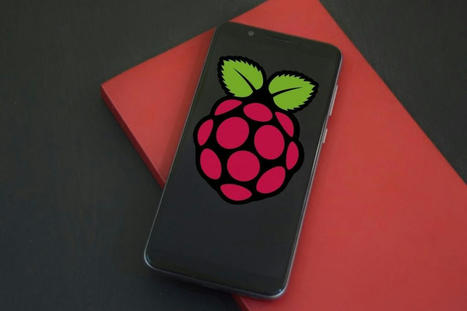
Using a Raspberry Pi requires many accessories (keyboard, monitor, etc.), which you might not always have on hand, or you won’t want to spend time plugging them in for a quick change in your setup. I generally use my laptop for this, but you can also use any Android device (smartphone, tablet, etc.). I’ll show you how in this tutorial.
Si trateas con Raspberry Pi o sistemas Linux en general, es casi imperativo que conozcas SSH (Secure Shell). Sobre todo cuando te conectas de forma remota a otro equipo, es muy probable que lo necesites o incluso que ya lo hayas utilizado. Pero quizás desconozcas su funcionamiento y cómo utilizar SSH de forma eficiente. En el vídeo en Español que te dejo a continuación, te explican cómo utilizar SSH en 6 minutos.
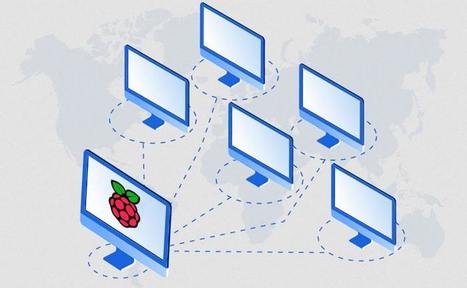
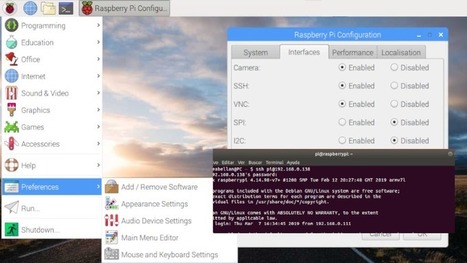
The small footprint and low energy demands of Raspberry Pi make it ideal for remote deployment, and accessing Raspberry Pi from another computer is a common user request. There are many different solutions for remote access to Raspberry Pi. The most common is to use one of two techniques: SSH and VNC. SSH and VNC involve opening a port on Raspberry Pi (VNC uses port 5900+N and SSH uses port 22). This potentially exposes your Raspberry Pi. Hackers actively look for Raspberry Pi devices with these open ports and default passwords. This is why you must change your password when turning on VNC.

Esta guía te enseñará cómo conectarte a tu Raspberry Pi de forma remota a través de SSH desde tu ordenador portátil o de sobremesa.
Muchos de los proyectos que creamos con nuestra Raspberry Pi no necesitan que esté conectada a un monitor permanentemente. Aunque sí que podamos acceder a ella para poder configurarla, copiar archivos, o simplemente ver información de como esta funcionando. En este tutorial vamos a ver varias formas de usar nuestra Raspberry Pi con una conexión remota desde nuestro ordenador sabiendo la IP que tiene asignada, o después de asignar una IP fija.
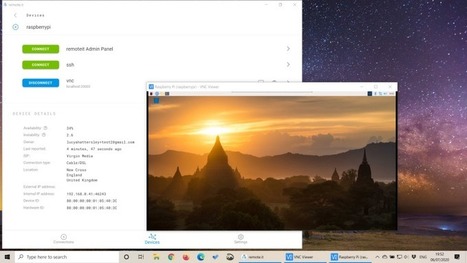
If you don’t have the Raspberry directly at hand (or no screen) and you need to make regular changes on it, it may be interesting to have access to the desktop from another computer (in addition to ssh) How to access a Remote Desktop on Raspberry Pi?
For each method, I will explain how to set it up on your Raspberry Pi and how to access it from the main OS (Windows, Linux, Mac and even from your smartphones)
From
github

Contribute to wikitic/raspberry_pi-ssh development by creating an account on GitHub.

PuTTY is a lightweight telnet and SSH client for Windows, along with an xterm terminal emulator. It allows you to securely connect to your systems while on the go. Learn more abou
|

For a long time, root was the default user on Linux, but it’s now disabled on most distributions. If like me, you were used to it, this article will answer your questions and guide you with the new best practice. I’ll also show you some workarounds if you really need “root”.

Access and control your Raspberry Pi remotely via SSH from any computer or even an Android phone.
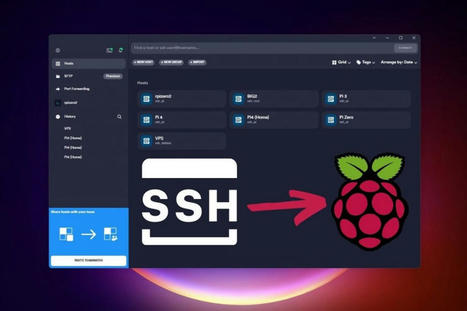
Being able to control your Raspberry Pi from another computer remotely is an important part of the Raspberry Pi’s learning curve. SSH is generally the protocol we use to do this, even if it’s not the only option. If you are new to Linux, Raspberry Pi, or just SSH, you’ve come to the perfect place: I created this guide for you, to answer all of your questions about this method.

Hace ya tres años, Microsoft presentó WSL, lo que son las siglas de Windows Susbystem for Linux. Como usuario de Ubuntu pensé «Esto no sirve para nada, no lo voy a usar nunca si ya uso Ubuntu de nativo», pero ¿estaba en lo cierto? Probablemente no. Justamente he empezado a usar WSL en Windows 10 porque soy usuario de Linux, porque el terminal de Ubuntu nos ofrece posibilidades muy interesantes que merece la pena tener a mano.

In this quick guide, we will walk you through the process of how you can enable SSH when your Raspberry Pi boots.
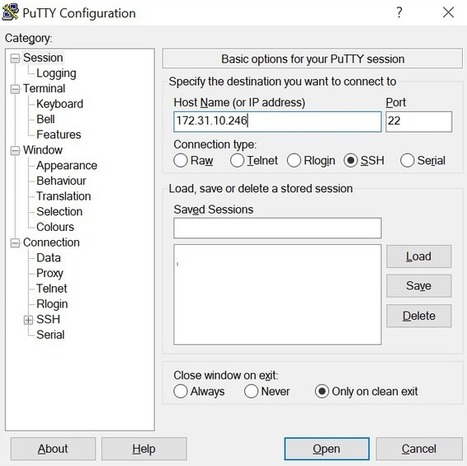
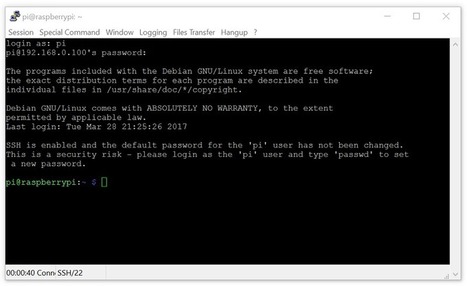
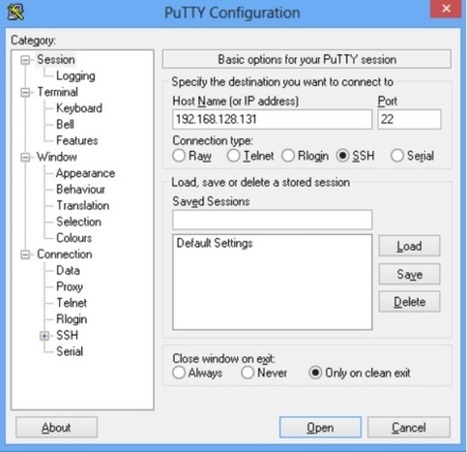
PuTTY is a software application that you can run from your desktop or laptop computer to access the Raspberry Pi command-line interface. It uses SSH (secure shell) to open a terminal window on your computer, which you can use to send commands to the Raspberry Pi and receive data from it. There are other programs that you can use to access the Raspberry Pi terminal, but PuTTY is by far the most popular. PuTTY is open source and free to use. Visit the PuTTY website to download and install it.
Welcome to part 3 of the Raspberry Pi tutorial series. In this part, we're going to cover how we can remotely access our Raspberry Pi, both with SSH and with a remote desktop client. We want to eventually be able to remotely access our Raspberry Pi because much of the "value" of the Raspberry Pi is its size, and that it can be put in a variety of places that we might not want to have a keyboard, mouse, and monitor attached to it at all times and we probably don't want to have to carry over all of this stuff when we do want to access it.
Después de configurar tu Raspberry Pi probablemente no quieras usar el teclado y el ratón. Ahí es donde una conexión remota ayuda: Puedes tener acceso remoto a tu Raspbery Pi a través de SSH desde cualquier otro ordenador que esté en la misma red que tu Pi.

Today we will focus on a topic that interests everyone, i.e. everything that is related to the SSH connection to your Raspberry Pi First of all, what is the default SSH password of the Raspberry Pi? But we will also see in detail many other points on SSH connections to Raspberry Pi, including:
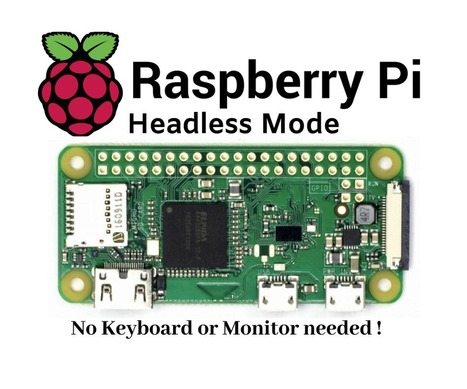
In previous instructable I shared a beginners guide to Raspberry Pi. There we saw how to boot Raspbian onto the Pi and use it as a desktop. But for that setup we require a lot of peripherals like monitor, HDMI cable, wireless keyboard and OTG adapter. Most of the time we don't need these peripherals after the first boot. To save some money we can use the Pi in Headless mode i.e accessing it without a monitor.
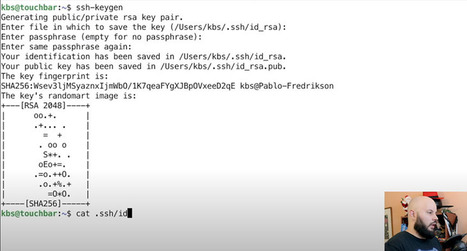
Secure Shell (SSH) es un protocolo de comunicación entre dos sistemas usando una arquitectura cliente/servidor y que permite a los usuarios conectarse a un host remotamente. La sesión de conexión está encriptada haciendo imposible que alguien pueda obtener contraseñas no encriptadas.
En esta entrada vamos a ver mRemoteNG, una genial herramienta para realizar una conexión SSH a nuestra Raspberry Pi desde un equipo con Windows.
|