
Después de un tiempo sin darle uso a mi Raspberry Pi 3, voy a instalar el sistema operativo Raspberry Pi OS. Voy a instalar el sistema operativo sobre una memoria SSD de 16 GB.
Get Started for FREE
Sign up with Facebook Sign up with X
I don't have a Facebook or a X account


 Your new post is loading...
 Your new post is loading...
Your new post is loading...
Después de un tiempo sin darle uso a mi Raspberry Pi 3, voy a instalar el sistema operativo Raspberry Pi OS. Voy a instalar el sistema operativo sobre una memoria SSD de 16 GB. 
No comment yet.
Sign up to comment

This post is an introduction to the Raspberry Pi. You’ll see what is the Raspberry Pi and what can you use it for. You’ll explore its features and see what sets it apart from a normal computer. Finally, we’ll also show you how to get started by installing the operating system, and what accessories do you need.
Raspberry Pi 3 modelo B, ¿qué es? ¿para qué sirve y cómo se utiliza?
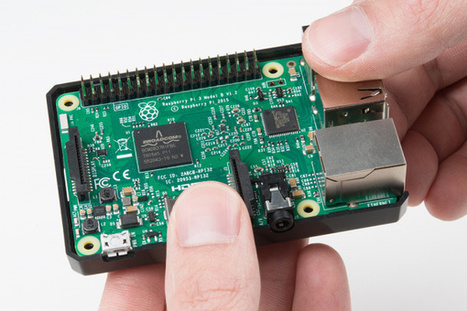
Heads up! The Raspberry Pi 3 Model B+ has the same mechanical footprint as both the Raspberry Pi 3 Model B and the Raspberry Pi 2 Model B. This guide will show images of the Pi 3 Model B but you can still follow along with the Pi Model B+. Now that the Raspberry Pi 3 Model B and the Pi 3 Model B+ are the latest and greatest in the line of Raspberry Pi Single Board Computers, what’s new? This hookup guide goes through the same process of getting going that worked with the Pi 2, but from a Pi 3 point of view.

Finding your Raspberry Pi 3 isn’t quite reaching its limits? You’re not alone. Despite it being the most advanced version of the little computer to date, it can be tricky to get your set up right. It doesn’t matter whether you’re using your Raspberry Pi to run retro games, as a media center, or any of the other wonderful projects that might pique your interest. If the Pi isn’t configured to run at its most optimum, you’re going to have a bad experience.

I wanted to build a weekend project that allows me to send an email and capture the picture of a target environment and finally receive automatic reply as an email with attached snapshot. Therefore, I bought Raspberry pi 3 with a separate pi camera module from amazon.de. Here’s how I took my first picture and video from raspberry pi :)
En esta Sesion 1 acerca de Raspberry Pi 3 - Instalacion Configuracion de RASPBIAN, les explicare los periféricos que vamos a necesitar para poner a funcionar nuestro Raspberry Pi 3, luego les explicare como Pre Cargar el Sistema Operativo RASPBIAN sobre el micro SD y finalmente veremos la instalación y configuración paso a paso de nuestro sistema operativo.

Now that the Raspberry Pi 3 is the latest and greatest in the line of Raspberry Pi Single Board Computers, what’s new? This hookup guide goes through the same process of getting going that worked with the Pi 2, but from a Pi 3 point of view.

La Raspberry Pi 3 se puede arrancar desde un USB, disco duro o por el puerto Ethernet, aquí tienes toda la documentación para hacerlo.
Tutorial de raspberry pi 3 donde explico como instalar OPELEC 2016 para usarse como centro multimedia. En el proximos videos estaremos usando arduino.
|

Upgrading from an older Pi to the new Pi 3 is almost as simple as swapping out the microSD card. Almost - but not quite. Here's what you'll need to do first.

En este taller de formación del profesorado se explican los detalles de montaje, configuración y uso educativo de una Estación Meteorológica Digital (EMD). Este aparato resulta fácil de instalar y utilizar para el registro de los valores meteorológicos. Existen modelos de un ajustado precio y un funcionamiento bastante fiable. Resulta ideal para desarrollar en el centro con el alumnado proyectos de investigación basados en la observación científica de cómo estos valores varían con la estación, mes o época del año. El tratamiento informático que incorpora una EMD para la recogida y publicación de datos facilita la observación sistemática aproximándose a un nivel casi profesional. A partir de esta recogida, tratamiento y análisis de datos se pueden deducir conclusiones interesantes de aplicación en la vida cotidiana próxima.
En la primera parte de este artículo se vió cómo instalar y configurar una Raspberry Pi con unos consejos básicos para protegernos de accesos indebidos. Aquí se añadirán unas nociones elementales para fortificar nuestra Raspi frente a intrusos. Para aumentar la seguridad se verá cómo filtrar el tráfico con la herramienta IP Tables, cómo restringir a servicios como DHCP, OwnCloud o los accesos por SSH a IPs o redes conocidas. También algunas obviedades sobre seguridad física que pasan desapercibidas, la olvidada IPv6 que estará mejor desactivada si no se va a usar y dos aspectos que no están directamente relacionados con la seguridad pero igualmente importantes: Mantenimiento y monitorización.

The Raspberry Pi can be extremely useful for projects that do not require a monitor, keyboard, or mouse. The downside is that setting up the Pi to connect to the Internet, expand the filesystem, and run code generally requires these computer accessories.
This tutorial will show you three different ways you can configure your Raspberry Pi without the need for a monitor, keyboard, or mouse.
Certainly, there are more ways to connect to the Raspberry Pi. These show three common approaches to get you started interacting with a headless operating system on the Pi.
A día de hoy no hay una versión oficial de Android para ningún modelo de Raspberry Pi. Si buscáis en G**gle sale una versión medio decente que se denomina RaspAnd pero que es de pago y no solo no es oficial, si no que no está clara la legalidad de su uso. Hay otros sistemas operativos tipo Android. Sin embargo, solo usan el motor y luego el resto es para un propósito especial.
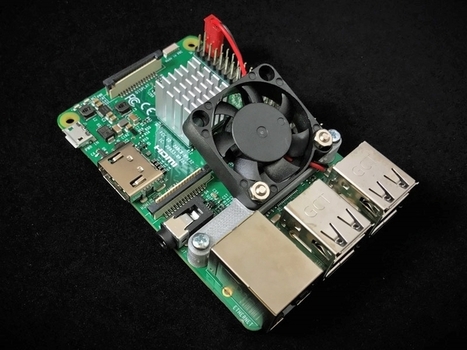
La tercera versión del Raspberry Pi es una de las más populares entre los entusiastas, pero nadie niega que sufre serios problemas térmicos. El simple hecho de instalar un pequeño disipador ayuda, sin embargo, la mejor opción es utilizar refrigeración activa. La clave está en crear el soporte adecuado para el ventilador, y eso es exactamente lo que sugiere Ofer Dekel en Microsoft Research. Las diferencias de temperatura son impresionantes.
En este nuevo video, Raspberry Pi 3 Alarma Basica con Sensor de Movimiento PIR - Sesion 3, explicare una alarma básica compuesta por un Sensor de Movimiento como dispositivo de entrada que permitirá disparar un Buzzer ante la presencia de un intruso. Esta alarma básica es el principio de las alarmas mas optimizadas que realizaremos en los próximos videos con toma de fotos, envío de mensajes de texto y almacenamiento en el Cloud.
En este video, Raspberry Pi 3 Modelo B Primera Mirada - First Look realizo una primera mirada al maravilloso mundo de Raspberry Pi3 Modelo B, empiezo con una descripción general asi como de sus características técnicas mas importantes y sus aplicaciones de uso.

Ya conoces Raspberry Pi?, ¡ La revolución de las Mini PC !
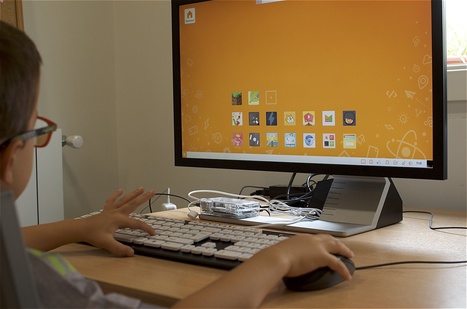
Llevaba la Raspberri Pi 3 solo unos días rondando mi mesa de trabajo cuando mi hijo mayor, de cinco años, se acercó decidido a ella y comenzó a trastearla. Identificó fácilmente los puertos, la estuvo cogiendo y dejando varias veces sobre la mesa con sumo cuidado hasta que su curiosidad se impuso y preguntó lo que yo llevaba tiempo esperando oír: ¿qué puedo hacer yo con esto papá?
|