 Your new post is loading...
Even though chiropractic medicine is quickly becoming popular among most Americans, there are still many myths about the field. Over the last few decades, chiropractic medicine has become more widely accepted by the conventional medical community. Unfortunately, there are still a number of myths and misconceptions that affect the public’s view of chiropractic care. 1. Chiropractic physicians are mistrusted by other doctors.At one time, it was common for chiropractors or chiropractic physicians to be viewed with skepticism and contempt by other doctors, such as general practitioners. This misconception, however, was formed mostly in the mid-20th century and is no longer present. In the 1940s, a number of conservative physicians belonging to the American Medical Association (AMA) publicly scorned chiropractic medicine, trying to eliminate the profession by portraying chiropractic physicians as uneducated and unscientific charlatans. This persisted until a 1980s lawsuit found the AMA guilty of conspiracy against the chiropractic practice. Today, support for chiropractic medicine within the medical community continues to grow. Academic studies showing the effectiveness of chiropractic care have been published in major medical journals, including this study published in the Journal of the American Medical Association. In February 2017, the American College of Physicians also updated their guidelines suggesting those with low back pain use various conservative, non-invasive therapies such as spinal manipulation before resorting to pharmaceuticals.Presently, the effectiveness of chiropractic treatment is largely accepted by medical doctors, and many hospitals even have chiropractic physicians on staff. 2. Chiropractic adjustments are dangerous.Another common myth is that chiropractic adjustments are dangerous. In fact, chiropractic care is less invasive than many other forms of medicine, and a number of studies have proven its safety and effectiveness for patients of all ages. Chiropractic medicine is a natural and safe alternative to other treatments, including conventional pain management such as steroids, anti-inflammatory medication, and surgery, which are associated with risks, side effects, and complications. All doctors, including chiropractic physicians, are required to pay for malpractice insurance — however, chiropractic doctors pay much less for this insurance than medical doctors because injuries resulting from chiropractic care are so uncommon. According to NCMIC, a major malpractice insurance company for the chiropractic industry, medical doctors pay annual premiums as high as $18,000 compared to about $3,750 paid by chiropractic physicians. 3. Chiropractic physicians are less educated than “real” doctors.Due to the holistic nature of chiropractic medicine compared to more conventional approaches, many people who are unfamiliar with the profession, regard chiropractic physicians as less rigorously trained than other doctors. This, however, is simply false; chiropractic physicians are required to earn a Doctor of Chiropractic degree (or DC) and a state license in order to practice in the United States. Obtaining a DC degree at National University for example, requires five academic years of additional education on top of an undergraduate degree. Similar to the training undergone by medical doctors, DC students gain a solid foundation in the basic sciences with coursework in anatomy, physiology, neurology, pathology, and pharmacology, before going on to their clinical science training. A year of clinical internships and rotations completes their medical training. Chiropractic physicians must pass four sets of national board exams in order to obtain a license within the United States. To maintain their license, they must complete continuing education to be sure they are current on the latest natural medicine practice innovations and research. 4. Chiropractic physicians only treat back pain.Though chiropractic medicine is most widely known for treating spinal disorders, it is actually used to resolve or manage a variety of health conditions, including acute and chronic pain, fatigue, chronic gastrointestinal infections, autoimmune disorders, diabetes, and headaches. It is often used by women to treat pregnancy-related pain and conditions at any stage of planning. At National University, students are trained to become primary care physicians and thorough diagnosticians. No matter what the illness, students are taught to focus on the complete health and function of the patient, not merely specific issues or symptoms. They are taught to consider a wide range of factors that may impact health, such as biomechanical dysfunction, genetics, trauma, hygiene, microorganisms, nutritional status, exercise, posture, environment, and stress. Students graduate with many tools in their tool belt, and can draw upon various treatment modalities and innovations to help their patients. 5. Chiropractic medicine is only for adults.Many parents fear that chiropractic medicine is unsafe or unnecessary for children. However, chiropractic care for children dates from as early as 1910. As a natural and non-invasive form of medicine, chiropractic medicine is a safe and effective first line of treatment for a number of child-related ailments. At National University, chiropractic students are trained as first-contact physicians and when necessary, will work integratively with other health care providers to find the best treatments possible for their patients. Chiropractic physicians also provide preventative care to help establish healthy habits in children at all stages of their lives. For example, posture analysis can help identify posture habits that can greatly impact overall health, including energy levels, breathing, stress, and sleep. Additionally, chiropractic care encourages neuroplasticity, preventing neurodevelopmental disorders such as ADHD and Sensory Integration Disorder.
A club golfer was cured of a nagging consistent shoulder pain. Shoulder injury chiropractor, Dr. Alexander Jimenez evaluates the case study. Here’s a pertinent quote from the late lamented author of Letter From America, Alistair Cooke: ‘To get an elementary grasp of the game of golf, you must learn, by endless practice, a continuous and subtle series of highly unnatural movements, involving about 64 muscles, that result in a seemingly “natural” swing, taking all of two seconds from beginning to end.’ An avid club golfer with a handicap of 4 and a right-handed stroke asked for assistance with his nagging L shoulder pain that had recently become markedly worse and finally was threatening to stop him playing. He explained he knew he must have asked for help sooner, but he believed it would just go away (one of the most commonly heard statements by treating practitioners!) and it had now been hanging around for about six months in total, despite routine training. He explained that initially it only used to damage when he caught his chipper from the grass and disrupted his follow-through, but now if he used an iron he'd feel a sharp pain unless he happened to stroke the ball flawlessly. It would also ache when he slept on the side, and after playing a full round it ached for some days. He had tried a million stretches and even appeared quite flexible with specific movements around the shoulder. In addition, for some years he had battled with R low- back pain and anterior hip pain which, when really bad, would render him limping a couple of days after an 18-hole round. AssessmentEvaluation showed all the signs of rotator-cuff tendinitis (inflammation and microscopic breakdown of tendon), together with accompanying weakness of the muscle itself, leading, over time, to excessive anterior translation of the head of his humerus (extra shearing of the ball in his socket joint) on follow-through. This would likely cause an impingement of his already thickened tendon beneath the rectal acromial arch of the shoulder, giving him the sharp stabs of pain he complained of more lately. His standing posture gave us the most clear clues as to why this had evolved, without ever needing to video his stroke biomechanics: rounded shoulders and a very noticeable low- rear arch (lumbar lordosis) are classic signs of poor postural control resulting in wrong movement patterns within his stroke. Gradually over time something needed to give often it's the non-dominant arm. Had he had been middle-aged, we may have X-rayed his shoulder to search for any calcification of his tendon (he'd just turned 30), and only if progress wasn't going well would we believe doing an ultrasound scan to find out the size of scarring and limb breakdown. TreatmentRehabilitation could have a month or two if all went according to plan the key unknown factor is how well he'd take on the challenge of holding his shoulders and pelvis differently; this re-education procedure is frequently the most difficult. The general treatment procedure will first entail improving flexibility so that appropriate posture positions can be held most of us get stiffness in a number of our joints because of gravity wrecking our great posture. Recent improvements in sports physiotherapy have enhanced the speed of the process significantly. Aside from a systematic stretching regime from the patient, we 'release' muscle tightness by deep-tissue massage and trigger-point treatment, heat, a home program of self-pressure massage with a tennis ball, and mobilizing of the tight parts of the capsule of the shoulder with seat-belts. Tightness in the posterior rotator-cuff muscles of this specific patient took a lot of effort to workout, and lat dorsi and pec major/minor were also big players. Additionally, he had considerable stiffness in his thoracic spine, particularly with L rotation, which was worked loose, as were certain gluteal and hip-flexor muscles. The Next Two PhasesSecondly, postural muscles needed to be 'turned on', ie recruited correctly, and a schedule of gradual strengthening of their ability to restrain the joints to which they're responsible began. In this instance the crucial ones were the lower and mid trapezius and transversus abdominus muscles we also taped up them sometimes to help him remember to continue using them, until it became more habitual. Around this time, pain has gotten less and less of a problem along with his postural control was growing nicely. He was able to come back to his coach and start utilizing the positional changes in his stroke, slowly increasing the stroke distance and frequency and all the while maintaining his flexibility with the tennis ball. This third phase, which entails integrating the right posture into the stroke, has to do with the coach, and requires substantial discipline on the part of the athlete to ensure he remains inside the realms of what his brand new system can tolerate without being overloaded. Because he can still overdo it! All went well, with all the golfer reaching one of his best-ever scores in the Queensland Open Tournament three months later. However, two weeks after that he dived badly in a game of rugby and twisted the exact same L shoulder and ripped the exact same rotator-cuff tendon he'd worked so hard to fix. Back to the chiropractor.
El Paso, TX. Chiropractor, Dr. Alexander Jimenez looks at the role of the proximal tibiofibular joint in the etiology of lateral knee pain. Pain about the lateral aspect of the knee is usually attributed to ailments such as iliotibial band compression/friction syndrome, lateral meniscus lesions and patellofemoral pain, and the encouraging patella lateral retinaculum. In the absence of those conditions, other less frequent presentations could be sinus plica, fabella syndrome, biceps tendinosis, or popliteus tendinosis. One of the more unusual kinds of lateral knee pain in the athlete might be the proximal tibiofibular joint (PTFJ) -- either as hypomobility or instability(1-4). This injury occurs in various sports involving twisting forces around the ankle and knee like football, wrestling, softball, gymnastics, long jumping, dancing, judo and skiing. The variety of symptoms it can cause, contain external knee pain (particularly on weight bearing), locking and 'popping' in the knee and also transient nerve symptoms. This makes this harm a significant one to recognize and speech, particularly in large demand athletes. Anatomy Of The Proximal Tibiofibular Joint (PTFJ)The PTFJ is an inherently stable ‘plane like’ joint on the posterolateral part the knee, and is stabilized by a host of primary and secondary stabilizers(5,6). The primary stabilizers (see figure 1 below) include(7): - Biceps femoris tendon
- Lateral collateral ligament
- The principal capsule and ligament associated with the joint.
- The secondary stabilizers contain:
- Arcuate ligament
- Popliteofibular ligament
- Popliteus muscle and tendon
These soft tissues work together to stabilize the PTFJ. Kinematic studies have suggested that the lateral collateral ligament serves as the major stabilizer of this PTFJ in extension(1,2). Because of the resistance supplied from the lateral collateral ligament, the majority of the joint injuries are thought to occur while the knee is in flexion. This may explain the association between multi-ligamentous knee injuries which occur in flexion and PTFJ disruptions. The joint is surrounded by a fibrous capsule, which can be further strengthened by notable attachment ligaments which blend in the capsule. Posteriorly, it's a thick single band, which runs in an oblique direction from the head of the fibula to the rear of the lateral tibial plateau. This can be coated with the popliteus tendon. Furthermore, a single feeble band runs from the fibular head into the anterior element of the popliteus tendon. Anteriorly two or three bands run obliquely in the very front of the fibular head to the lateral condyle of the tibia(7). A synovial membrane -- like that found inside the knee joint -- lines the interior surface of the capsule of the PTFJ. In 10 percent of the populace, this synovial space is continuous with that of the knee joint. The joint is closely connected with the frequent peroneal nerve, moving forwards by the popliteal fossa around the fibula head, and here it is vulnerable to injury. Such an injury to the nerve with injury to the PTFJ may cause foot fall and loss of sensation in parts of the feet and leg. There are different anatomic variants of the PTFJ which can be classified into three types: 1. Type I includes PTFJs with a nearly horizontal articular surface (less than 30° of inclination) and a surface area of less than 20mm(1,2). 2. Type II includes PTFJs with a large, elliptical surface, concave on the fibula, and frequently having a joint communication to the knee. 3. Type III includes PTFJs with a small articular surface (less than 15 mm) and a steep inclination (more than 30°)(8). These anatomic variations have to be considered when treating patients with an injury to the PTFJ. Biomechanics Of The PTFJThe anatomy of the PTFJ directly relates to its functional stability. It can withstand stresses applied in either a longitudinal or axial manner. Roughly one-sixth of this static load applied in the ankle is transmitted across the fibula into the PTFJ(9,10). Thus, the primary functions of this PTFJ are as follows: - Dissipation of torsional stresses applied at the ankle
- Dissipation of lateral tibial bending moments
Tensile, rather than compressive, weight bearing(1,2).
As the ankle dorsiflexes, the PTFJ receives a torsional stress via external rotation and anterior glide of the fibula(4,8). Thus, decreased mobility of the PTFJ may subsequently limit ankle dorsiflexion assortment of motion. When the knee bends, the fibula moves anteriorly, and with knee expansion the fibula head moves posteriorly. It was found that with the knee bent, the mobility of the proximal fibula increased and the fibular head may be moved approximately 1 cm in both anterior and posterior directions. With the knee extended, the trip of the fibular head was minimal as a result of stabilizing character of the supporting soft tissues(1,2). There's also a slight upward movement of the fibula due to forced expansion of the malleolar mortise during maximal dorsiflexion of the ankle(11). The shape and orientation of this PTFJ may also influence the way the PTFJ works. In a horizontal PTFJ, both articulating surfaces are both curved and planar, and their place provides some stability against displacement. From the oblique type of joint, the articulating surfaces are far more variable in place, configuration and inclination. Because this kind of joint is not as able to rotate and accommodate torsional stresses than a horizontal joint, it is thought to be more likely to dislocate. PTFJ DislocationPTFJ dislocations have been classified as follows(1,2): - Type 1 (subluxation only)
- Type 2 (anterolateral)
- Type 3 (posteriosuperior)
- Type 4 (superior)
Associated peroneal nerve injuries are more likely to be associated with types 2 and 3. The mechanism of injury was described as a surprising inversion and plantar flexion of the foot and ankle, with a simultaneous knee flexion and external rotation of the leg. For this reason, it is commonly related to lateral ankle injuries, and therefore usually related to a traumatic event in the athletic context. Normal mechanisms of injury would be twisting injuries, hard landings or slipping together with the knee flexed under the body. Sports doctors should also be alert to subluxation of the joint (excessive forward to backward motion of the fibular head, causing symptoms), which is frequently related to ligamentous laxity. The nature of the traumatic event dictates the manner in which the PTFJ will dislocate. Even though there are four types of dislocation, the usual person in sporting contexts is anterolateral (type 2). This, together with the external rotational torque of the tibia on the foot through twisting of the body, springs the head of the fibula outside cartilage. At this point, a violent contraction of the peroneal nerves, the extensor digitorum longus and the extensor hallucis longus (caused by abrupt inversion and plantar flexion of the foot), pulls the fibula forward. Signs & SymptomsIdentification of the harm is generally based on clinical history and clinical suspicion. Because of the nature of this presentation, it's often mistaken for a meniscal injury. Common signs and symptoms which may alert a sports medicine practitioner to a PTFJ injury are as follows: 1. Outer-knee pain, which is aggravated by pressure over the fibular head. 2. Anterolateral prominence of the fibula head in type 2 injuries. 3. Usually minimal effusion. 4. Limited knee extension. 5. Crepitus (grinding) on knee movement 6. Pain on weight bearing. 7. Visible deformity. 8. Locking or popping. 9. Ankle movements provoking lateral knee pain. 10. Temporary peroneal nerve palsy (pins and needles on the outside of the leg). This is more likely in the athlete who suffers a type-2 anterolateral dislocation as the nerve courses close to the front of the fibula head. Plain X-ray imaging is generally not helpful, but may show the subtle signs of increased interosseous distance and displacement of the fibula from its regular position. But a CT scan may be needed to verify the diagnosis(16, 17). The main abnormality is lateral displacement on the anteroposterior view, and possibly slight anterior or posterior displacement on the lateral view(18). It has been suggested that computed tomography of the knee could be proper in patients where this diagnosis is suspected, due to the poor analytical value of plain radiology (16). MRI has the benefit of revealing ligament injuries in addition to the dislocation. Injury ManagementCurrently, there is not any definitive option for surgical treatment of severe dislocations of this PTFJ. The options are: 1. Closed reduction and immobilisation in plaster cast. 2. Closed reduction without immobilizing. 3. Temporary operative stabilization of the joint and repair of the joint capsule. 4. Immediate joint fusion (arthrodesis). 5. Resection of the fibular head. The treatment options also change with the pattern of dislocation. The management of type 1 and 2 injuries is reduction by anteroposterior pressure over the fibula head, together with the knee slightly flexed and the ankle everted. There is often an audible and/or palpable movement with rapid improvement in symptoms. There's insufficient evidence to support or refute the use of immobilization after a decrease of a type 1 or 2 injury, although several previous case reports have recommended immobilization for varying periods together with the knee in extension or minor flexion for 2-3 months(1,2,19,20). It is controversial whether weight bearing ought to be performed after the process(21). It's more difficult to reduce type 3 and 4 accidents, and these can require open reduction and fixation. However attempting a closed reduction initially is an alternative. Several techniques have been described involving fixation and supplementing using a portion of the biceps femoris tendon(22, 23). PTFJ injury is usually missed, and a number of individuals present with chronic lateral knee pain or joint uncertainty. Unrecognized dislocations often present with peroneal nerve symptoms like pins and needles in the leg or feet, or weakness of foot motions. There is absolutely no function for attempted closed reduction within this circumstance. Surgical stabilization is needed in around 57 percent of late or recurrent instances because of persistent pain and chronic instability(1,2,24). Normal ligament reconstructions include iliotibial band or the biceps femoris tendon(25, 27-29). Resection of the fibular head is believed to affect knee stability and gait. The decision to eliminate hardware after arthrodesis remains contentious. It has been discovered that PTFJ arthrodesis with early screw removal at three to six months has got good results in athletes(30). ConclusionInjuries to the PTFJ are uncommon in the sporting knee. This injury type may manifest as instability and dislocation, or as a hypomobile joint following ankle sprains. Early identification and treatment are essential to enable prompt rehabilitation. Treatment options vary according to the time of injury, nature of injury and associated morbidity. A return to sport is possible after effective treatment. References
1. J Bone Joint Surg 1974;56-A:145–54.
2. Clin Orthop; 1974. 101:192-197.
3. J Orthop Sports Phys Ther. 1982; 3:129-132.
4. J Orthop Sports Phys Ther. 1995;21:248-257.
5. Emerg Med J. 2003;20(6):563.
6. Knee Surg Sports Traumatol Arthrosc. 2006;14(3):241
7. Arthroplasty Today; 2016. 2(3): 93–96.
8. J Anat. 1952;86(1):1.
9. J Bone Joint Surg Am. 1971;53:507–513.
10. Gegenbaurs Morphol Jahrb. 1971;117(2):211.
11. Moore K.L., Dalley A.F., Agur A.M., Limb L. 6th ed. Lippincott and Williams and Wilkins, Wolters Kluwer India Pvt; New Delhi: 2010. Clinically oriented anatomy; p. 508.
12. Nelaton A. Elemens de Pathologie Chirugicale. Paris, France: Balliere; 1874. p. 292
13. Am J Knee Surg. 1991;4:151–154.
14. J Orthop Trauma. 1992;6:116–119.
15. J Bone Joint Surg Am. 1973;55:177–180.
16. Orthopaedics 1999;22: 255–8
17. Br J Radiol; 1993. 66;108-11.
18. Postgrad Med; 1989;85:153–63.
19. Ann Emerg Med 1992;21:757–9.
20. Am J Sports Med 1985;13:209–15.
21. Cases J. 2009;2:7261.
22. Arch Orthop Trauma Surg 1999;119: 358–9.
23. Int J Clin Practice 2002;56:556–7.
24. J Am Acad Orthop Surg. 2003;11(2):120
25. Arthroscopy. 2001;17(6):668.
26. Clin J Sport Med; 2007. 17(1), 75-77.
27. Knee Surg Sports Traumatol Arthrosc. 1997;5(1):36.
28. J Bone Joint Surg Am. 1986;68(1):126.
29. J Bone Joint Surg Br. 2001;83(8):1176.
30. Knee Surg Sports Traumatol Arthrosc. 2011;19(8):1406.
31. J Orthop Sports Phys Ther. 2006; 36:3-9.
32. Foot Ankle Int. 2000;21:657-664. 23.
33. Foot Ankle Int. 2004; 25:318-321
34. J Orthop Sports Phys Ther. 2002; 32:166-173
Legend has it that every year the body department staff at one of the United States' top universities lay down bets on how long it will take before the new medical students discover the "freshman's nervel" when the time comes to dissect the lower limbs of cadavers. Science based chiropractor Dr. Alexander Jimenez takes a look. The clinical tutors take great joy in hearing the enthusiastic exultations of medical students as they pare back the gastrocnemius muscle of the calf to be presented with what appears a nerve- like arrangement. "Wow, look at this, I just discovered the tibial nerve!" After allowing time for backslapping and high fives one of the students, the tutor slides over to the dissection table to point out that what they have just found is not actually the tibial nerve but the tendon of the plantaris muscle. The slender plantaris is the topic of the subsequent case study, outlining the rather debilitating injury known as "plantaris tendon rupture". Mr B's Bumpy RideMr B, a 45-year-old recreational cyclist, introduced to physiotherapy one week after he felt his calf tear while skiing. He was a long-term Warfarin user ever since, a few years before, he had had a surgical C5/6 combination that had resulted in some horrible blood clots. His last clot had been more than 12 months previously. Mr B described the ski hitting the top of a mogul and forcefully dorsiflexing his foot while his knee was extended, also forcefully. He felt immediate calf pain and was not able to bear weight on the leg. After being escorted down the slope on the rear of the snowmobile, he removed his boot and noticed swelling in the medial calf. This would not be an unexpected occurrence in somebody on Warfarin. The next day he was tender on the medial side of the popliteal fossa (back of the knee) and then down the calf. Upon evaluation a week after, Mr B had a tight swollen calf and was not able to walk without a limp. He could not walk down stairs, push off in walk or twist on a fixed foot. Stretching the gastrocnemius was debilitating. We immediately suspected a garden variety muscle strain of the gastrocnemius and proceeded to treat him with mild soft-tissue flush massage, direct trigger- point therapy, heat and motion therapy, compression and mild isometric calf exercises, which we progressed to single-leg calf increases as pain allowed over a number of days. After nine days, Mr B has been walking pain- free and managed to perform 3 x 15 one-leg calf increases without pain. He had been discharged from physio with directions to continue calf raises for four weeks, and also to progress his return to biking from wind trainer to flat streets to hills over the same period of time. Twelve days after we had discharged him, Mr B had been gardening and, while on a slope, his foot slipped. He was forced into rapid dorsiflexion and knee extension again. He felt immediate pain and has been unable to weight-bear. Back at the practice, he revealed significant calf swelling and tenderness at the posterior knee. Concerned that we were looking at something more menacing than a simple calf strain, we delivered him for a diagnostic ultrasound. The ultrasound clarified the plantaris tendon as being "blind ending" from the calf, suggestive of plantaris rupture. There was a massive hematoma in the gastroc/soleus fascia. No extra gastrocnemius or soleal tear was discovered. We explained to Mr B this rather unexpected pathology. He had been handled the same way as previously, but we focused on lots of friction massage to his torn plantaris tendon and also a far slower and more conservative return to rehabilitation and cycling; we also threw in certain single-leg proprioception exercises for good measure. He returned to cycling three months later with no further problems. AnatomyAlong with the soleus and gastrocnemius, the plantaris forms the “triceps surae” muscle of the calf (see Figure 1, below). It originates on the lateral femur as a rather small, pencil-like muscle. It is 7 to 13cm long and runs downwards and medially. It then forms a thin, long tendon that courses medially to extend all the way down the medial calf and medial side of the Achilles tendon, inserting on to the calcaneus (main heel bone). It runs between the soleus and gastrocnemius muscles. This long, slender tendon is often mistaken for a nerve – hence the term “freshman’s nerve”. It is absent in 7 to 10% of the population(1). The muscle is most likely too small to perform any real part in plantarflexion of the ankle, the job done by soleus and gastroc. It's been indicated that the muscle and its tendon once controlled big-toe flexion in the days when people climbed trees. But apes don't possess this muscle, so that argument doesn't hold. Moore and Dalley suggest, however, that the muscle has a high percentage of muscle spindles (2): glands in the muscle that are highly sensitive to extend. It therefore seems possible to me that perhaps this muscle building functions just a proprioceptive role, a hypothesis shared with Menton in his very interesting argument about plantaris being a "sensory muscle (3)". This point has merit once we consider we're the only animals that stand upright on two feet. In standing with the knees extended, this muscle will always be shooting and fine-tuning our standing posture, helping us to maintain equilibrium. However when injured it may result in ongoing pain and disability, and potentially thwart the development of a serious athlete hoping to return to a running-type sport. InjuryRupture of the plantaris muscle/tendon has often been referred to as "tennis leg", because of its tendency to rip in middle- aged tennis players. In fact, they frequently describe the sensation as one of being struck in the calf with a tennis ball. It is an accident nearly entirely continued by the athlete over 40, being nearly unheard of in younger athletes. But a case study does exist emphasizing this injury in a professional footballer (4). Injury to this muscle/tendon must always be guessed in athletes presenting with severe medial calf pain, irrespective of age. The plantaris tendon can rupture when vigorously contracted, especially if the ankle is dorsiflexed and the knee extended. Imagine a tennis player lunging to get a ground stroke and needing to push off forcefully while down low to the floor. Although the muscle is quite small and the tendon very thin, the pain can be very intense and is felt at the medial gastrocnemius; immediate swelling and haematoma cause this area. It's easy to mistake a plantaris tendon rupture for a gastrocnemius muscle rupture. On the positive side, plantaris tendon ruptures usually recover much faster than gastrocnemius tears. Because of this, MRI or ultrasound imaging may be desired in order to determine the damaged structure. This will enable the clinician to make a better judgement about how long that the rehabilitation is likely to take and how the prognosis appears longer term. What's more, ruptures of the myotendinous junction of the plantaris are often thought to be more severe than simple ruptures or tears of the tendon proper. The pain in this instance will be much more severe and the muscle will retract upwards into the popliteal space, often between the popliteus tendon and the lateral gastroc head. The resultant hematoma is frequently also more severe and functionally more debilitating. Ruptures of the plantaris muscle are often seen in conjunction with anterior cruciate ligament (ACL) ruptures (1). This also suggests that the injury mechanism for a plantaris muscle equilibrium can actually be like the mechanism for ACL rupture. TreatmentThere is a lack of scientific evidence on conservative versus surgical procedures in plantaris muscle or tendon rupture. Much of the philosophical literature implies that the injury should be handled along the very same lines as another muscle injury, bearing in mind that its small size must allow the muscle to fix quickly. Ice treatment when maintaining the muscle elongated helps to regenerate the muscular tissue faster and to a more functional and aligned matrix. This can be done by icing the calf with a straight knee; the ankle is slowly dorsiflexed and plantar flexed. The muscle should be kept compressed when not iced. Active release techniques, soft tissue massage, trigger point therapy etc can be used to help enhance calf muscle tone and speed the elimination of the hematoma. Progressive strengthening can then start as pain permits. This can start as a simple isometric calf hold exercise on a step and then later progress to complete eccentric calf loading as pain and function improve. References
1. Helms et al (1995) Plantaris Muscle Injury: Evaluation with MRI imaging. Radiology. 195 (1) p. 201-203
2. Moore KL, Dalley AF (2006, Philadelphia) Clinically Orientated Anatomy. Lippincott, Williams and Wilkins
3. Menton DN (2000) The Plantaris and the Question of Vestigial Muscles in Man, Technical Journal 14 (2): p. 50–53
4. Bradshaw et al (2005) Traumatic Achilles Paratendinopathy Complicated By Plantaris Tendon Rupture And Subsequent Post-surgical Complications. Medicine and Science in Sports and Exercise: May 2005 37 (5) p. S281
A 35-year-old man with what his sports physician described as "left periscapular pain of unknown origin." The sports doctor was hoping that a physiotherapy test and subsequent treatment would settle the symptoms. Chiropractic injury specialist Dr. Alexander Jimenez investigates... This gentleman had a 15-year history of work from the sheeting department of a local hardware store. His job took him to lift and load on to trucks around 200 plasterboard sheets daily. The store man was also an energetic outrigger canoeist, currently in heavy training for an upcoming long-distance event. In outrigger canoeing six paddlers sit at a 14m canoe built of Kevlar, graphite and S glass (a magnesiaalumina- silicate glass with high tensile strength). The kayak design comprises an elongated arm (the outrigger), which helps to balance the canoe in open water. The canoeists use 4--5ft paddles, and possess a specific paddling sequence where they change sides every 15--20 strokes. He described a vague persistent pain in the left periscapular area proximal to the medial edge of the scapula (ie, only by the long border of the shoulder blade close to the spine). The pain was severe enough to be preventing him from sleeping through the night. Upon questioning he stated he thought the pain had been mildly gift for the best part of ten years. Employer records confirmed that he had complained of a similar pain seven decades before but had chosen not to seek treatment, having thought that the symptoms in the time to be too gentle for any intervention. However, the symptoms had lately become far more acute -- to the point where he could no longer physically carry the plasterboard sheets at work. A few days prior to visiting me, the store guy's symptoms had significantly slowed following a lengthy paddling session (20km). The final straw came in the close of the session when group members had to carry the 145kg canoe about 50m to load it on into the back of a trailer. He had been carrying the kayak with his left hand and the pain radiating from his mid spine area had become excruciating. He decided to take illness leave out of work and cease all of his coaching. Upon examination, I could see that he had a very long and gloomy left scapula, with hypertonicity (overdevelopment) in the left posterior shoulder muscles and right-sided paraspinals. The costo-transverse joints of the third to seventh ribs on the left side were especially hypomobile. All active motions of the shoulder and cervical spine were normal selection and all of the muscle tests round the shoulder and cervical spine seemed to offer normal results. The customer described no history of significant left knee or cervical spine injury or injury. He demonstrated that the lift and carry technique he was using with all the plasterboard sheets. He also carried the sheets on his left side with his left arm fully externally rotated and elbow in extension so he could hold the base of the sheet. This activity seemed to force his scapula to a depressed and protracted position. He would then elevate the right arm above his head to hold the top of the sheet. In this manner he can "hang the sheet off his left arm, together with his right hand to balance it. On palpating the offending area, I found he had two spots of exquisite tenderness. The first was just under the medial edge of the scapula; the second on the rib angle of the fourth or fifth rib. Due to the severity of his symptoms, the night pain and point tenderness about the rib angle, I called him to get further investigation (x ray and bone scan) to rule out any stress fractures of the rib. The x-rays came back negative, so I guided my therapy at mobilization, muscle energy techniques to address the rib hypo-mobility, and soft-tissue therapy and acupuncture for the rhomboids, back shoulder and upper trapezius. Following two weeks my canoeist showed no improvement in symptoms and his night pain continued. I referred him for a CT scan to rule out degenerative changes in the thoracic spine, costo-transverse or costo-vertebral joints. So two weeks farther on, without a clear diagnosis and no actual improvement in symptoms, I routed the store guy for an MRI scan to rule out any additional soft-tissue harm to rhomboids or middle trapezius, and to investigate the cervical spine to exclude virtually any radiculopathies in that area that might mimic soft-tissue injury in the periscapular area. After consulting with the referring doctor, we all agreed that the store man could vanish for a while off on a much needed holiday. I sent him off with directions to self-manage the injury, using a tennis ball to the rhomboids, a thoracic roller to mobilize his thoracic spine and some scapular-setting/ stabilization exercises. He returned three weeks later (seven months after his initial trip to the clinic) at exactly the exact same state as when he'd left. Client and physiotherapist both being exasperated with the lack of progress, we decided to take the plunge and see whether the sports physician could diagnostically block the pain, with a regional anesthetic infiltration. The sports physician palpated the painful place thoroughly and determined that the most tender stage was the spot under the lateral border of the scapula, which he believed corresponded to tendon material of their rhomboid. Miraculously, the pain at the periscapular area fully disappeared with the local anesthetic -- despite there was no evidence of degenerative or inflammatory modification on the MRI. The physician followed this up with a corticosteroid injection in the same spot. Fourteen days after the patient was ongoing to become symptom free so we began a progressive rehabilitation program to re-strengthen that the rhomboids and proceeded to handle the thoracic spine and rib joint hypomobility. Following six weeks (16 months from initial presentation), he returned to perform and paddling, and although perhaps not 100% symptom-free, was able to resume sheet- carrying at work and was back into paddling long distances without any ill effects. An Unusual Tendinopathy?Even the rhomboid muscles (minor and major) are described as strong retractors and downhill rotators of the scapula. There is very little from the literature on pathologies affecting the rhomboids, which makes it apparent that these deep bending shoulder muscles are not often injured in either sporting or occupational environments. This case shows that the rhomboid muscle and its bony scapular attachment can be just as vulnerable to pathological tensile and compressive loading as other more common culprits (like Achilles tendon), provided the right mixture of repetitive and traumatic stress. For me this was an extreme blend of occupational and sporting stress that had led to an isolated instance of "rhomboid tendinopathy , although the exact origin of the pain still remains a mystery, as nothing ever showed up on the MRI. Perhaps the magnetic strength of the MRI (1.5 Tesslar) was not powerful enough to pick up high signal density at the rhomboid tendon, or perhaps that the MRI results returned as a false negative, a case occasionally seen in chronic patellar/ Achilles tendinopathies. It seems that the recurrent protraction and melancholy of the scapula brought on by carrying and holding heavy plasterboard sheets over many years -- and exacerbated by the repeated action of the paddling -- had contributed to an inflammatory or degenerative process in the thoracic and attachments of the rhomboid muscle on to the scapula. Upon release the individual still exhibited a somewhat protracted and gloomy scapula. It is likely that this imbalance may never be completely solved with the scapular retraining exercises; the protracted period of time that his scapula was subjected to the unbalancing forces could have led to permanent length-tension changes from the rhomboids and upper trapezius.
In the last few years, there's been a steady growth in the popularity of minimalist running shoes, that claim to offer you the benefits of barefoot running without some of the drawbacks. Science based chiropractor, Dr. Alexander Jimenez investigates. It had been back in the late 1970s that the running boom really got underway. Since that time, tens of millions of individuals around the world have enjoyed recreational and competitive running, equally as a pastime and as means of getting and keeping healthy. However, as any clinician knows, the biomechanical demands of running are such that the prospect of injury is comparatively high in comparison to other endurance sports like swimming or biking. Not surprisingly, as a result, the growth in the popularity of running was accompanied by a growing number of accidents. It's hardly surprising, therefore, that the previous 3 decades has witnessed an explosion in running shoe technologies, together with successive generations of shoes with increasingly complex solutions to guarantee the ideal running gait along with the absorption of their impact forces, that are a particular difficulty when pounding the tarmac or pavements. Bearing this in mind, you might expect that the rate of injury suffered by runners per mile run has been steadily decreasing. However, studies on the prevalence of running-related accidents conducted from 1989 to the present have found a remarkably consistent rate of injury(1). In other words, despite all the technological advances in shoe development over these past decades, the rate of injury has held pretty steady. The Barefoot RevolutionIn more recent decades, some runners have taken a different approach by embracing quitting running. The proponents of barefoot running claim that this manner of running is much more 'natural' and enables the human foot to operate in the manner that Nature meant it to -- something that can't occur when the foot is shod in an artificial shoe. The claimed advantages of barefoot running revolve around the fact that an assessment of seasoned barefoot runners in comparison to shod runners reveals several striking (no pun intended!) differences. Most of these differences stem from the fact that barefoot runners typically land with a mid-foot strike (where the foot lands rather flatly) or forefoot strike (where the ball of the foot contacts the ground first and then the heel is lowered). This contrasts with the fact that 75% of shod runners land with a rear- foot strike in a heel-to-toe fashion(2). The significance of this fact is that the ground response impact forces generated from the collision of their foot together with the surface are typically much higher when a runner heel-strikes -- that the size of the peak impact force during rear-foot attack was shown to function as 1.5 -- 3 times your body weight(3). The use of a cushioned running shoe typically decreases this impact force by approximately 10%, which makes it more tolerable. But a far more effective approach to decrease the size of foot-strike impact forces would be to embrace a mid- or forefoot attack (see Figure 1). It follows that with no cushioning underfoot to decrease the effect of rear-foot attack, barefoot runners obviously embrace a mid- or - forefoot strike, which really turns out to be more effective at reducing impact forces, and so (according the proponents) reduces the risk of injury. Why is it that a mid- or - forefoot strike pattern can reduce the severity of ground impact forces in contrast to some rear-foot strike? Specifically, the researchers looked at the joint kinematics and influence absorption characteristics of the shoulder, hip and knee joints throughout rear-foot strike jogging, forefoot strike running and barefoot running. One of the primary findings was that in rear-foot strike, there was a significantly greater dependence on the knee and hip joints to absorb impact forces compared to barefoot and forefoot strike running. Specifically, the barefoot and forefoot runners demonstrated increased plantar- flexion at initial ground contact, which increased peak ankle energy absorption and decreased peak knee and hip power absorption. However, in both forefoot strike and barefoot running, the forces at initial contact are transmitted through the comparably smaller middle foot muscles and bones as opposed to throughout the calcaneus, talus and tibia straight, which could be a problem with a few runners. While a structurally sound foot may have the ability to consume these forces efficiently, it's very likely that different foot types may respond differently to these increased forces to the forefoot (see Box 1). Barefoot Benefits Or Barefoot Lies?The data on foot attack differences between shod and barefoot runners are widely accepted across the sports science and running community. What this mean concerning injury danger remains a topic of controversy, yet. Barefoot running proponents assert that (provided a slow transition is created) the introduction of barefoot running to a training program may diminish the risk of injury. But this is contested by a number of investigators. By way of example, Craig Payne, a senior lecturer at the Department of Podiatry at La Trobe University in Melbourne, commented at a recent paper: “The barefoot running community has an appalling track record at how they misinterpret, misuse and misquote research. The simple facts are that not one risk factor study on running injuries has linked high impacts to running injuries, yet the barefoot running community claim that the evidence shows this and consider high impacts as the cause of all injuries.(5)” Placing this argument to one side for the moment, there are some other, undeniable drawbacks to barefoot running. For instance, running barefoot on extremely hot pavements/tarmac or at extremely cold conditions may hurt the bottoms of the feet. Additionally, there are risks such as nails, glass, pebbles and other objects that could puncture the soles of feet or lead to stubbed toes. Moreover, even if heel strikes are eliminated by running barefoot, using shorter strides typically found in barefoot runners signifies the feet hit the floor more frequently -- what's gained by reducing the power of impact may be offset by the increase in the frequency of impacts. The evidence to date is that while barefoot running may provide some theoretical benefits concerning reducing foot strike effect by promoting a more mid/forefoot strike routine, there are incontrovertible disadvantages. In something of a halfway-house evolution, therefore, running shoe manufacturers have recently begun to offer so-called 'minimalist' running shoes. Minimalist shoes (sometimes referred to as 'barefoot shoes') have been designed to enable the foot to move through a similar selection and pattern of movement during running as could an unshod foot, while at exactly the exact same time offering some security. Others are slightly more considerable, being designed to help runners slowly transition from rear foot normally shod running to barefoot-style running. The Minimalist PromiseImplicit in the marketing behind minimalist shoes is your guarantee that (providing they are introduced very slowly) their usage will help runners to come up with a more natural working fashion, resulting in fewer injuries, a much more balanced musculature and much better running posture. However, what does the science say about these claims? Among the first studies into the use of minimalist sneakers compared the biomechanics of barefoot running with this of running in minimalist footwear and conventional running shoes(6). In the analysis, the mechanical qualities of this foot/shoe-ground port were investigated in eight experienced barefoot runners to be able to appraise the floor pressure supply, sagittal plane kinematics, and running market. The researchers also sought to discover if a minimalist shoe (Vibram Five Fingers) was effective in mimicking the experience of barefoot running and both these conditions were compared to the usage of conventional running shoes. As mentioned above, it turned out that, when compared with the standard shod condition, when running barefoot the athletes landed at more plantar flexion at the foot, which decreased impact forces and shifted stride kinematics. In particular, significantly shorter stride length, foot contact times, and higher stride frequency were observed. The usage of this Five fingers shoe also led to peak impact forces that were significantly lower than shod running, and much nearer to barefoot running. The lower limb kinematics with Five fingers was comparable to barefoot running, having a foot position which was significantly more plantar flexed than in conventional shoes. The researchers concluded: “The Five fingers shoe seems to be effective in imitating the barefoot conditions while providing a small amount of protection.” Another purported advantage of minimalist shoes is that they allow a more precise estimate of dynamic and static foot position in comparison to wearing a conventional cushioned running shoe. The theory is that this increased 'foot awareness' may help encourage a more efficient running motion, especially over undulating terrain. In a 2011 analysis, researchers looked at the effect of some five- minute minimal protection shoe on dynamic and static ankle position sense (again, Vibram Five fingers shoe) and compared it equally with a conventional shoe and also barefoot running(7). Static ankle joint position sense was assessed from the sagittal and frontal plane by asking fourteen experienced amateur runners to estimate the perceived direction and amplitude of a support incline surface plank placed under their right foot while standing. The energetic measures were performed with all the subjects running on a treadmill at 12kmh and requesting them to assess the treadmill surface slope. The results demonstrated that plantar flexion, dorsiflexion, eversion and inversion moves were underestimated, irrespective of shoe or static/dynamic testing. However, in the static trials there was significantly more angle error underestimation with the running shoe, although no significant differences were found between Five fingers and barefoot condition. While running (dynamic test), the treadmill surface slope was considerably improved estimated with Five hands than with traditional sneakers, or barefoot running. Question MarksThe above studies suggest that the use of minimalist shoes could have its location in a training program; however, more recent study is much less positive. To do so, ground reaction force data and kinematics were collected from 22 highly-trained runners throughout overground running while barefoot and in 3 shod conditions (minimalist shoe, racing level along with the athlete's regular shoe). The results demonstrated that though there were important differences between barefoot and shod conditions for kinematic and kinetic variables at the knee and ankle, there were no differences between shod states -- ie which none of those shod conditions successfully replicated barefoot running. Another study published only a couple of months ago examined the claims that minimalist shoes can promote a more efficient running activity, and so improve running economy(9). This analysis compared minimalist and standard running shoes (along with 'rocker shoes') for their impacts on energy cost and conducting efficiency. Eighteen endurance female runners who were inexperienced at running barefoot or with minimalist sneakers completed a six-minute sub-maximal treadmill running test for every footwear illness, during which oxygen consumption, carbon dioxide production, heart rate and rate of perceived exertion were measured. The main finding was that compared to the typical shoes, the minimalist shoes did not reduce energy expenditure or improve running economy (despite being lighter). The rocker shoes actually increased energy expenditure, something that the investigators put down to the significant extra mass of the shoe design. An even more unfavorable evaluation of the minimalist shoe asserts stems from a brand new US study, published in July of 2013(10). In the study, the researchers set out to determine if running in a minimalist shoe ends in a decrease in ground reaction forces and alters kinematics over standard shoe running. They also looked at whether any 'within- session 'accommodation to a minimalist shoe occurs. Fourteen male, rear-foot striking runners that had never run in a minimalist shoe were analyzed while running at 3.35 meters/sec for ten minutes on a treadmill in minimalist and standard shoes while three-dimensional lower extremity kinematics and kinetics were assessed. Data were accumulated after a minute and then again after ten minutes of running in both shoe types. The first finding was that minimalist shoe running resulted in no changes in step length or step rate. To make matters worse, after ten minutes, the vertical effect peak and moderate vertical loading rate during foot attack improved. To put it differently, the minimalist shoes hadn't only increased impact and loading forces initially, as time moved on, there was likewise no accommodation -- ie things got steadily worse! The researchers concluded: “Running in a minimalist shoe appears to (at least in the short term) increase loading of the lower extremity over standard shoe running. Moreover, the accommodation period resulted in less favorable landing mechanics in both shoes. Our findings therefore bring into question whether minimal shoes will provide enough feedback to induce an alteration that is similar to barefoot running.” Increased Injury RiskGiven that running in minimalist footwear was promoted as a means of eliminating or reducing running accidents by returning to a more natural gait, it may be surprising to learn that the literature includes an increasing number of studies showing an increased chance of harm from minimalist shoe usage. Furthermore, this isn't the injury risk arising as a consequence of switching unexpectedly to minimalist shoes without a gradual transition (see box 1above), but instead appears to be an inherent danger in the usage of these shoes themselves. Patients were interviewed to determine their running history, injury background, transition to minimalist footwear, and also their new injury details. These runners were running an average of 26 miles each week (ie not large mileage) for a mean of 19 decades. After changing into minimalist footwear, an accident occurred in these runners following an average of 2.8 months. Thirty-six experienced recreational runners underwent magnetic resonance imaging (MRI) before and following a 10-week period. Throughout the ten weeks, 17 subjects conducted only in their conventional (cushioned) sneakers while the other 19 gradually transitioned into the Vibram Fivefinger running shoes. A rating of 4 represented a stress fracture. The pre-training MRI scores weren't statistically different between the classes. However, the post-training MRI scores showed that from the Vibram group, 10 of the 19 athletes showed gains in bone marrow oedema in a minimum of one bone following 10 months of running. This implies that even using a carefully structured transition period, minimalist-type sneakers might raise the risk of stress fracture injuries. Summary & ConclusionsWhile barefoot running does appear to decrease impact loadings throughout foot strike, there is much controversy and little scientific agreement about any potential benefit concerning injury reduction this could cause. The evidence for using minimalist shoes, however, is rather more convincing -- but sadly in the wrong direction! While they can improve foot proprioception, there's conflicting evidence about whether minimalist shoes can successfully mimic barefoot running. Indeed, some studies indicate that they might increase impact loadings throughout foot strike. The evidence for their ability to decrease injury rates is rather more damning as a growing number of studies seem to suggest that far from reducing injury risk, using minimalist shoes may actually raise this risk -- even with an extended transition period into minimalist shoe use. References
1. JAMA. 2011;101(3):231-46
2. Nature. 2010 Jan 28;463(7280):531-5
3. Proceedings ISB XXth Congress, American Society of Biomechanics, 29th Annual Meeting. Cleveland. 2005:553
4. Int J Sports Phys Therapy 2012; Vol 7(5) 525-532
5. CMAJ, January 11, 2011, 183(1)
6. J Sports Med Phys Fitness. 2009 Mar; 49(1):6-13
7. J Sports Med Phys Fitness. 2011 Sep; 51(3):401-8
8. Br J Sports Med. 2013 Apr;47(6):387-92
9. J Sci Med Sport. 2013 May 24. pii: S1440-2440 (13)00102-3
10. Med Sci Sports Exerc. 2013 Jul 19. [Epub ahead of print]
11. Foot Ankle Int. 2012 Apr;33(4):262-6
12. Med Sci Sports Exerc. 2013 Jul;45(7):1363-8
13. Orthopaedics. 2011 Jul 7;34(7):e320-23
14. Foot (Edinb). 2013 May 10. pii: S0958-2592 (13)00018-7
Injury chiropractic scientist, Dr. Alexander Jimenez looks at how knees can be hyperextended and hurt during sport -- and the way they can be treated. Knee hyperextension injures could be chronic or acute in their presentation and are often very painful. Structures that are most frequently injured because of knee hyperextension are the infrapatella fat pad (IPFP) or in the event of an acute hyperextension injury (for example when being handled in rugby) trauma to the anterior cruciate ligament (PCL) and/or the posterior lateral corner (PLC) of the knee. This article will talk about both chronic and acute hyperextension injuries of the knee. Additionally, it will outline the anatomy of this infrapatella fat pad, the PCL and the posterolateral corner (PLC). Injury mechanics will be discussed in addition to treatment options. Infrapatella Fat PadAnatomyThe infrapatella fat pad is an extrasynovial structure which sits on the anterior aspect of the knee only distal to the patella. It is portable and its form, pressure and quantity all alter with knee movement(two) It is attached anteriorly to the proximal aspect of the patella tendon and inferior pole of the patella and posteriorly it attaches to the intercondylar notch of the femur and in some people the ACL(2) (see Figure 1). It is a richly vascularized arrangement and is innervated by branches of the obturator, saphenous and common peroneal nerve(2). Its nociceptive fibers are most dense in the central and lateral parts(two). Mechanism Of InjuryBoth of these conditions can be quite painful and debilitating. These customers will frequently have knees that hyperextend and may walk with inadequate quad core control and knee hyperextension. The IPFP can also be injured by trauma to the knee. This may either be through blunt effect or through shear injury with a patella dislocation or ACL rupture. Iatrogenic causes also have been clarified as a result of location of arthroscopy portals and possible for fibrosis. AssessmentOn evaluation a patient with a disorder of the IPFP will often clarify a sharp, burning and or aching pain profound and on each side of the patella tendon. Pain- provocative activities include maximal knee extension or actions that need active knee extension, moving upstairs or prolonged knee flexion(1). Several clinical evaluations are used to differentially diagnose IPFP disorders from other pathologies about the knee. Patients with IPFP ailments will often have swelling inferior to the patella and may describe that they have "bloated" knees (see Figure 2). Objective tests include: 1) Hoffa’s test: The IPFP is palpated (either side of the patella tendon) with the knee in 30-degree flexion. The knee is then fully extended (passively) and increased pain in the IPFP indicates a positive test (see Figure 3). 2) Passive knee extension test: The patient lies supine and the knee is passively extended. Pain inferior to the patella indicates a positive test. 3) Differentiation test: This test is to help differentiate between IPFP and patella tendon disorders. The location of most tenderness is palpated in 30-degree knee flexion. Whilst continuing to palpate the location of most tenderness, the patient is then asked to gently activate the quadriceps muscle, and the clinician resists this movement. Isometric activation of the quadriceps “lifts” the patella tendon off the IPFP which would decrease the pain on palpation if the IPFP is the cause of the pain. ImagingWhen imaging is required, MRI is the modality of choice for suspected injuries to the IPFP. Increased T1 or T2 hypointense signals may indicate fibrosis of the fat pad. T2 weighted images that that show hypointense signal may indicate inflammation or acute haemorrhage or oedema. TreatmentDisorders of the IPFP most commonly respond quite well to traditional therapy. The main goal of treatment is to de-load the fat pad to reduce pain and permit quadriceps strengthening to occur. Fat pad de-loading tape ought to be educated to the patient so continual impingement of the fat pad is prevented (see Figure 4). Both posture and gait retraining should occur early so knee hyperextension is averted during these actions. Muscle retraining ought to be based around quadriceps strengthening exercises particularly in closed kinetic chain rankings. Exercises which can be beneficial in the rehabilitation process include wall squats, splits squats, squats but exercises that involve complete knee extension should be avoided. In the elite athlete where resting from instruction is tough, a CSI may be practical to help decrease pain. Posterior Cruciate Ligament (PCL) InjuriesThe PCL, though most commonly injured when the knee is flexed, may also be hurt in a forced hyperextension of the knee (rugby tackle). It's been estimated that about 60% of PCL injuries also have the posterolateral corner and this may be higher in injuries that demand knee hyperextension(1). AnatomyIt comprises of an anterolateral bundle which can be most tight in knee flexion and a posteromedial package which is tight in extension(3). The posterolateral corner (PLC) consists of their poplitues muscle, the lateral collateral ligament, bicep femoris tendons along with also the popliteofibular ligament (see Figure 5). Isolated harm to the PLC is rare but is frequently associated with PCL injuries. AssessmentThe patient with PCL injury will frequently complain of poorly defined knee pain and often with minimal swelling. Several tests are Utilized to help determine whether harm to the PCL exists: 1) Posterior drawer: This test involves the patient lying supine with the knee bent to 90 degrees. The position of the tibia relative to the femur is noted with posterior-positioned tibia indicative of a PCL injury. 2) Posterior sag: The patient lies supine with hips flexed to 90 degrees and knee bent to 90 degrees. The practitioner supports under the lower calf of both legs and looks for posterior sag of the tibia (see Figure 6). 3) Quad contraction test: If posterior tibial translation is suspected with the patient in supine and the knee bent to 90 degrees. The clinician holds the lower shin and asks the patient to contract quads. If a posterior sag is present then contraction of the quadriceps will lead to anterior translation of the tibia. PCL injuries are rated from 1-3 and are best quantified with the knee in 90-degree flexion in which the tibia normally lies 1cm anterior to the femoral condyles. The grading process is outlined below: G1: the tibia lies anterior to the femioral condyles but this distance is diminished to 0-5mm; G2: the tibia lies flush with the condyles; G3: the tibia can be pushed beyond the medial femoral condyle. As stated before, injuries to the posterolateral corner may also occur with injury to the PCL once the knee is hyperextended. Several tests have been described to help identify if a posterolateral corner injury is present: 1) External rotation recurvatum (hyperextension) test: The patient lies supine and stabilizes the distal thigh with one hand whilst lifting the great toe with the other. If more hyperextension is noted in the affected knee then a posterolateral corner injury is suspected (see Figure 7). 2) Dial test: The patient lies prone with the knees flexed to 30 degrees. The clinician externally rotates the tibia of both legs (ensuring the thighs remain stabilized). An increased range of external rotation of greater than 10 degrees indicates a positive test (see Figure 8). This test can also be done with the knees flexed at 90 degrees and if there is still increased range then a combined injury to the PCL and PLC is suspected. Gait assessment also needs to be undertaken and those patients with instability of their posterolateral corner have varus gapping in foot attack when their knee is extended. ImagingPCL and PLC injuries generally occur in the acute injury. In case of a substantial acute injury x-rays could be warranted to rule out bony avulsion of the PCL from its tibial insertion. If this is present then surgical repair should be undertaken. MRI might again be beneficial to identify PCL and PLC accidents. TreatmentResults reveal that patients with isolated PCL tears have a fantastic functional outcome (even though continuing laxity) with a structured rehabilitation program. The literature does suggest, however, that PCL lack does lead to greater joint contact pressure on both the patellofemoral and tibiofemoral joints. Surgery is indicated if PCL injury happens in combination with other structures (including PLC) or even if important instability exists. If the PCL injury is important (grade 3) then the customer should be immobilized in extension for 2 months(1). If a slight injury (grade 1-2), then a graduated rehab program ought to be commenced with specific emphasis on quadriceps strengthening. Table 1 outlines a rehabilitation program following a regular 1-2 PCL injury. These timeframes should be used as a guide only and progression throughout the rehabilitation program should be decided by the customer's ability as opposed to a predetermined timeframe. ConclusionHyperextension injuries at the knee may not occur commonly but may be significant. Unless multiple constructions have been hurt, a well-structured rehab program gives very good results. References
1. Brukner and Khan (2012) Clinical Sports Medicine 4th Edition. McGraw Hill.
2. Dragoo J, Johnson C, McConnell J (2012) Evaluation and treatment of disorders of the infrapatella fat pad. Sports Medicine. 42 (1) 51-67.
3. Grassmayr M, Parker D, Coolican M, Vanwanseele B (2008) Posterior cruciate ligament deficiency: Biomechanical and biological consequences and the outcomes of conservative treatment A systematic review. Journal of Science and Medicine in Sport. 11 433-443.
El Paso, Tx.'s Scientific chiropractor Dr. Alexander Jimenez looks at a case study of a rugby player who got more than he wanted to tackle. The Player & Mechanism Of InjuryA 115kg rugby union player who plays as a hooker is presented by this case study. During a competitive game he went in to execute a tackle with a bent knee, and the player being tackled fell onto him. As he went to get up off the floor that he felt popping sensation and a severe pain in the knee and he was unable to straighten the knee. He was not able get to a position to come off the field or to straighten it and immediately fell to the floor with the knee locked in 30 degrees of flexion. He was stretchered off the field and taken immediately to the medical room where he had been administered some powerful painkilling medications (Entonox). At the time his knee was far too painful to test properly; however, the attempted examination by the physician discovered that the knee was not able to be unlocked, a gross swelling had already begun but the joint play on anterior draw (Lachman's test) felt normal. It was felt that due to the discomfort, the rapid and the inability to unlock the knee, the diagnosis was that the player had sustained an meniscus rupture or had endured a tibial plateau fracture. The player underwent an MRI of the injured knee the next day. The report was as follows: FindingsThere has been an acute tear of the meniscus with flipping of the posterior horn fragment to the anterior part of the lateral tibiofemoral compartment. - No injuries are seen inside the joint compartment.
- The ACL is undamaged.
- The PCL, medial and lateral collateral ligaments are intact.
- The corner structures are intact.
- No meniscal tear is seen.
- No injuries are observed in the medial tibio
- There is fibrillation to the medial patellar facet cartilage at the level of the patella equator.
- No injuries are seen within the trochlea.
- No signs of subluxation is observed.
- Patellar tendon and the quadriceps expansion appear within normal limits.
Impression- Acute tear of the lateral meniscus with flipping of the posterior meniscal fragment into the anterior lateral tibiofemoral joint compartment.
The player was treated surgically with a repair and the flap was success- fully relocated and sutured into position. He was discharged wearing a motion-limiting brace (0-60 degrees originally). The rehab program is explained below. He returned to play with operative and had no difficulties. Anatomy Of The MeniscusThe plateaus are attached to by the two meniscus and the congruency of the tibia enhances . The meniscus are made from a fibrocartilage and they are wedge-shaped. The two meniscus are 'C'-shaped being the lateral more curved and more crescent-shaped. The meniscus attach to the tibial plateau in the anterior and posterior horns through the intercondylar eminence. They are attached at the periphery with ligaments. Uniquely the medial collateral ligament which restricts the freedom of the meniscus is attached to by the medial meniscus. The lateral meniscus is attached to the femur via two specific ligaments (ligaments of Wrisberg and Humphreys). The unique blood supply to the meniscus determines its healing capability in the event of injury. The peripheral portion of the meniscus (between 10-30%) receives a direct blood supply and this is known as the red-red zone of the meniscus. Terminal loops are sent by the small blood vessels to the center material of the meniscus and this is termed the red-white zone of the meniscus. The part that is remaining only receives nourishment and this is called the zone that is white-white. The meniscus have a range of significant functions that are biomechanical. They function as a shock absorber (they can absorb as much as 45-70% of weight-bearing load) as well as a spacer between the femur and tibia to prevent any connection between the two bones, they offer a degree of knee stability, and also have a proprioceptive function. The joint surfaces are also lubricated by their existence in the knee. This is evident in knees which have had meniscus removal -- they show onset arthritic changes as the bones no longer have a cushioning effect. Throughout knee flexion the femoral condyles slide and load the posterior horn of the meniscus. The knee also internally rotates with knee flexion and a shear effect is imparted by this across the meniscus the medial meniscus nonetheless, the meniscus translates by double the space of the medial meniscus in a front-to-back direction during knee flexion. These two features that are biomechanical make the meniscus more susceptible to injury in flexion and rotation. Forces Acting On The KneeMeniscal tears in the knee occur when the knee is flexed and concurrently and the condyle loads the meniscus the knee rotates along with a shear force is applied to the meniscus. If the meniscus collagen's ability to withstand this shear is exceeded by this shear force, a tear will result. This happens in the athletic knee. This sometimes happens typically in cutting and step- ping actions or landing and twisting simultaneously. The athletic activities most likely to make this shear effect on the knee are NFL, soccer, rugby, volleyball, netball and tennis. In an older degenerated knee, the fluid content of the meniscus is reduced due to age-related changes to the meniscus and cartilage structures. It's much easier to damage the meniscus with in a knee with a meniscus that is degenerated. Clinical Features Of Meniscal TearsSubjectiveThe individual usually remembers the specific mechanism of injury as being a step or cutting maneuver that induces knee flexion and then adds spinning (netball, basketball, volleyball, soccer, touch rugby), or they might be tackled and the knee is forced into rotation (rugby, NFL). Furthermore, the patient may be caught in a deep squat posture and tries to bounce out of that position ('bum to ground' squats) or they may fall and slide with their knee flexed (MMA, martial arts, extreme sports). As the latter occurs, the foot may be caught on the floor as the knee is flexed and a rotational force may be applied to the knee. The level of pain experienced can vary depending on the kind of tear and if concomitant injuries like collateral ligaments and ligaments are involved. Some tiny tears might be painless and pose as a sore knee afterwards. This might be more prevalent with older degenerated knees. Some individuals may experience a definitive popping sensation as the tears acutely or tearing sensation. More severe injuries such as bucket handle the meniscus may be displaced by tears . These may spontaneously unlock using a sensation. ObjectiveAn torn meniscus' typical features are: - joint effusion. This will be detected during examination on a standard fluctuation test;
- joint line tenderness. This is more prevalent with meniscus tears;
- Pain on loaded flexion -- duck and squats walks;
- restricted flexion and/or extension (in anterior horn tears). This may be pain- limited and/or restricted by a block (because of the torn meniscal flap). ;
- McMurray's test (passive flexion/rotation) may be positive in an acute tear; however, the rate of false negatives can be very high. A McMurray's may replicate a clunk or click in the knee.
ManagementWhether surgery is not needed by a meniscus or not depends upon a number of key variables: - The zone -- red zone tears cure well whereas zone tears don't heal;
- Type of tear bucket handle tears will probably cause locking of the knee so need surgery. Tears that are slightly painful but not locked may do well with conservative management;
- Demand of the sportsman -- a young footballer will require as meniscus as possible, therefore surgical repair would be indicated.
Brukner and Khan (2012) have offered a number of criteria which might help in determining surgical versus nonsurgical treatment. Furthermore, Noyes et al (2012) provide additional advice on whether the tear should be repaired or removed. In the case study presented, the player had an inability to compete and an episode of twisting, had a locked knee with his McMurray's and severe pain was unable to be analyzed as a result of pain. So surgery was the only option, the MRI confirmed the severity of the tear and displacement. SurgeryThe purpose of surgery is to preserve as much of the meniscus as possible. In athletes, the current preference is by repairing the tear with sutures preserve the meniscus. In knees and crush that is severe type accidents will the meniscus be eliminated. Unfortunately not all meniscus tears can be repaired, especially if damage has occurred. Long-term follow-up of meniscus injuries that are debrided versus mended reveal that in debrided meniscus, the chance of early onset osteoarthritis is much higher due to the reduction in surface of the meniscus. Variations exist in the sort of repairs that a surgeon may perform. It is generally accepted that sutures are prefer- able as perpendicular runs to the circumferential fibers of the meniscus to horizontal sutures. The timeframe for rehabilitation will differ based on the location and extent of the tear. Tears of the meniscus which are repaired will require more than lateral tears. Monitoring of the knee is required as remaining meniscus and the articular cartilage take the time to adapt to load increases. Monitoring of signs such as knee and effusion stiffness will alert the clinician that the knee is not able to accommodate to loads that are applied. Although not discussed in this bit, more and more evidence is showing that meniscus transplantation can be successful in the management of meniscus. Post-Surgical RehabilitationThe player’s post-surgical rehabilitation is presented as a color-coded chart below. The purpose of the chart is that it represents a visual reference point for the player to refer to. It progresses through different stages or different ‘danger zones’. Black represents the high-risk stage then it passes through red, orange, yellow, green and finally white when there is minimal risk. The key features of the attached rehabilitation program are as follows: Weight bearing status 1. The surgeon initially wanted the player non-weight bearing as the lateral meniscus had sustained a significant delamination off the tibial plateau. 2. Partial weight-bearing on crutches started at four weeks post-op and progressed over the two weeks until he was full weight-bearing at week six post- op. The player continued to use crutches in full weight-bearing when outdoors for safety up to seven weeks post-op. Range of movement 1. Due to the extensive nature of involvement of the lateral meniscus, the surgeon wanted the player motion-limited for the first four weeks from 0-60 degrees. He was concerned that flexion past 60 degrees would create excessive compressive effect on the posterior horn of the meniscus. 2. From week four the brace was opened up to 75 degrees and then in week 5 to 90 degrees. 3. The brace was removed at seven weeks post-op. Physiotherapy/manual therapy 1. Range of allowable movement (0-60) was maintained with: - patellofemoral mobilizations
- passive and active knee flexion/extension
- soft tissue massage to calves, popliteus, hamstrings and ITB.
Exercise therapy 1. The player was initially started on simple inner range quads in supine (0-20 degrees), straight leg raise and active knee flexion/extension in motion limiting brace in sitting on bed. 2. A muscle stimulator (Compex) was used to maintain quads (disuse atrophy mode). 3. Hip exercises were also started focusing on hip abduction (side lie) and extension (prone). 4. From week 4 post-op he started using a muscle stimulator in single leg squat position in brace. 5. From week 6 he was performing muscle hypetrophy mode muscle stim squats on single leg from 0-60 degrees. 6. He started leg press (0-60) at week 7. 7. He started two-legged squats (0-60) at week 9 and the range was increased 10-20 degrees per week over weeks 10-15. He was performing full squats (0-110 degrees – parallel thigh) by 15 weeks post-op. 8. He squatted 180kg for six reps at 15 weeks post-surgery (his PB was 210kg for six reps). Posterior chain 1. The player started loaded hyperextension and reverse hyperextension exercises from week 4. 2. He started bridging in brace from week 5. 3. He started performing hip thruster in brace from week 6. 4. More high demand hip-dominant exercises were then added weekly. Cardio/cross train 1. Seated boxing was started at week 2 post-op. 2. Swimming with no kicking was started at week 4 post-op (enough time to allow full suture healing). 3. High seat bike was started at week 6 to limit knee flexion to 0-60. 4. Cross trainer was started at week 8. 5. Deep water running was introduced at week 10 (this required more than 60 degrees of knee flexion hence why it was delayed until week 10). 6. Alta G (anti-gravity treadmill running) at 50% bodyweight was introduced at week 10 and this went to 80% week 11. 7. Hard anaerobic efforts on Watt bike were introduced from week 12. Running 1. Alta G running started at week 10 although this was low-level intensity – 8-10 kph. 2. The surgeon reviewed the player at 12 weeks post-op and allowed the player to commence ground running. 3. The player ran every second day and the volume was gradually increased each session. 4. Over three weeks the player ran on 13 occasions. The distance was gradually increased from 500m to 6km over the 13 sessions. A player of his position would cover 6-8 km a game so the bottom end of the distance expectation was chosen. 5. Speed elements were gradually introduced over the 13 sessions; however, top speed was delayed until the second last session. 6. The player ran a standard 1.2km field shuttle fitness test at week 13 post-op. His pre-injury best was 5.04mins and his first attempt post-injury was 5.15, which was well within 90% of his best effort. 7. He started change of direction at 15 weeks post-op and quickly progressed through the stages. 8. He also started non-contact skills work at 15 weeks post-op. Skills/rugby 1. As a line out forward he is required to throw the ball into the line out; this skill element was maintained early on by incorporating seated (on Swiss ball) throwing from week 4. 2. He started standing throwing at week 10 post-op. 3. Solitary machine scrums started at week 14, five-man scrums at week 15 and full scrums in weeks 16 and 17. 4. Non-contact skills started at 15 weeks post-op. 5. Progressive contact training was started at week 13 and quickly progressed over four weeks. Criteria For Returning To PlayThe accepted criteria for return to play following surgery are: 1. No effusion; 2. Full range of movement; 3. Normal quadriceps bulk and strength; 4. Equal proprioception left to right (as measured with a star excursion balance test – SEBT); 5. Full completion of training for two weeks; 6. Strength levels within 90% of pre- injury levels; and 7. Field conditioning tests within 90% of pre-injury levels. Conclusion This case study presents a instance of a flipped bucket handle tear of a meniscus in an elite level baseball player. A mechanism of injury resulted in an irreducible locked knee and the posterior horn of the meniscus flipping itself in the anterior compartment of the knee and detaching from the attachment, leading to acute pain. Successful surgery allowed for preservation and a full recovery of the lateral meniscus with no loss of meniscal substance. The mature of the injury resulted in a protracted rehabilitation period nonetheless, the player involved was able to successfully return to play after surgery. References
1. Brukner et al (2012) Clinical Sports Medicine (4th edition). McGraw-Hill Australia. NSW.
2. Noyes et al (2012) Meniscus repair and transplantation: a comprehensive update. Journal of Orthopedic and Sports Physical Therapy. 42(3): 274-290.
3. Brindle et al (2001) The meniscus: review of basic principles with application to surgery and rehabilitation. Journal of Athletic Training. 36(2); 160-169.
4. Rath E and Richmond JC (2000) The menisci: basic science and advances in treatment. Br J of Sports Medicine. 34: 252-257.
5. McDermott I (2011) Meniscal tears, repairs and replacement: their relevance to osteoarthritis of the knee. Br J of Sports Medicine. 45: 292-297.
How frequently have patients said something like, "I've been resting my leg since the injury so it doesn't get worse"? Injury expert, Dr. Alexander Jimenez looks at the use of 'rest' in acute injury management. IntroductionRICE has long been recognized through the acronym of rest, ice, compression and elevation, with the ‘p’ in PRICE referring to protection. The usage of the term 'rest' has been widely criticized with a key emphasis now on the degree of loading or motion to facilitate the recovery process (1). The purpose of the review is to highlight the advantages of movement of loading during the early stages of rehabilitation and the suitable degree. To explain that we refer to the word mechanotherapy and how loading and movement can optimize soft tissue repair by suitably loading the body's own systems (two). The term 'rest' can be misinterpreted by the practicing athlete or gym user and in when they ought to return to loading and what form the individual ought to be inactive. Although therapists use these protocols as part of practice, it is essential to draw upon the research to reevaluate the RICE acronym is now perhaps not the best tool for helping injury management. History Of Rest Vs ActivityDifferences of opinion relating to activity compared to rest date back to the early 1700s(3). Several high profile researchers and doctors in the 1700s and 1800s encouraged the benefits of motion and loading . Julius Wolff published his research to what we now refer to as Wolff's law of bone loading to invigorate the adaption of bone remodeling and recognized. Lucas- Championniere went farther in the 1800s to say that the healing response time accelerated with rest inhibiting muscle, cartilage and ligament regeneration and remodeling. In contrast, their contemporaries John Hilton and John Hunter widely recognized rest as an important treatment modality, suggesting that early motion was a cause of increased bleeding which eased adhesion formation(3). Researchers during the 1800s had scientific evidence available pertaining to tissue recovery to support their claims of movement. Consequently, rest became the favored safe strategy, especially for patients with acute back pain and mattress rest undoubtedly became a frequent feature of lumbar spine rehabilitation(4). Bed rest became a precursor to the disablement of the human motor system amongst patients with musculoskeletal injury, which predisposed the patient to additional health complications(3). Current evidence now relates to that of the initial findings of Championnaire, which gives rise to a movement and tissue loading approach. Suggested Acronym AlternativesOther acronyms which were suggested within the literature and clinical practice include MICE(5) (movement, ice, compression and elevation) and PRICE, with 'rest' being replaced with 'restricted activity and controlled mobility'(6). An acronym recently published in the British Journal of Sports Medicine is the POLICE guidelines (Box 1) that changes rest for optimal loading(1). However, it is essential to protect the injured body part during the inflammatory stage in the first 3-6 days to prevent bleeding. It's essential to protect the tissue from damage and to handle pain. To provide protection, braces crutches and strappings are often used as treatment tools. It is important not to just think about loading from a standing perspective from a standing standpoint but also to include moves in sitting, supine or side lying too with gravity assisted or removed (1). It's the expertise of the clinician that ought to determine the amount of loading appropriate for severity and the character of the tissue. The ice, compression and elevation (ICE) components of POLICE continue to be essential as part of the initial stages of the management of an acute injury to handle the inflammatory response. In certain situations, it's critical to keep an structure motionless to allow for repair, but movement is advised to promote the formation of collagen networks. Consequences Of The Term 'Rest'An individual will be advised that rest (combined with ice, compression and elevation) is the appropriate treatment and they'll perceive that as when they were told to do 'nothing'. For the novice exerciser, being advised to rest may mean that they have a return to activity or perhaps don't return at all which could have a significant impact on their health to game. For the elite athlete, being told to rest may have impacts that are emotional during the rehab process that they cannot do some kind of conditioning. Although one body part may be injured, with loading this is an fantastic opportunity for the individual to maintain their physical state and to work on areas that are poorer. This is where the therapist's skills come to prevent excessive or undesirable loading to the part. For instance, a grade 1 muscle strain requires 'rest' from the field of play but not break from activity and demands controlled loading. The diagram in Box 2 illustrates the patient should be encouraged by a therapist to perceive an injury, which is a fantastic opportunity to develop skills and conditioning rather than to rest, which the RICE protocol encourages. The remodeling of scar tissue is most effectively influenced immediately after the inflammatory phase of repair as scar tissue is more pliable at this point(3). Scientists from the University of Tampere, Finland, stated that after a muscle tear the limb needs to be immobilized initially, to allow for a sufficient scar to form before activity is recommenced within the limits of pain(7). However, restricting movement over a longer period allows for the orientation of the scar tissue to not be put down in the direction of the applied stress (Box 3)(3). As the construction is positioned ultimately, during healing, it is optimal for the tissue fibers to align in the direction of stress. A factor is that re-injury could occur if the collagen fibers are not uniformly aligned in the direction of stress. MechanotherapyMechanotransduction is a term used for evolving physiological processes evident throughout the human body(2). The skeleton is an example as it lays cells down through a network of bone cells, ie the mentioned Wolff's law. Without physical loading the process of regulation is weak and bone cells are not able to be distributed efficiently and subsequently . Researchers from the University of Queensland, Australia, used a randomized controlled trial design with assessor blinding to measure the effect of an applied pneumatic cuff pressure in patients with a distal radius fracture(8). Twenty-one patients were allocated to either the treatment (with cuff pressure) or control group with both groups performing grip strength exercises for six months whilst immobilized and four weeks post-immobilization. The results yielded increased muscle strength in the treatment group from week one to week 10 as measured by a power grip test. Furthermore, at 10 weeks post-fracture the treatment group had 10-15 percent more range of movement than the control group and was 24-29 % more powerful. It is clear how controlled loading during fracture healing has the capacity although this was a study. A research carried out by scientists at the University of Ulster, Ireland, found that ancient exercises for grade 1 and 2 ankle sprains started during the first week of rehabilitation significantly accelerated tissue healing(9). The study was a randomized controlled trial design, with assessor blinding, whereby 101 participants were allocated to either a group that is PRICE or a PRICE group with ankle exercises to improve range of strength and movement. There were significant gains in the time spent walking, step count and time being physically active in the therapy group. There were, however, no substantial differences observed during swelling and activity in pain. The re-injury speed was 4% (two participants from either group). This is an example of optimizing and enhancing the integrity of the ankle ligaments can promote scar tissue formation to encourage an early return. Early passive motion is recommended for joint injuries and post-surgical interventions like cartilage defects undergoing repair(5). Continuous passive motion (CPM) is an example of providing movement using a low-level 'optimal loading' whilst in a non or touch weight bearing position to promote fluid drainage. It's vital to track the forces of surgically-treated cartilage defect with low loads and with use of a CPM machine for 6-8 hours each day for 6-8 weeks allows for enhanced grade of injury(10). It forms an abundance of data pertaining to movement after articular cartilage repair although this research is dated. This reinforces the need for another approach to the 'rest' aspect of the RICE protocol, which the POLICE acronym provides: that opportunity for loading. Achilles tendinosis is a injury within a clinic and has proved hard to treat. In a Achilles tendon there's a concentration of the neurotransmitter glutamate but not the inflammatory substance prostaglandin E2 in normal tendons. There is no chemical inflammation present in the chronic stage of the injury(11). Researchers from the University Hospital of Emeå, Sweden, analyzed the effect of eccentric loading in 25 patients' tendons (26 tendons in total) using focal tendon thickening, hyperechoic regions and irregular limb structure. All patients were followed up after 3.8 years(12). The patients had symptoms averaging 17 months prior to eccentric loading. At followup, 22 of the 25 were satisfied with the treatment provided and that tendon thickness had decreased on ultrasonography. There were no areas identified at follow- up. This research reaffirms the requirement and the best loading is vital in contrast to the age-old 'rest' approach. Patellofemoral pain syndrome is a frequent diagnosis in sports injury clinics and is efficiently managed through strengthening exercises for the vastus medialis muscle to give medial control to the patellofemoral joint(13). This study was a randomized controlled trial design, with assessor blinding, which investigated patients with a history of anterior pain during simple exercises(14). The treatment group were supplied with a comprehensive rehabilitation program for six weeks to be completed daily (Box 4). The results indicated significant improvement during stair ascent following the analysis and at eight months follow-up in VMO activation. This advancement in VMO firing had the capacity to reduce symptoms of pain proximal to the joint. This is an excellent example of optimal loading with steps to reduce pain by resting from aggravating activities but not resting from strength exercises. SummaryThe review has highlighted and reemphasized the requirement during the early phases of rehabilitation of loading and movement to increase tissue healing. Although movement is broadly used by therapists and controlled loading in their rehab protocols, it is very important that we look at moving on to an acronym commensurate with movement and loading, which the POLICE acronym acknowledges well from RICE. It is essential to be able to influence the phase of healing, that the therapist explains the value of optimal loading. Patients should be encouraged to use the term POLICE in sports injury practices and they should be educated on what optimal loading is compared to rest. This is where the therapist's skills are powerful and it ought to be recalled that the patient doesn't have the understanding of a trained therapist. References
1. B J Sports Med, 2012, 6 (4), 220-221.
2. Br J Sports Med, 2009, 43, 247-251.
3. The Iowa Ortho J, 1995, 15, 29-42.
4. West J Med, 2000, 172 (2),
5. The Science and Practice of Manual Therapy, 2005, Elsevier Churchill Livingston, London.
6. Rehabilitation Techniques, 2011, McGraw Hill, Singapore.
7. Aust J Physiotherapy, 2007, 53, 247-252.
8. Best Pract Res Clin Rheumatol, 2007, 21 (2), 317-331.
9. BMJ, 2010, 340, c1964.
10. The American Journal of Knee Surgery, 1994, 7 (3), 109-114.
11. Knee Surg Sports Traumatol Arthrosc 1999, 7: 378–81.
12. Br J Sports Med, 2004, 38, 8-11.
13. J Multidiscip Healthc, 2011, 4, 383-392.
14. Med Sci Sports & Exerc, 2010, 42 (5), 856-864.
Running is possibly the most fundamental of sports, but it is still bothered with a plethora of lower limb injuries. Here injury scientist Dr. Alexander Jimenez focuses on the relationship of running biomechanics and related injuries to the hip joint, the greatest and most complicated of the lower limb, with a few preventative techniques to incorporate into your own training. Hip Runners & ProblemsHip pain is not the most common injury as it frequently does not occur instantaneously, but is that the accumulation of training and manifests as a gradual worsening of symptoms. The injury rate for long distance runners is approximately 3.3%-11.5% (1) and the hip is supposed to contribute to up to 14 percent of athletic injuries (two). Given the diversity of athletics, the hip is placed by this since the offender of nearly a sixth of injuries sustained. The intricacy of the hip joint leaves about 30% of hip pains undiagnosed and treatment plans cannot target the issue. Reoccurrence or impairment that is on-going then result from not fixing the cause. Hip AnatomyFig. 1: a) The hip joint displaying the femoral head connecting to the acetabulum; a tear into the labrum is comprehensive; b) The hip joint and pelvis with surrounding muscles shown (5). The hip is a ball and socket joint; the ball being formed by the head of the femur and the socket from the acetabulum of the pelvis. The socket thickness is increased on account of the fibrocartilage lining of the labrum (similar to the cartilage in the knee. This depth to the acetabulum provides inherent stability along with the help of the many surrounding ligaments and muscles, to the hip joint and holds the ball at the socket. The labrum also comprises free and sensory nerve endings which are involved in pain perception and proprioception ie the consciousness and equilibrium of the joint within the entire body (3). This architecture makes it possible for the cool to move in all 3 planes (forwards and backward, to both sides, and to rotate inwards and outwards) providing six different moves and therefore a very flexible joint (4). This mobility is what if coupled with the speed and power of running and produces the hip complex in character, allows an array of complications. Biomechanics Of RunningOf running, the cycle can be broken down into two stages to help clarify effect is transported through the mechanics of running occur and the body. Both stages would be the stance phase (when the foot lands on the floor), displayed along the bottom in Figure 2, along with the swing phase (when the foot is moving through the atmosphere). The stance phase begins with heel contact on the ground. Mid-stance takes place the foot's remaining part follows and can also be known as the absorption phase, when. The knee and ankle are fully flexed at this point to absorb the ground impact and work to control the landing. The leg shops this elastic energy inside the muscles for later on. The hip, knee and ankle fully extend using this recoil propel the body forwards and to attain the stage and upwards. The stance phase lasts as a longer stride is taken by the runner running. The stance phase also issues the hip joint to about five times body fat compared to three times body weight in the swing period (6). The faster you run the time on the ground and so the less compels transmitted the leg up. The lower limb muscles at the hip, shoulder and knee all work to restrain movements and to limit the forces. They encounter floor reaction forces from the power of the muscles contracting and the impact of the floor. The thicker the stance phase, eg the larger or the tougher that the landing the operate, the more activation required with these muscles to offload the joints and also consume these forces. While each runner will have a style, the repetitive routine of conducting and its impact can exceed a runner's limitation on the strain they can endure. This combination of variables is the reason behind injury. The Impacts Of Running On The HipIn conducting, the effect occurs through the heel strike. The amount of this will depend on the frequency the duration of contact, and also just how heavy you land on the heel. Runners who impact more will have less effect force. A single load can damage the articular cartilage and rip the labrum, particularly if associated with a sudden trip or fall. More likely, however, it's the repetitive loading from running that causes small micro injury to the hip joint, and this accumulation of harm will eventually thin the cartilage layer resulting in tearing and shearing of these cells (4). The fashionable flexes to absorb these impact forces through the hip flexor muscles of Pectineus, Tensor Fasciae Latae, and Ilioposoas, Sartorious, Rectus Femoris. The pelvis will rotate backward to allow more space to happen to flexion. It is going to then marginally adduct (using adductor longus, adductor brevis, adductor magnus and pectineus) prior to moving into abduction (using the gluteus medius primarily) to your terminal swing and remove (7). The hip motions into extension (the leg goes backward) to propel the body forward and this mostly exerts the gluteus maximus muscle while the pelvis tilts forward to adapt the hip joint mechanics. If some of those mechanical motions become compromised the forces will be transmitted incorrectly, giving instability and putting increased strain into muscles and the hip joint. Repetitive loading subsequently leads to trauma. Hip Pathologies & Their Relation To RunningThere's a multitude of hip pathologies the runner may endure. Here we will have a look at the most common injuries. Strains -- Strain can occur to any of those muscles involved with hip biomechanics if they're overloaded from poor alignment and mechanisms. The muscle strains happen into the iliopsoas from over-flexing in the hip joint, or on impact once the hip is still flexed and load is taken by the muscles. The gluteus medius can also become injured if the runner over-adducts (where the hip moves inwards) during their running routine and the gluteus medius tendons get irritated with direct compression below the bone. Trochanteric bursitis -- This can be swelling and inflammation of the fluid-filled sac that's the bursa that resides to the greater trochanter (the other side of the hip). This bursa normally allows movement of the band over the hip bone, but repetitive shearing may cause it to become inflamed. Femoroacetabular impingement (FAI) -- This occurs when the femur induces impingement on the acetabulum, mainly when the cool comes into flexion as well as the bony structures collide. This may occur as a pincer impingement as a CAM impingement where an extra ridge of bone develops , or where the acetabulum rim develops an lip of bone. As the labrum is ground back on by the extra bone repeatedly FAI which goes unresolved can finally lead to tears. Labral tear -- This is currently tearing of the labrum that surround the hip joint and acetabulum. It may happen over time by or out of a traumatic event micro - traumas. Analysis and the assessment of those pathologies is beyond the scope of this article; however, a physiotherapist may use testing to assist with diagnosis and therapy planning. Rehabilitation & Prevention GuidelinesGiven this variety of pathologies that are potential, a identification is imperative for therapy planning. The therapy suggestions below could be applied from hip injury, or for rehab to the avid runner for measures. Information regarding the avoidance of repeated or regular hip flexion should be paramount. This will the anterior hip and replicate type problems to impingement. If flexion cannot be averted, ie with sitting, then the runner should be educated to lean back or stand up into extension. Cycling and treadmill running wouldn't be proper cross-training methods as both encourage hip flexion and internal rotation (giving more impingement to the acetabulum)(7). Swimming is non-impact and avoids these positions that are irritable. The three phases of rehabilitation joint with preventative measures or could be followed in order: 1. Strengthen the gluteal muscles the gluteus medius and maximus in isolation; 1a. Bridging Lie on your back with your knees bent and arms. Put a resistance band around your thighs so that it pulls on your knees. You need to make an effort to maintain them apart from pushing against the band (this activates gluteus medius). Slowly push up through the heels and lift your buttocks and back off the floor, holding for five minutes and then gradually returning (since the knees remain bent the hamstrings can't control and gluteus maximus is going to be triggered). Duplicate for collections. 1b. Clam Lie on your side with all the hip on top. Maintain the feet together as you lift the top knee upward into external rotation (that activates the gluteus medius and averts the hip adducting). Control the knee to the return to the beginning position for muscle control and hip stability. Repeat for three sets of 10 repetitions. 2. Strengthen the whole limb with joint movements incorporating muscle groups and core stability; 2a. Lunge with twist Take a step forward with the specified leg and bend both knees and buttocks simultaneously; but do not bend the hip more than 60 degrees. Once in position then rotate the entire body from right to left and return to the starting place (that strengthens the heart for pelvic equilibrium). Duplicate for sets of 10. 2b. Single leg squat Position on the specified leg together with all the pelvis neutral, bend at the knee and hip right into a position. Keep the knee on the feet and then rotate the body to the right and left while keeping the back straight (that spinning further activates gluteus maximus and struggles the heart muscles. Duplicate for sets of 10 as you can. 3. Strengthen the fashionable in movements that replicate running patterns; 3a. Standing hip hikes Stand erect with feet hip distance apart. Hitch up the specified hip while maintaining neutral pelvic stability (eg do not let your hips twist or move . Repeat for three sets of 10 repetitions. 3b. Forward step-ups Stand in front of a high step or stair and hold on to a banister or rod at the same side (pushing down this will activate the latissimus dorsi back muscles which are associated with the gluteal muscles. Leading with the chosen hip step upwards then return back down. Repeat leading with the leg every time for three sets of 10 repetitions. 3c. Hip swings Using a similar setup as the forward measure ups, but the knee on a seat rests. Holding on to the pole, bring the specified hip forwards into reunite and hip flexion. The static leg ought to maintain great pelvic stability and will be attracted into extension (activating gluteus maximus rather than hamstrings). Repeat for three sets of 10 repetitions. Return To Running ProgramReturn to running injury can happen together with the strength training when the problem was corrected, muscular strength and control is adequate and biomechanics are adjusted. The runner should aim to begin with these guidelines at approximately 60 per cent intensity and duration of runs and advancement: - Begin working on soft surfaces to restrict impact eg monitor or ground;
- Include a comprehensive dynamic warm-up
- Increase rate once technique is adequate;
- Run on alternate days for the first 3-4 weeks;
- Continue with strength training above and expand to build workout and strength whilst minimizing impact;
- Slowly introduce sprints, hills, accelerations, decelerations; picking one element at a time (7).
Overview- Because hip flexibility and strength is vital for every single stride, hip injuries can be painful to the runner. The hip joint is a complex joint that goes in several directions and can be stabilized with a profound acetabulum and muscles and ligaments;
- These muscles control the fashionable orientation of running at every stage. The stance phase and swing phase require muscles to operate at different times;
- The hip can endure injuries from running such as femeroacetabular impingement, bursitis, muscle strains and tears;
- These injuries are the result of biomechanics, giving pelvic uncertainty that forces are transmitted 25, and changing the lower limb alignment and overload the structures;
- Rehabilitation and/or prevention exercises should be included consisting of functional running-related exercises limb strengthening and strengthening.
References
1. Br J of Sports Medicine. 2007; 41(8), 469-480.
2. J of Orthop and Sports Phy Ther. 1994; 19, 121-129.
3. Clin Orthop Relat Res. 2008; Jan 466(1): 239-247.
4. Phys Ther in Sport. 2004; 5: 17-25.
5. Brukner P and Khan K (2009). Clinical Sports Medicine. 3rd ed. Australia: McGraw-Hill Professional. 48-49.
6. J Biomech. 1993; Aug 26(8): 969-990.
7. Phys Ther in Sport. 2014; Article in Press:http://dx.doi.org/10.1016/j. ptsp.2014.02.004.
Chiropractor, Dr. Alexander Jimenez details the relevant anatomy and biomechanics of the hamstring, common mechanisms of injury, the clinical signs and symptoms and management in the kind of surgical repair. IntroductionHamstring injuries in athletes are re-injury and typical to the hamstring is a reasonably frequent occurrence. Orchard and Seward (2002) found that at elite-level Australian Rules football, hamstring injuries were the most common kind of injury requiring time off from competition. Muscle strains are the most frequent, followed by more significant myotendinous junction tears. These respond well to rehab. Total ruptures of the muscle are uncommon as are complete ruptures of the hamstring origin (Steinbruck 1987), and accidents like these can be very painful. Hamstring muscle origin ruptures in the kind of avulsions of the growth plate are more frequent in younger populations due to the immature epiphyseal growth plate (apophysis) found to the ischial tuberosity in older children and adolescents (Wootton et al 1990). Avulsions in adults with ischial tuberosities that are fully-fused have a tendency to be ruptures of the proximal hamstring tendon or complete avulsion fractures of the ischial tuberosity. Prompt diagnosis and proper treatment of ischial tuberosity avulsions/ tendon ruptures is critical due to the residual loss of power persistent in non-operatively treated instances of hamstring ruptures (Birmingham et al 2011). The ongoing complications with chronic non-repaired complete hamstring tendon avulsions are pain, weakness and cramping during locomotion and pain with sitting (Wood et al 2008, Harris et al 2001). As with most tendon avulsions repair leads than delayed repair. Repair within four weeks of injury resulted in better outcome compared with those repaired after four weeks (Harris et al 2011) Relevant Anatomy & BiomechanicsThe hamstring muscles comprise the biceps femoris (long head and short head), semitendinosus and semimembranosus. All muscles (except biceps short head) attach onto the ischial tuberosity. The head biceps starts on the femur along the linea aspera. At the origin, the head attach to the ischial tuberosity and of the semitendinosus and bicep form a conjoined tendon and the semimembranosus with its tendon attaches. Figure 2 above shows the attachments of the two individual heads. At puberty there appears at the ischial tuberosity a secondary ossification centre and this doesn't fuse until the late teens or early twenties. In this time frame between the appearance of the apophysis and its fusion, a force traction on the hamstring may avulse the apophysis as this forms the weak link between the muscle and the bone. After skeletal maturity, injury is more likely to take place at the junction. The hamstring origin is intimately connected to the sciatic nerve's passage during the upper posterior thigh. Serious injury to the muscle that produces a large hematoma may create adhesions in the vicinity of the sciatic nerve that may complicate the athlete's performance when recovered, or the nerve may be injured due to a grip neuritis as the muscle belly retracts away from the nerve (Chakravarthy et al 2005) or due to compression from a tight fibrotic band directly to the ischial tuberosity. Diligent treatment of sciatic nerve mobility is a significant element in hamstring rupture direction (see below in conversation on management). It is not unusual for the hamstring origin rupture to involve only two heads of not all three and the hamstring. These are classified as partial avulsions. It is more common if the avulsion is partial that it involves the conjoined tendon of the biceps femoris and semitendinosis (Heinamen 2013). Mechanism Of Injury (MOI)The hamstrings are vulnerable to trauma due to the anatomical arrangement and on account of the leverage that acts through the hip during functional movements. The most frequent MOI is forced knee extension in a position of hip flexion and as the muscle is placed below a rapid and large eccentric load. The force is directed to the junction. This is sometimes due to a sudden and forceful landing from a jump with the knee locked in extension, or during foot contact in sprinting, or in excessive and uncontrolled hip flexion such as when the leg slips out from underneath the body and moves into hip flexion with the knee extended (forward splits, water skiing and bull riding). However, it is thought that in order for tendons to rupture, a degree of degenerative change needs to be present in the tendon prior to rupture. This has been observed that rupture and supraspinatus tendons that rupture. This possible clarifies why myotendinous ruptures in the hamstrings of young athletes almost never happens, they fail at the growth plate and might also explain the rising frequency at middle aged recreational athletes (Cohen and Bradley 2007). The hallmark of classic tendon degeneration is an anatomical and biochemical change in tendon tissue. Collagen fibers become disorganized, the intracellular matrix changes foci develop in the tendon, hypervascularity of the tendon is present. The forces which create this effect that is degenerative tend to be both compressive and tensile . As the hip is rapidly flexed the force is applied due to rapid eccentric loading on the hamstring tendon. The force is a result of the unique anatomy of the ischial tuberosity bone that 'pushes' into the tendon and makes a compression zone. Due to repeat episodes of tensile and compressive force, the tendon gradually degenerates and may eventually rupture as it's weakened (Docking et al 2013). Signs & SymptomsThe usual mechanism of injury has been described above, and the pain can be severe and debilitating once the hamstring origin ruptures. The athlete describes it as 'being shot by a sniper'. An audible 'pop' may be heard. The athlete will be guarded on the affected limb and will be reluctant to weight bear on a loaded limb. On examination, a palpable defect may be felt below the ischial tuberosity and a loss of the contour of the hamstring may be observed, however these will be dependent on the size of the gluteals and any intervening adipose tissue that may make direct palpation and visualization difficult. A discolouration may be seen throughout the muscle, if the athlete is examined following the incident. The athlete will demonstrate a painful weakness in both knee flexion and hip extension that is isolated. Range of motion is going to be as they'll be unwilling to weight bear pain functionally and restricted they may walk with a limp. Presentation to the practice has been delayed, generally because the athlete assumes the injury is purely muscle-related and will heal, if, then the patient may show atrophy of the hamstring muscle due to disuse. ImagingCT imaging and plain x-rays supply little use unless an avulsion of the hamstring tendon from the ischial tuberosity has happened. Ultrasound imaging may be helpful; however, its sensitivity and specificity has not yet been reported. As the delicate tissue detail is visualized in an MRI, MRI is the investigation of choice in a suspected rectal origin rupture and it can highlight tendon retraction's level in addition to any interference with the nerve. Furthermore, MRI can be used in through all phases of recovery to appraise the therapeutic capacity of the tendon. ManagementThe treatment of hamstring origin injuries is contentious; fix or not fix. A number of standards have been suggested that can help the practitioner decide if the hamstring injury requires surgery (Domb et al 2013): 1. Osseous avulsion with more than 2cm retraction; 2. Complete tears in all 3 tendons with or without retraction; 3. Partial tears that remain symptomatic despite prolonged conservative treatment. However, some and complete incomplete ruptures of the hamstring origin will require treatment in the vast majority of athletes on account of the concerns regarding loss of strength and power. The case for operative management of partial hamstring origin rupture is not as clear-cut. It may be that some of these can rehabilitate well following a partial rupture; however, if pain and dysfunction persist after a lengthy rehabilitation process, then repair of a partial rupture can result in good clinical outcomes (Aldridge et al 2012). However, Lempainen et al (2006) presented a series of partial hamstring ruptures that responded well to surgical intervention. SurgeryThe hamstring is approached with a posterior incision starting at the gluteal fold. The incision may extend over a distance to completely access the hamstring tendon that is retracted. The posterior cutaneous nerve and the sciatic nerve is going to be visualized and any adhesions can carefully be resected (neurolysis). A neurolysis will be necessary if the surgery was delayed due to failure or a delayed surgery following treatment. This will be evacuated, if there is a hematoma observed. The proximal tendon stump on the ischial tuberosity will be found as will the retracted tendon and these will be approximated with the knee in flexion (to decrease the hamstring stretch). They will be repaired with Ethibond sutures and Merselene tapes. This will be anchored tapping screw if the tendon has avulsed of the tuberosity. By flexing the knee to 45 degrees to create tension the integrity of the repair will be tested. This enables the surgeon to check the 'safe' available range of motion intra- operatively so that physiotherapy can start early (at two weeks) in the safe ranges. This will avoid a prolonged immobilisation that's been demonstrated to lead to range and strength loss and significant atrophy in hamstring repairs. Then the demand for a postoperative knee flexion brace is not required, if the injury is reasonably new. However, if the surgery was delayed due to failed conservative management a knee flexion brace post-operative may be required. Some authors have attempted endoscopic repair of the hamstring tendon and state that this procedure offers more benefits like minimal scar tissue, superior visualisation of the hamstring tendon, decreased bleeding and better protection of the neurovascular bundle (Domb et al 2013). Post-Surgical OutcomesAlmost all studies conducted on the outcomes of hamstring tendon repair in return and strength return to function show that it is unreasonable to expect that the athlete returns to full strength in the hamstring following a hamstring tendon. Although the strength of the hamstring is still diminished, the athlete can return typically to a pre-injury amount of competition. Wood et al (2008) found that in those with repaired hamstring tendons, 80% returned to pre-injury heights of sports. What's more, hamstring strength returned to a level of 89% to a mean of 84% and hamstring endurance. Konan and Haddad (2010) found that 90% of the hamstring injuries they tracked returned to pre-injury levels of sport. Isokinetic testing and all reported functional outcome showed that the hamstring strength returned to 83% at six months compared with 56% at the pre-surgery level. Finally, Cohen and Bradley (2007) reported on seven patients who underwent operative repair and found that average time to return to function (and sports) was 8.5 months. To pre-operative levels of function, six of the seven had returned by post-operative six months. References - Aldridge, S.E., Heilpern, G.N., Carmichael, J.R., Sprowson, A.P., Wood, D.G. Incomplete avulsion of the proximal insertion of the hamstring: outcome two years following surgical repair. Journal of Bone and Joint Surgery. 2012. 94(5); p. 660-662.
- Birmingham, P., Muller, M., Wickiewicz, T., Cavanaugh, J., Rodeo, S., Warren, R. Functional outcome after repair of proximal hamstring avulsions. The Journal of Bone and Joint Surgery. 2001. 93-A(19):p. 1819-1826.
- Chakravarthy, J., Ramisetty, N., Pimpalnerker, A., Mohtadi, N. Surgical repair of complete proximal hamstring tendon ruptures in water skiers and bull riders: a case report of four cases and review of the literature. British Journal of Sports Medicine. 2005. 39; p. 569-572.
- Cohen, S., Bradley, J. Acute proximal hamstring rupture. J Am Acad Orthop Surg. 2007. 15(6); p. 350-355.
- Docking, S., Samiric, T., Scase, E. Purdham, C. Cook, J. Relationship between compressive loading and ECM changes in tendons. Muscle Ligaments Tendons J. 2013. 3(1); p. 7-11
- Domb, B.G., Linder, D., Sharp, K.G., Sadik, A., Gerhardt, M.B. Endoscopic repair of proximal hamstring avulsion. Arthrosc Tech. 2013. 2(1); p. e35-e39.
- Harris, J.D., Griesser, M.J., Best, T.M., Ellis, T.J. Treatment of proximal hamstring ruptures: a systematic review. Int Journal of Sports Med. 2011. 32(7); p. 390-495.
- Heinanen, M. Proximal Hamstring Avulsion – Anatomy, Cause of Injury, Surgical treatment and Post-operative Treatment Protocol. Suomen Ortopedia ja Traumatologia. 2013. 36: p. 104-110.
- Konan S, Haddad F. Successful return to high level sports following early surgical repair of complete tears of the proximal hamstring tendons. Int Orthop. 2010; 34:119-23.
- Lempainen, L., Sarimo, J., Heikkila, J., Mattila, K., Orava, S. Surgical treatment of partial tears of the proximal origin of the hamstring muscles. British Journal of Sports Medicine. 2006. 40; p. 688-691.
- Orchard, J. and Seward, H. Epidemiology of injuries in the Australian Football League, seasons 1997–2000. British Journal of Sports Medicine, 2002. 36; p. 39-45.
- Pombo, M., Bradley, J.P. Proximal hamstring avulsion injuries: A technique note on surgical repairs. Sports Health. 2009. 1(3); p. 261-264.
- Steinbruck, K. Epidemiologie von Sportverlezungen. 15-Jahres-Analyse einer Sportsmedizinischen Ambulanz. SportsvertetzSportsch, 1987. 1; p. 2-12.
- Wood, D.G., Packham, I., Trikha, S.P., Linklater, J. Avulsion of the proximal hamstring origin. Journal of Bone Joint Surgery (Am), 2008. 90-A; p. 2365-2374
- Wootton J.R., Cross, M.J., Holt, K.W.G. Avulsionof the ischial apophysis. The case for open reduction and internal fixation. Journal of Bone and Joint Surgery. 1990. 72; p. 625-627
Chiropractor Alexander Jimenez takes you through the second part of rehabilitation masterclass for the surgically repaired acromioclavicular joint (ACJ). Surgery For ACJ InjuriesType III injuries and type II injuries in the high-level throwing athlete is the start of the spectrum for the decision. This is usually based on a case--by-case basis, and the standards for surgery versus conservative direction may be based on: 1. Injury to Left the joint a small degenerative (new on older injury). 2. For individuals in high risk sports (contact Game, combat sports, motocross) where the danger of re-injury may be quite high, the initial preference would be to care for the ACJ conservatively. This might push on the surgeon to think about a procedure if the ACJ is re-injured. 3. In throwing sports dominant arm, early surgery clicking and popping on account of the biomechanical loads in the ACJ or may be preferred to prevent any sensations of ACJ instability. 4. Arm dominance. Injuries to the ACJ On the side might be a factor in early operation. 5. Amount of uncertainty. Instability at the Direction tend to do poorly with direction compared with the up-down kind instabilities. The decision to Handle Type III injuries surgically versus non-surgically still remains controversial. Some researchers have found that the results following surgical versus non-surgical AJC injuries is very similar (Calvo et al 2006). If the decision is to postpone surgery on a Type II and III ACJ injury, then the usual time period is three months of conservative rehab. If the athlete complains of pain, sensations of instability or an inability to perform game at preceding levels of functionoperation is subsequently considered. The more serious kind IV, V and VI will always need operation. Kinds of SurgeryThere are four Kinds of procedures which have been described for remedy of ACJ injuries. These include: (1) Primary repair of the AC joint With rods, screws, plates, tension band wiring or pins.This procedure involves an open repair of the ACJ using a host of options that are fixating. These may be done with or without CC ligament reconstruction. A comparative study performed by Sugathan and Dodenhoff (2012) found the tension band wiring, although preferable within a Weaver- Dunn procedure (see below) in relation to ACJ strength and functional outcome in acute ACJ accidents, had greater chance of early post-operative complications in contrast to the Weaver-Dunn procedure and also the need for future operation to remove any metal work in and about the ACJ. They recommended the procedure, especially in those with failed conservative management. (2) Distal clavicle excision with soft tissue reconstruction (Weaver- Dunn).This procedure involves resection of this distal clavicle followed by discharge of the CC ligament from its attachment on the acromion. The end of this ligament is then connected to keep it at a position. Transfer of the conjoined tendon, where the half of the tendon is transferred to the distal clavicle, has been described. Since the operation CC ligament is left undamaged transfer of the tendon has been argued to be superior to the Weaver -- Dunn technique. (3) Anatomic coracoclavicular reconstruction (ACCR).The ACCR procedure entails a diagnostic Shoulder arthroscopy and arthroscopic distal clavicle excision. The AC ligament tied into the distal clavicle via two drill holes and is dispersed from its own acromial insertion. An autograft (donor site being the gracilis or semitendinos) or an allograft is then looped underneath the coracoid and through two drill holes in the clavicle. The graft is then tied in a figure-of-eight to itself Fashion or adjusted to the clavicle with interference screws. Several biomechanical studies are completed which illustrate that ACCR produces anterior and approximates the CC ligament complex's stiffness. (4) Arthroscopic suture fixation.Two Kinds of surgical techniques for Preventing the CC ligaments exist. The technique involves utilizing two anchors. The suture anchors tied over a bone bridge at the clavicle and are fixed in the coracoid. Included in the procedure the CC ligament is transferred. The kind of procedure involves utilizing two apparatus to reconstruct the CC ligaments and coracoid. Post-Operative RehabIn spite of the surgical process used, the postoperative rehabilitation protocol will probably be similar for all types. The point if difference is going to be that if screw/plate fixation was utilized these will be removed at around eight weeks. Stage 1: protection and Immobilization (0-6 months).The vast majority of surgeons would request a conservative six-week interval of sling that is complete immobilization to permit tissue recovery that is full with no undesirable stretch on enhancement apparatus or the ligaments used in surgery. This differs with other shoulder surgeries like shoulder reconstructions and rotator cuff repairs. The concern with sling removal in the first phase is the burden of the arm along with scapular provide a substantial traction force to the ACJ, and when that is allowed to happen in the first phases, then the ACJ may wind up getting excessive post-operative laxity. Most surgeons will urge no pendulum in the initial six weeks rather than permit the arm to be unsupported whilst in the position to prevent this. The goals so at this point are: 1. Allow recovery of soft tissues; 2. Reduce pain/inflammation; 3. Early protected range of motion; 4. Retard muscle atrophy in scapular stabilizers. The sling can be removed for cleanliness purposes. At two weeks post-op, the patient can begin passive range of motion (therapist- guided) or active assisted (patient-guided) flexion and abduction moves whilst lying in supine. All these abduction and flexion movements are gradually progressed per week two to six to 70 ° as pain permits. Normally internal and external rotation can be pushed to the limits so long as pain permits. Because this movement produces the best amount of strain on the 20, Extension motions are avoided in this phase. Soft tissue function to the pec major/ minor, subscapularis and the latissimus dorsi if the arm could be abducted off to expose those muscles are often started early. Due to the restriction on pendulum exercises at the shoulders that are ACJ-reconstructed, the arm tends to 'adhere' to the side fairly easily as a result of soft tissue contracture and adhesive capsulitis from the shoulder joint. Consequently, if the therapist is able to get into the shoulder , then gentle passive mobilisations of the shoulder joint (bodily in addition to attachment) are allowed for the glenohumeral joint. Scapular setting exercises can be performed in a confirmed position with the sling in situ. Allow pain ranges that are free of retraction and melancholy. These could be held as 10-second isometric contractions. This can be enhanced with muscle stimulators put on the trapezius and the stimulator set to an 'atrophy' mode. Similarly, muscle stimulators may be utilized on the deltoids and pec in an 'atrophy' style. In the patient, lie May start gentle isometric shoulder Turning and abduction exercises in four weeks post operative. Exit criteria for stage 11. Pain and inflammation in the ACJ. Stage 2: recover range of movement (7-12 weeks).The Main goals in this point are: 1. Gradual growth in range of motion; 2. Increase in isometric strength; 3. Maintain pain-free inflammation and ACJ. The sling is discarded at six weeks . Because of the restrictions placed on movement in the first 6 weeks, the progression of motion is to permit abduction and active assisted flexion then progress to only in weeks 9 through to 12. Rotation movements with the arm from the side could be improved unrestricted nonetheless, extension remains prevented until 10 weeks post-op. It's expected that the patient will have attained 90\% of range of movement into flexion, abduction and hands. Isometric deltoid, lat dorsi and pec important can be progressed at this stage in places; spinning potency could be worked with therabands through variety. Likely lying scapular retraction and depression drills can be improved in this stage. Since the patient achieves comfortable ranges of shoulder flexion, gentle wall slide exercise can be started to strengthen the serratus anterior. To execute a wall slide exercise (see image below) start with the forearms connected with the wall. Slide the forearms up the wall gradually externally rotating the arms/forearms on the way upward. This will produce scapula upward spinning and protraction to activate a necessary muscle in the control of scapula motion, the anterior. From week 7 onwards, treadmill running together with the affected arm is allowed for the athlete engaged with a running game. Because of this difficulty with this running technique, running velocities need to be limited to 12-14 km/hour. Using the arm kept locked from the side to minimize excessive shoulder flexion and extension movements running is enabled in weeks 9 and 10. Running is allowed in weeks 11 and 12 and rates can be progressed. It is hard to attain end speeds in this stage due to the flexion and extension of the shoulder required in the arm drive phase, therefore speeds can be curbed to maximum. Exit criteria for stage 21. 90 + % are achieved by Range of movement. 2. No pain in ACJ one hour post- exercises. 3. No night pain in the ACJ. 4. Pain-free running at rate. Stage 3: strengthening phase (13-16 weeks).The aims in this point are: 1. Regain whole selection of motion. 2. Regain 90+% pre-injury yanking power. 3. Regain 70 pushing against strength. 4. Neuromuscular control. 5. Integrate ability components. Range of movement that ought to be close to 90+% in 12 weeks is now pushed into end of variety rankings. This can be done with a great deal of athlete directed self-stretching for the worldwide mobilizers such as rotator cuff flexibility in infraspinatus and pectoralis major dorsi. What's more deep tissue myofascial releases to muscles as well as ACJ and glenohumeral joint mobilizations can be used to enhance arthrokinematics of the affected joints. Traditional strength work improved or is now begun if started. As a guideline, regaining strength in an ACJ is similar to regaining strength in a joint. It should progress based motion instructions. The order of movements directions that can be improved, and a direction added each week are: 1. Horizontal pulling (as an example, seated rows, susceptible flyes, susceptible pulls, 1 arm rows). 2. Vertical drawing (close grip pulldowns, 1 arm pulldowns, lat pulldowns, chin up variants). 3. Horizontal pushing (push-up variants, bench/dumbbell/cable presses, incline bench). 4. Vertical pushing (dumbbell/barbell shoulder press, lateral/front increases). 5. PNF diagonal patterns (flexion/ abduction/external turning to expansion/ adduction/internal rotation). It's anticipated that the end of week 16 has the majority of the movement directions re-introduced however the strength of the pushing movements will just be around 70 percent of pre-injury levels. What's more, any heavy traction movements to the shoulder for example deadlifts are avoided at this stage. Deadlifts with the scapular stored in retracted positions may be started, but most of the posterior chain strength operate will need to be performed away from deadlifts. Medium to high level proprioceptive work can be incorporated into this stage with exercises for example: 1. Ball arm wrestle. 2. Push-ups on instable surfaces. 3. Kind shoulder exercises. For the contact sport athlete involved in kind sports such as soccer, AFL skills are now able to commence in situations that are non-contact. Exit criteria for stage 31. Complete painless variety of movement. 2. Pain Free Scarf test. 3. Pulling on strength 90. 4. Pushing strength 70% pre-injury. 5. Pain-free running at full speed. Stage 4: return to game stage (16-24 months).The goals in this stage are: 1. Maintain painless full range of movement. 2. Regain 90+ strength. 3. Integrate back into training. This phase is a continuation of stage 3 in the athlete is still currently progressing back to shoulder strength whilst in increasing return to training. Pushing motions can be really progressed to regain 90+% of pre-injury strength. The athlete must have complete painless range of shoulder flexion, extension, abduction, hand behind back and flat flexion (scarf test). If the athlete is involved in a contact sport like American Football, AFL, the decision to begin contact that is controlled is also a choice based on certain criteria. Before starting contact, the athlete should Have the ability to perform: 1. Pain-free clap push-up; 2. Bench dip. Both of these movements impose a tensile and compressive pressure on the ACJ they are good screening movements if the ACJ has recovered from injury and surgery to ascertain. Exit criteria for stage 41. Complete painless variety of movement. 2. Pain-free scarf test/clap push-up/ seat dip 3. Pulling on strength close to pre-injury that is 100 percent. 4. Pushing strength 90 percent+ pre-injury. 5. Completed contact training. Return To Contact TrainingStaging an athlete back into a training situations that are competitive needs a development of drills and skills that resemble the demands of the contest whilst still allowing appropriate protection of their shoulder/ ACJ at crucial stages of recovery. A logical means is to alter the training environment from safe and controlled situations initially to events that are more advanced as they progress. For example, starting in then progressing to standing kneeling positions, walking and walking positions allows the athlete to practice contact elements without fear of further ACJ injury. Below is a good example of how an ACJ-injured athlete would progress contact situations for a combative sport such as combative sport like football. ConclusionReturning back an athlete in the surgically reconstructed ACJ is similar in time and material period to additional shoulder surgeries except for a couple of differences. First, the protection stage is far more important to stick to in the athlete as ancient motion from the sling may result in grip on the joint which may render the ACJ hyper-mobile from the post- operative phase. The progression of range of movement is different to shoulder operation because rotation movements are permitted nonetheless, extension is averted for the first ten weeks. Following these differences, return to game guidelines and the remainder of the rehab process is similar in content to shoulder surgeries in the development of range of motion contact in instruction. The stages of rehabilitation is going to be highly dependent on the sport. For the throwing athlete, proper throwing needs to be woven with all all the pitching, tennis, golf and swimming, similarly into the phases of rehab. The touch sports athlete includes a bunch of other complicating integrations that aren't a problem with athletes that are non-contact. Most of the ACJ-repaired athletes may return to sport participation within six months of operation based on the sport played. Some sports might be back competing in 14-16 months post- operative. Power athletes may take considerably longer and sometimes up to nine months post-operatively. References
1. Bontempo NA and Mazzocca (2010). Biomechanics and treatment of acromioclavicularand sternoclavicular joint
injuries. British Journal of Sports Medicine. 44. 361-369.
2. Bearn JG (1967) . Direct observations on the function of the capsule of the stemoclavicular joint in clavicle support. J Anat; 101:159-170.
3. Bosworth BM (1941). Acromioclavicular separation. New method of repair. Surg Gynecol Obstet; 71: 866-81.
4. Calvo E et al (2006) Clinical and radiologic outcomes of surgical and conservative treatment of type III acromioclavicular joint injury. Journal of Shoulder and Elbow Surgery.15(3); pp 300-305.
5. Fukuda et al (1986) Biomechanical study of the ligamentous system of the acromioclavicular joint. J Bone Joint Surg AnL 1986;68:434-440.
6. Headey J, Brooks JH, Kemp SP (2007). The epidemiology of shoulder injuries in English professional rugby union. Am J Sports Med;35: 1537–43.
7. Peterssen CJ (1983) Degeneration of the acromioclavicular joint. A morphological study. Acta Orthop Scand. 54; 434-438.
8. Richards RR (1993). Acromioclavicular joint injuries. Instr Course Lect. 42:259-269.
9. Rockwood CA (1998) Disorders of the acromioclavicular joint. Rockwood CA and Matsen F. The Shoulder. Philadelphia. USA. Saunders. 483-553.
10. Sugathan HK and Dodenhoff RM (2012) Management of Type 3 Acromioclavicular Joint Dislocation: Comparison of long-term functional results of two operative methods. International Scholarly Research Network ISRN Surgery Volume 2012, Article ID 580504, 6 pages.
11. Tossy et al (1963) Acromioclavicular separations: useful and practical classification for treatment. Clin Orthop Related Research. 28; 111-119.
12. Warden SJ.(2005) Cyclo-oxygenase-2 inhibitors: beneficial or detrimental for athletes with acute musculoskeletal injuries? Sports Med;35: 271–283.
In part I Chiropractor, Dr. Alexander Jimenez looked at chondral and osteochondral injuries to the patellofemoral joint, outlining the important pathophysiology and characteristic mechanisms for this injury, displaying signs and symptoms when this injury occurs. In part two, he considers the postsurgical rehabilitation of microfracture procedures. Chondral and osteochondral defects of the patella and/or trochlear groove may be a debilitating injury for the athlete who frequently will require surgical intervention. The rehabilitation following operation can be lengthy and involved, with a firm commitment from the patient to 'buy in' to the post-surgical rehab. A Substantial Quantity of work on microfracture methods and the subsequent rehabilitation post operatively was provided by Dr J Richard Steadman(1-4). Many of the ideas provided in this section are drawn from suggestions by the aforementioned author and also Tyler and Young(5). It is difficult to prescribe an Specific time-dependant or criteria-dependant rehabilitation protocol to microfracture procedures as the recovery time is directly influenced by the size of the defect as well as the bodyweight of the patient. Big lesions (>400mm2) in heavier athletes will take considerably longer to recover than smaller lesion (200mm2) from lighter athletes. The development through phases depends on both of these variables in addition to the response of the post-surgical knee to increases loading. What is consistent in rehab is the purpose of the initial period of recovery, in which it's important to deliver an optimum physical environment via secure weight bearing and passive motion to permit the mesenchymal stem cells that leak into the surgically created marrow clot to distinguish and create new cells and an extracellular matrix. With time these cells and matrix will grow to form durable fix tissue in the original flaw. Any ancient loading on this tissue has the capacity to damage the healing tissue and cause a failed fix; therefore loaded movement is limited in the first post-operative interval and slowly reintroduced to permit adaptation in the newly formed fibrocartilage to happen(1). Studies on primates with microfracture procedures revealed that at 6 months post- Operation, the fixed cartilage revealed restricted repair of chondral tissue but at 12 weeks the bone showed improved repair having a more mature hyaline cartilage(6). These findings suggest that constraints in weight bearing and protection of this defect site could be justified for greater than six weeks to allow the tissue repair to adapt to increased anxiety. CPMAfter surgery all patients are placed in a continuous passive motion (CPM) system to encourage variety of movement and also to promote tissue maturation for your first 3 months following surgery. Using CPM after microfracture (see Box 1) has demonstrated improvements in cartilage lesion levels in patients with full thickness chondral defects(7). Weight BearingThe patient is instructed to just 'touchdown weight endure' for the eight months following surgery to avoid any muscle contraction around the knee which may lead to compression of the tibiofemoral joint and/or patellofemoral joint. For accidents to the tibiofemoral joint, a motion limiting brace is not worn but to get a patellofemoral lesion the knee brace is proposed also is braced at 0°-20° expansion to avoid any flexion of the knee, which may result in the patella calling the femoral trochlear groove and make shearing at the maturing marrow clot. The brace is to be worn at all times except once the patient is in the CPM machine. Given the femoral condyles are Weight-bearing surfaces, restrictions are placed upon the amount of weight a patient is allowed to place upon the involved lower extremity. However, patellofemoral lesions are able to take more weight initially (around 30\% bodyweight) and that is progressed to weight bearing as tolerated from the brace from 2 weeks post-operation. For larger lesions of the patellofemoral joint (>400 mm2), weight-bearing is protected for the first 6 months. After the first 8 weeks, the individual can increase the weight-bearing as tolerated. The patient using a patellofemoral lesion is invited to fully weight bear in the knee motion brace from 8 months onwards. Nevertheless the brace is gradually opened to permit more knee flexion. Patients are slowly weaned off crutches over weeks 9 and 10 and the brace removed at 10 weeks post-operation. Mobilisations and patella/quadriceps mobilisations are initiated Immediately to prevent adhesion forming Between the patella and femur. This can also be encouraged in patellofemoral lesions. Total From early post-operative stages, except for The patellofemoral lesions, where flexion Isn't encouraged. Manual therapy is a Defining characteristic in the first 12 weeks later Operation. Once full passive range of movement Is restored with full extension and complete flexion (without a continuing knee effusion), The emphasis moves from range of Motion and progresses to strengthening. StrengtheningGentle non-weight bearing quadriceps contractions are encouraged from an early stage such as inner array quadriceps setting, right leg lift and muscle stimulators (on the atrophy setting), and this is continued for the first 12 weeks after operation. At this stage, supine/side lie inclined hip exercises are invited with resistance to keep some proximal hip muscle hypertrophy. In 12 weeks post-surgery, the patient ought to have near full range of passive and active motion, and strength training could be safely progressed. In tibiofemoral lesions, the ranges of movement allowed for strengthening are initially confined to 0 degrees to 300 degrees through this 12per week phase of rehab. Full weightbearingisallowedasthepatient feels comfortable; nevertheless the range is always limited in this age. In patellofemoral lesions, the surgeon will notice during operation where stage of knee flexion that the patella enters the trochlear groove and moves over the newly generated marrow clot. As an instance, at a small patella lesion, the surgeon may note that the patella contacts that the femur out of 20-40° of knee flexion, however before and following this range there is not any patella to femur contact. Loading the knee joint in flexion is subsequently averted in this 20-40° range for the first 4 months post- operation but loading up to 20° and out of 40° onwards is allowed. Loading may take the form of single leg squats, 1 legged leg presses and additional split squats (see Figure 2). Isometric holds can be added in the upper knee flexion angles and muscle stimulators can also be utilized along with these movements. Isometric holds can be added in the maximum knee flexion angles and muscle stimulators can also be utilized along with these motions. The focus of this 12-16 months post- surgery is to create a few quadriceps and hamstring endurance in secure places before the potency emphasis in weeks 17 onwards. More sport- specific lifting such as Olympic weight lifting is postponed until easy single leg motions can be performed via range and with no pain. It may be required at this stage to still protect bigger lesions in the painful variety of movement. Hip dominant movements that don't involve knee flexion under load can also be improved in this stage. By the week 24 onwards, it is expected that the individual will then be comfortable enough and have sufficient strength to advance to more traditional weight training applications, incorporate more volatile Olympic lifts and also have begun simple plyometrics-type moves. These are all gradually improved throughout the last stages of rehabilitation. Cardiovascular TrainingIn tibiofemoral lesions, gentle turning on the bicycle and deep water running (no touching the pool bottom) could be started when 1 week post-operation if the lesion is small. But, in larger lesions (>400mm2), this really is postponed to 4 weeks post surgery. At 12 weeks post-surgery, many non-impact cardio function is allowed for example spinning, water jogging, running, and treadmill walking. Spinning on the bike is completed initially without resistance until the patient can attain a comfortable 45 minutes pain free, and without post-exercise effusion. Then the load is slowly inserted and the time reduced to 20 minutes. This is built up to 45 minutes before another increase in load is allowed. This is gradually increased 5 minutes each session-assuming the knee suffers no pain and no post exercise effusion. Straightforward running mechanics drills could be started in 16 months post-operation, with a focus on drills to enhance hip/ knee/ankle mobility. The running time is increased 1 minute each week and walking period reduced each week so that after 5 months the patient should be able to run 20 minutes continuously. Bodyweight is increased 10\% per week so that by 5 weeks they're up to 100\% body weight. Speed and endurance drill are actively commenced at around 21 weeks post-operation and slowly improved over a 4-5 week period. By 26 months post-operation, the athlete must currently be able to perform the majority of the mobility, speed, agility kind drills prior to being reintegrated into group training. Generally athletes in high impact sports that involve cutting, landing, pivoting and abrupt deceleration can take 9 weeks to completely recover their physical abilities and also the confidence needed prior to return to competition. Long-Term ImpairmentThe long-term outcomes after having a microfracture procedure demonstrate some handicap to athletic purpose can be expected. After the microfracture procedure was performed in several athletes, improvements in role were initially seen. Lysholm knee scores increased by 56.8 to 87.2 after surgery while Tegner scores increased from 3.2 to 6 in the two-year follow up. The athletic population revealed an 80\% increase in sports activities during the initial 2 years, but this gradually declined to 55\% at 5 decades. This is sometimes attributed this decrease to the organic decline in your ability to perform at a high level with age in addition to the chance that the fibrocartilaginous repair tissue gets less resilience and might deteriorate over time(8). But, those athletes that have experienced a microfracture procedure will have the expectation that they'll return in competition in a span of 6-9 months after surgery. Once they've progressed through the phases of rehab, particular outcome measures may be used to determine the key exit criteria for complete return to sport. These are: - Minimum knee effusion article training
- Return to maximum jogging velocities
- Confidence in changing and landing direction
ConclusionKnee micro-fracture procedures involve a lengthy rehabilitation process which involves controlled passive movement with protected weight bearing. Because of the debilitating effects of protracted non invasive and lack of competitive quadriceps exercises in the early post- operative period, the patient may expect significant quadriceps wasting and functional limitation at the ten to twelve week stage following surgery. Therefore regaining full range of movement and redeveloping quadriceps muscle power is going to have a lengthy lengthy rehabilitation period. When the athlete has attained adequate weight bearing power, then return to functional capacities like running and changing direction will also be lengthy time dependant endeavour. Patience and consistency are required by both therapist and patient to slowly recover function, having the expected time to return to sport confidently often being greater than two weeks in duration. References
1. Clin Sports Med. 2010; 29; 257-265
2. J Knee Surg. 1980; 15:170-176
3. J Arthroscopic and Related Surgery. 2003; 19(5): pp 477-484
4. J Knee Surg. 2003; 16(2), pp. 83–86
5. Curr Rev Musculoskelet Med. 2012; 5:72–81
6. Am J Sports Med. 2005;33(5):680–5
7. Am J Knee Surgery. 1994; 7: pp 109-116
8. Knee Surg Sports TraumatolArthrosc. 2005;13:213–21
|
Shoulder chiropractor, Dr. Alexander Jimenez examines the latest research into shoulder problems and gives practical advice on achieving balanced upper-body development. Chronic shoulder injury is a common issue, and not only for athletes. Among the people at large, day-to-day activities such as DIY or gardening can produce chronic pain, as may resistance work at the gym, when weightlifters pile on the weight without paying attention to the demand for balanced strengthening. Adults beyond age 50 are more vulnerable to general to rotator-cuff tears, the incidence increasing with age(1). One large group, known as 'overhead athletes', are at increased risk of chronic shoulder injuries. The overhead group covers a broad array of sports such as swimming, tennis, cricket, javelin and baseball, all of which include variations on the standard throwing activity where the arm moves over the head (see below). The throwing movement recruits a large number of muscles and unites a massive assortment of arm motion with high forces or levels at the shoulder joint. All overhead athletes often perform many repetitions of the movement, typically with the dominant arm only, as part of their sports training. For the shoulder and arm to maneuver efficiently requires coordinated movement of the scapula and humerus, called scapulo-humeral rhythm. By way of instance, arm abduction is accompanied by some upward rotation of the scapula, allowing the deltoid muscle to maintain a good length-tension relationship throughout the whole 180 degrees of abduction. Scapular and humeral coordination also involves the stabilizing muscles of the scapula working in concert with the rotator-cuff stabilizing muscles of the glenohumeral joint. If the scapula retains its position correctly, the rotator cuff is going to do its job more effectively. Or, to put it another way, active stability is necessary to prevent excessive stress on the shoulder joint. Get The Balance RightThe importance of rotator-cuff muscle strength in throwing was examined by a researcher from the West Point Army Hospital at the US(2). Scoville et al looked at the strength of ordinary subjects without any shoulder injury symptoms, comparing strength ratios of the end range of lateral and medial rotation. Subjects were assessed on an isokinetic dynamometer (which measures joint strength). Full range of motion (ROM) was defined as 90 degrees of lateral rotation (forearm vertical) to 20 degrees of medial rotation (forearm 20 degrees below the horizontal). The average force produced in the last 30 degrees of each direction was assessed as end ROM. The group average strength ratios outcomes are as follows: The concentric lateral rotation to eccentric medial rotation ratio of 1:2.4 indicates the lateral rotators have readily enough strength to decelerate the arm as it moves back into the cock position. The eccentric lateral turning to concentric medial rotation ratio of 1.05:1 suggests that the lateral (external) rotators are capable of decelerating the forward motion, but only just. The results of Scoville's study suggest that ordinary adults without a shoulder problems possess adequately balanced strength for effective biomechanics of throwing. But it also shows how significant it really is for overhead athletes to keep that equilibrium of muscle strength, otherwise the lateral rotators might not have the ability to manage the more powerful lateral spinning force, compromising the shoulder joint. Problems often arise when athletes concentrate on their training solely on the prime mover muscles, such as pectorals and deltoids, resulting in a relative weakness of the rotator-cuff and scapular stabilizer muscles. It is common practice now for overhead athletes to pay additional focus on lateral rotator strengthening. The same information will apply to all those that do resistance training: be certain to include exercises for the rotator-cuff and scapular stabilizers in order to create balanced strength in the upper body. While the Scoville study analyzed rotation strength alone, we have already noted above that throwing combines spinning with flat extension and flexion movements. The rear deltoid muscles should also therefore act eccentrically to decelerate the arm throughout the end range when the pectorals and anterior deltoid are working concentrically. So strengthening applications must also look closely at back shoulder strength, including pulling and rowing movements to equilibrium pressing movements. Here, again, gym-goers have a tendency to be most unaware of the need for balanced development, typically focusing on the 'mirror muscles' (pectorals, deltoids and biceps) and neglecting the back. The ideal program is going to be one that boosts strength in all muscle groups and also develops a balanced physique, front and back. What Goes WrongRecent research from Kibler and McMullen (3) utilizes the idea of 'scapular dyskinesis': a change in the normal position or motion of the scapula during combined scapulo-humeral moves. They suggest that a wide variety of symptoms reveal exactly the same biomechanical fault, the inhibition or disorganization of activation patterns in scapular stabilizing muscles, resulting in altered scapular function. This idea is supported by research from a team from Belgium(4). Cools et al investigated the time of trapezius muscle activity during a sudden downward decreasing motion of the arm, comparing the operation of both 39 overhead athletes with shoulder impingement against the of 30 overhead athletes with no impingement. The trapezius operates on the scapula in 3 sections: the lower portion depresses, the centre portion retracts, and the upper portion raises it. Cools measured the time that the muscles took to change on in all three parts of the trapezius and at the middle deltoid, and discovered significant differences between both groups. Those with impingement showed a delay in muscle activation of the middle and lower trapezius the muscles which are important for preserving good shoulder positioning. Another study from Cools and his group(5) researched if 19 overhead athletes with impingement symptoms had differences in their scapular muscle power (measured by isokinetic dynamometer) and electromyographic activity on the affected and uninjured sides. They found that the injured side revealed significantly lower peak force during protraction, a significantly lower ratio of protraction to retraction force and significantly lower electromyographic activity in the lower trapezius through retraction. Collectively these findings support the idea of scapular dyskinesis involving abnormal recruitment timing and strength of the trapezius muscle, specifically the middle and lower portions. These results indicate the importance for harm prevention of good scapular stability in the depression and retraction movements. Research in Germany highlighted changes in flexibility at the shoulders of overhead athletes(6). Using ultrasound-based measurement, Schmidt-Wiethoff et al found that the dominant arm at a group of pro tennis players had a considerably greater range of external rotation compared to the non-dominant arm, even while their internal rotation showed a substantial deficit relative to the non-dominant arm. Furthermore, the total rotational assortment of motion of the dominant arm was significantly less than that of the non-dominant arm or of a management group. Among the control group (not included in any overhead sports), there were no important differences in flexibility between their own shoulders. How To Protect Your ShouldersIt would appear in the study that incorrect muscle function (developed through sport-specific demands or injury) is most evident at the lower and middle trapezius and lateral rotator-cuff muscles. From a practical viewpoint this means overhead athletes and people involved with weight training need to spend time on specific strengthening exercises to encourage injury prevention and ensure balanced strength and good posture. Step 1: Equalize Front & Rear StrengthThe beginning point is a balanced program for front and back shoulder muscle growth. Opposing muscle groups have to be trained equally. While exercises for the anterior shoulder and pectorals create power, to train just those muscles will unbalance the shoulder. The better approach is to plan exercise pairs that work opposing muscles (see Table 1). Coaches and therapists must check that equivalent quantities of sets from each column are written into strength programs. Step 2: Develop Good Pulling FormIt's crucial to do row or pull exercises with proper technique so as to ensure that the middle trapezius, rhomboids and lower trapezius muscles are properly recruited. As an example, the lat pulldown is a popular exercise for the upper-back and rear-shoulder muscles, involving adduction of the arm. The workout begins with the arms above the head. Throughout the pulldown motion the exerciser must focus on utilizing the lower trapezius muscles to depress the scapula while the massive latissimus dorsi muscles pull on the elbows downwards. And throughout the return motion, it's important to make the lower trapezius muscle 'keep hold' of the scapula as the arms rise with the weight. This recruiting creates the proper scapulo-humeral rhythm. Without correct use of these lower traps, the lat pulldown is performed in a hunched shoulder position, which promotes poor mechanics. Exactly the same coaching principle applies to rowing exercises. These involve horizontal expansion of their arm, utilizing the powerful latissimus dorsi muscles, and require concurrent scapular retraction in the middle trapezius and rhomboids. Exercisers should concentrate on retracting the scapula at the same time as the elbow is pulled straight back and maintaining the scapula retracted as the arm goes forward with the weight on the return motion. If the scapula is not stabilized the athlete will perform the practice in round-shouldered (kyphotic) posture, which again leads to bad shoulder joint mechanics. Measure 3: Isolate The Rotator CuffThe small but essential muscles of the rotator cuff should be targeted alongside the lower traps to prevent developing weakness or dysfunction. In the following four exercises, look closely at the coaching points. Exercise 1: Internal Shoulder RotationUse a resistance band or a pulley cable machine for this movement. Muscles targetedSubscapularis and pectoralis minor, the shoulder’s medial rotators. Start position ● Stand with good posture, abs in and shoulders wide. ● Grasp the handle out to the side, palm facing forward. ● Tuck your elbow firmly into your side and fix an elbow angle of 90 degrees. Movement ● Pull arm across your body. ● Finish with the palm facing into your body. ● Keep the elbow positioned close to your side to ensure the movement targets shoulder rotation alone. ● Hold upper body still, to prevent other muscles assisting the shoulder. Only your arm moves. ● Return to the start position slowly, under control, and repeat. Exercise 2: External Shoulder RotationUse a resistance band or pulley machine. Muscles targeted Infraspinatus and teres minor, the shoulder’s external rotators Start position ● Stand with good posture, abs in and shoulders wide. ● Grasp the handle with your forearm across your body, palm facing into your body. ● Hold your elbow close to your side and fix an elbow angle of 90 degrees. Movement ● Pull the arm out and away from your body. ● Finish with the palm facing forward. ● Keep the elbow positioned close to your side to ensure the movement targets shoulder rotation alone. ● Hold upper body still, to prevent other muscles assisted the shoulder. Only your arm moves. ● Return to the start position slowly, under control, and repeat. Exercise 3: Side Lying RaiseMuscles targeted Supraspinatus (top of the rotator cuff), assisted by the deltoid and infraspinatus. This exercise is particularly effective at recruiting rotator-cuff muscles while avoiding putting the shoulder joint through a stressful range of motion. It is therefore beneficial for those with shoulder injury. Start position ● Lie on your side with your body straight. ● Place top arm straight so your hand lies by your hips, holding a dumbbell. ● Use your scapular muscles to pull your top shoulder into a wide position. Avoid hunched or rounded top shoulder. Movement ● Lift the dumbbell straight up until your arm makes a 45 degree angle. ● Ensure your body does not roll or sway, only your arm moves. ● Lower the arm slowly, under control, and repeat. Exercise 4: Human ArrowMuscles targeted Lower trapezius, focusing on scapular depression. This movement can take a little time to learn, so don’t expect clients to get it first time. Start position ● Lie on your front with your arms by your sides. ● Have your palms facing up and fingers pointing towards your feet. ● Eyes look down into the floor, nose just off the ground. ● Do not lift your head, so your neck remains relaxed. ● Engage your abdominals and pelvic floor to keep your lumbar spine in place. ● Let your shoulders fall forward and rounded to the floor. Upper back starts relaxed. Movement ● Pull your shoulder blades back and down so that your fingers slide down your side towards your feet. Feel that you are extending your arms down. ● Your upper back will extend slightly and all your muscles around your scapula will feel strong. You will feel your shoulder blades pull downwards into your back if you engage the lower traps correctly. ● Do not extend your lumbar spine and lift up off the floor. The low back should remain flat as the exercise is designed to isolate the scapular muscles. It is not a dorsal raise. ● Hold the position for 10 seconds and relax. ● Repeat 10 times. References: 1. Milgrom C, Schaffler M, Gilbert S, van Holsbeeck M, Rotator cuff changes in asymptomatic adults. The effect of age, hand dominance and gender. J Bone Joint Surg Br. 1995 Mar; 77(2):296-8
2. Scoville CR, Arciero RA, Taylor DC, Stoneman PD, End range eccentric antagonist/concentric agonist strength ratios: a new perspective in shoulder strength assessment. Journal of Orthopaedic Sports and Physical Therapy 25(3), 1997
3. Kibler WB, McMullen J, Scapular dyskinesis and its relation to shoulder pain. J Am Acad Orthop Surg. 2003, 11(2)
4. Cools et al. Scapular muscle recruitment patterns: trapezius muscle latency with and without impingement symptoms. Am J Sports Med. 2003, 31(4)
5. Cools et al. Evaluation of isokinetic force production and associated muscle activity in the scapular rotators during a
protraction-retraction movement in overhead athletes with impingement symptoms. Br J Sports Med. 2004 38(1)
6. Schmidt-Wiethoff et al, Shoulder Rotation Characteristics in Professional Tennis Players. Int J Sports Med. 2004 Feb;25(2)
Chiropractic injury specialist, Dr. Alexander Jimenez examines a preventive injury approach based on the very best of what's known. In sports medicine, there's not any tougher challenge than hamstrings -- often our most commonly seen injury, as well as uncomfortably significant re-injury rates. With a growing amount of research in this area(6), this is a good time to bring the literature together and invent an evidence-based method of preventing hamstring injury and recurrence. Injury incidenceIt is painfully easy to find evidence. Various sports report high squad incidences of hamstring injury, for example: - 18% and 20% per season among sprinters.
- 40% over two seasons among track and field athletes.
- 12%,16%, and 23% per season in Australian Rules footballers(8,2,9,10,11,12).
- In one sprint season, every second injury was to a hamstring(8).
- 12% and 13-16% of injuries per season in soccer(2, 3).
Reports of re-injury rates run as high as 39% in soccer, 12%, 17% and 31% in Aussie Rules and 23% in rugby union(3,1,2,5, 46). Risk FactorsThe logic of identifying risk factors is to modify these so as to decrease injury levels. We will need to know not just which factors are risky, but just how they influence harm. Modifiable Factor 1): The HamstringsPowerful recent evidence implicates strength shortages as a pre-disposing factor for hamstring injury. The imbalances usually analyzed are: hamstring to quad (H:Q); eccentric to concentric (E:C); and side to side (S:S). By comparison, the demand for hamstring flexibility is much less apparent in the signs. Since 2008 a number of isokinetic strength studies, such as a very large one, have shown isokinetic strength shortages to be predictive of hamstring injury. Back in Hong Kong, athletes using a diminished H:Q had 17 times increased risk of hamstring injury (8) and in elite Japanese sprinters S:S weakness has been correlated with hamstring injury(two). One of 462 Belgian soccer players, the injury rate was considerably higher among gamers with isokinetic power imbalances, compared to those without(6). Past injury is an integral factor (see below), and a study may help us to understand why. It reports that optimum length (ie, the best muscle length for active stress) has been found to be briefer in formerly injured muscles. Reduced/shorter 'optimal span' could perhaps predispose the hamstring to injury during eccentric loading in its outer variety (ie, once the muscle is nearing full stretch)(16). The role of hamstring flexibility remains unclear: one study (Aussie Rules) revealed that sit-and-reach evaluation results didn't correlate with cerebral muscle injury(11). In a bigger Belgian soccer study, nevertheless, those injured had previously had considerably bad hamstring flexibility(17). Modifiable Factor 2): Other StructuresOne of Aussie rules players, too little flexibility in quadriceps(18) and hip flexors(19) has been predictive of hamstring injury. The same studies investigated restricted ankle dorsiflexion and concluded that this could have some relevance(19). I discuss this below. Weak gluteals are implicated due to their job as concentric hip extensors. It has been proven that sprinters with S:S fatigue in concentric hip expansion were more prone to hamstring injury on the weak side(two). Equally all pelvic muscles help to maintain pelvic stability and hence reduce injury threat(41). Non-Modifiable Risk FactorsAlthough the following factors are unalterable, it makes great sense to consider these when targeting particular players for preventive programs, especially in the event that you don't have access to expensive and time consuming isokinetic testing. Two studies found the best risk factor for a previous posterior thigh injury (12) or a past history of hamstring injury (19). This goes some way to describing recurrence rates touching 40% in 1 study(3). Some studies confirm that age is a factor, with older players at elevated risk(12,19,18,1). Players of black cultural origin(1) and Aboriginal descent(12) have been demonstrated to be more than averagely vulnerable. If, for instance, you're responsible for a black 29-year-old participant with a hamstring injury background, you'll have both rationale and evidence to direct your use of a preventive program with that individual. Mechanism Of InjuryTo examine more precisely the mechanism of harm, we must consider the part of the hamstring muscle. Injury generally occurs in a sprinting scenario. Quick active extension of the knee requires the hamstrings to act eccentrically to decelerate the late swing-phase; but then they have instantly to change to concentric loading during early stance phase, where they behave as hip extensors(20). This stage sets the hamstrings in their outer range, in the very moment they have to make the greatest effort. Fig 1 (below) helps illustrate how these risk factors interact. The eccentric action of the sprint creates very high intrinsic forces at the hamstring muscles(8). If at any stage the load exceeds the mechanical limit tolerated from the muscular unit, this will cause collapse(6) -- probably to be the result of excessive fibre stretch during a lengthening contraction(15). And the faster the exercise speed, the higher the eccentric torque created (22). Therefore it appears that hamstrings are hurt during eccentric contraction at the late swing phase of sprinting(48). Most injuries include the biceps femoris muscle(1,47). This might be because at sprints of 80 percent to 100% of high speed, summit lengths are significantly longer and occur later than in another hamstring muscles(23). In this last period of gait, a high-force stretch-shortening cycle happens, and the hamstring unit relies on its non-contractile component to absorb, then generate force(22,24). We can now start to learn the way the reduced isokinetic strength profile could cause hamstring overload and injury. Hamstring flexibility becomes an issue if you regard that harm happens in late swing/early posture stage, once the muscle is lengthened. Logically, a short muscle must invest additional time in its outer range (ie, slightly lengthened under pressure) so as to come up with a typical powerful stride length. This places the lengthened hamstring under more stress and might explain why short hamstrings can be prone to trauma(17). In the exact same way that 'optimum length' (the muscle's optimal length for active tension) is found to be shorter in previously injured muscles (see above), this decreased length could also predispose the hamstring to injury in the exact situation(16). The Fatigue FactorAnd here is something you may discover surprising: there's a strong rationale and a few evidential back-up to imply that both general aerobic and particular hamstring endurance operate are strongly implicated in injury. Hamstring injuries are most frequent during rivalry(1), even when effort should be at its highest. It is well known that in football a significant increase in injury is observed toward the end of each half(1). This may well be explained by the reduction in bizarre hamstring torque generation and operational power ratio -- caused by fatigue -- which players tend to suffer from at the conclusion of football halves. The angle of peak torque generation increases significantly (ie, the best length gets shorter) as every half goes on(42). Other factors include: - Muscle elasticity (which buffers the muscle fibers) reduces with length(48)
- Fatigued muscles consume less energy before they fail(26)
- Hamstrings fatigue comparatively faster than their antagonist, which will affect the H:Q ratio adversely(27).
Place this lot together in plain English and also you get a hamstring muscle that, as exercise duration raises, is weakening relative to its antagonist, and getting unable to create and absorb as much pressure in its own exposed selection. We know that sprint times slow and stride lengths shorten as exhaustion sets in(43). Therefore any athlete lacking endurance will put their hamstring at a compromised position. To now demand high rates and stride lengths can only risk injury. It's A Multi-Factorial ThingFatigue is not likely to be the sole factor in play. Here are some other prime contributors to injury: Hip flexor length is as important as hamstring length(48). The two rectus femoris and hip flexors can anteriorly rotate the pelvis. In late-stance stage, brief contralateral (opposite side) hip flexors will rotate the anus relatively anteriorly; and in late-swing phase the ipsilateral (same-side) leg will need to stride somewhat further to generate a normal powerful stride length. This will place the hamstring further into its vulnerable outer range. Similarly, a lack of dorsiflexion in the contralateral ankle during mid- to late-stance phase may limit a normal stride length -- again, causing the ipsilateral leg to over-stride. I've seen this in a young player with no history of hamstring injury who returned to play after a significant ankle injury, which had left him having significantly reduced dorsiflexion. On his return, this player, once worried (two matches in four days, as needs must), proceeded to severely rip his contralateral hamstring. The glutes play a twofold function. Primarily, neuromuscular control of the pelvis may permit the hamstrings to operate at safe spans(41). As posterior rotators of their pelvis, contralateral gluts control (ie, limit) anterior rotation in late stance phase, thereby helping to normalize ipsilateral stride length. Secondly, the glutes can act as synergists to the concentrically behaving hamstrings during early stance phase. It's been shown that concentric hip extensor weakness could induce a player to hamstring injury (two). So it can be that more powerful and more effective glutes will float the hamstrings at this point. Abdominal muscles are rarely mentioned from the hamstring injury literature, but no doubt that they play a part. As controls of pelvic rotation (combined with glutes), they could reduce anterior pelvic tilt and the negative effect of tight hip flexors and low back muscles. In summary, whatever regulates anterior pelvic rotation will help normalize stride length in late swing phase, which shields the hamstrings by maintaining them functioning inside a positive range (41). And conversely, any compromise or compensation to attain, 'normal strong stride length' will place the hamstrings at a mechanical disadvantage, raising the probability of damage. InterventionsPrevention is also, as always, the best medicine. And the key to an effective intervention would be to direct it to the right athletes, which means screening. There's both strong rationale and evidence to guide the screening procedure, which will in turn, guide your prescription. The time you save in not needing to train inappropriate players can then be spent with the 'at risk' players. Hamstring strength will be the mainstay of a prevention program. One out of both match athletes will have significant isokinetic strength shortages(6). I talk below where to 'set the bar' for isokinetic screening, a 'poor man's' algorithm/rationale for strengthening, and the rationale for exercise selection. Setting The Bar For Isokinetic TestingHow do you determine that athletes require a preventive intervention? Reports give a fairly confusing variety of outcomes. Most predictive studies indicate that a conventional (concentric: concentric) H:Q ratio of over 0.6 predicts injury. Actual figures include 0.6 , 0.61, 0.55, 0.47 and 0.57 or 0.55 (8,11,35,36,6). Logically, the operational H:Q ratio (bizarre hams: concentric quads) should best reflect injury risk, provided that it examines the ability of the eccentrically acting hamstrings to decelerate the concentrically acting quadriceps in late swing phase(8), where trauma typically happens(48). It appears that if cut-off is put at 0.98 (biodex), athletes under this are 'in danger'(8,6). The Croisier study (level of evidence 1) also showed that using only the 0.6 conventional ratio can miss as many as 30 percent of imbalances. Croisier also showed that a functional ratio higher than 1.40 eliminated risk of trauma, so get your athlete on the weights! The Croisier study used an imbalance of higher than 5% (between the 2 sides), though it accounts 10% and 20 percent being used in different research studies. 1 key point is that the further steps you use, the less chance of missing an in danger athlete. Consequently, if you place your cut-offs as follows... - Conventional ratio 0.6
- Functional ratio 0.98
- Side-to-side gap 5%
...you need to catch your at-risk athletes. Two cautionary notes: optimal isokinetic ratios differ between sports, so every individual game might have to set its own cut-off points(29). And keep in mind that the modest but real danger of injury involved with isokinetic testing(30,6). Poor Man's Assumption AlgorithmWithout isokinetic testing, you could be able to reason (evidence-based) or make some assumptions about who to include in preventative strengthening applications, following the algorithm in Fig 2. Rationale For Exercise SelectionThe perfect exercise involves using a well-controlled neutral pelvis as a base for the final phase of high-speed knee extension, followed immediately by hip extension, to strengthen the hamstrings in their outer range and improve their ‘optimum length’, without forgetting the need for endurance. Simple. One school of thought splits the task into three sections(31): i. High-load posterior chain exercises (glutes, hamstrings, lumbar extensors)To target hip extension in closed chain in the outer range, to be specific to late swing/early stance of gait. Ideal strengthening exercises are: - two-legged Romanian Deadlifts
- two-legged Good Mornings(31).
ii. High-volume eccentric exercises (including rotation)To target eccentric phase and train endurance; to improve the length-tension relationship of the muscle(16,28). Ideal exercises include: - one-legged Romanian Deadlifts
- one-legged Good Mornings
- Nordic hamstrings
A late-stage progression will be to add external rotation to any exercise, reflecting the external rotation role of biceps femoris(31). iii. Stretch-shortening phase exercisesRunning drills, plyometrics and gym-based pulleys or bands should be used to target timing and control of eccentric followed by rapid concentric movement. This may include coordination, other leg, speed and bounce exercises. The end stage of this will be sport-specific training drills, which are an effective prevention strategy(37). The aim is to optimize timing, control and endurance of the late swing/early stance phase, where the stretch-shortening phase occurs(22,24). The stretch-shortening cycle provides a buffer and reduces the stretch on muscle fibers(48) but the effect diminishes with duration(48). This suggests that endurance plays a key role in prevention(1,42,26,27), hence running drills (anaerobic intervals) are part of an effective prevention program(37). There is evidence to reassure us that resistance training does correct these imbalances. Nordic hamstring curls, for instance, have been shown to improve H:Q ratios from 0.89 to 0.98 (although note that standard curls had no effect)(32). Another study(33) showed that six weeks of strength training emphasizing the hamstrings improved functional H:Q ratios from 0.96 to more than 1.00 . A recent study showed that if you want strengthening to reduce the negative effects of fatigue, then these exercises should be performed as part of the cool-down, rather than the warm-up(25). The same appears to apply to stretching, which is best performed when fatigued(37). Testing EffectivenessA study of English rugby players found that Nordic hamstring exercises reduced the incidence and severity of hamstring injuries(5). Two more research in football successfully utilized the same exercise to greatly reduce hamstring injuries in contrast to controls(3,34). It appears that measuring the efficacy of the program does more than just demonstrate progress -- it may actually play a substantial part in consolidating advancement. Back in 2008 Croisier et al showed that by adjusting imbalances (as quantified by successive sessions of isokinetic testing) that they could decrease injury levels to people of players with no imbalances. However, if the isokinetic testing sessions were omitted, and the players were therefore unable to get objective feedback about attaining 'normalization' in their rehab attempts, their subsequent reductions in re-injury rates were not statistically significant. These favorable studies simply looked at strength parameters. Is it possible that by fixing other particular individual risk factors, as mentioned above, we can yield even more beneficial effects? Rehabilitate The InjuryEven the very best prevention approaches can't altogether banish hamstring injuries. With recurrence levels being so high(3,1,2,5), successful rehabilitation is an integral part of a prevention program. In most athletes with a history of injury, even when matched, the injured hamstring is still poorer(40,38)and 'optimal span' is shorter(16). So, again, it comes down to strengthening. Thus, in 26 previously injured athletes, 18 were found to possess a power deficit; those 17 who successfully bolstered the hamstrings to rigorous parameters prevented any further injury during the next season(40). Evidence of effective rehab also lends weight to the argument that hamstring span(17) and also poor spinal management(2,41,48) are risk factors. Athletes who did more stretching were discovered to have shorter rehabilitation times(39); apps that focused on improving neuromuscular control of the lumbopelvic region were more effective than conventional rehab alone (41). Alongside rehabilitation, it needs to be ensured that the athlete is back to decent levels of fitness. As there are no consensus guidelines for this(45), it is useful to refer to this athlete's previous aerobic and rate testing scores. Early exhaustion arising from bad aerobic fitness can compromise hamstring muscle functioning(42,43) and place the hamstrings at a physiological disadvantage. Not only should an athlete test ordinary for speed, but as injuries occur at top speed (21), They should have trained at full speed to gain this specific training impact. Lastly, if at all possible, hamstrings should be tested isokinetically to make sure that sensible strength parameters have been reached(38). The timing of return to competition must be the collectively agreed decision of all parties involved. When analyzing the risk/benefit profile of a recurrence, you want to think beyond simply the likelihood of a repeat accident. In a study of Aussie Rules players, participant performance upon return to game from hamstring injury (as assessed by the team coach) has been substantially reduced(44). It is very important that an athlete reach complete normal function when they should be expected to work well in competition. And Another Thing...We haven't yet mentioned the lumbar spine, sacroiliac joint, or adverse neural tension (ANT) as preceding and potentially predisposing a player to hamstring injury. A history of lumbar spine injury doesn't correlate to hamstring injury risk(12). After the concept, however, that anything which interrupts standard powerful stride length increases injury risk, a rigid or rotated pelvis (SIJ lumbar spine) or ANT leading to lack of flexibility in late-swing stage could be responsible. Equally, any source of pain or aggravation of neural interfaces (by way of instance nerve roots, neural foramen, piriformis) that raised hamstring muscle tone would again set the hamstrings in a mechanical disadvantage. According to this understanding, one of our athletes went to Germany, where they had been exposed to 43 injections, therefore I for one hope the rationale holds good. With this luxury (and possibly even with it), the best expectation would be to improve lumbopelvic control, not only to safeguard the lumbar spine structures but also to unload the hamstrings. ConclusionFollowing this tour around the pelvis, to describe hamstring injury as multi-factorial seems understated. All players should undergo the identical screening and identification processes. But all prevention/rehab interventions need to be tailored to the patient so they target appropriate risk factors. Sources: 1. Woods C, Hawkins R et al. The F.A. medical research program: an audit of injuries in professional football – analysis
of hamstring injuries. Br J Sports Med 2004;38 (1): 36-41.
2. Sugiura Y, Saito T et al. Strength deficits identified with concentric action of the hip extensors and eccentric action
of the hamstrings predispose to hamstring injury in elite sprinters. J Orthop Sports Phys Ther 2008;38:457–64.
3. Arnason A, Andersen TE et al. Prevention of hamstring strains in elite soccer: an intervention study. Scand J Med Sci
Sports. 2008; 18:40-48.
4. Orchard J, Seward H. Epidemiology of injuries in the Australian Football League, seasons 1997–2000. Br J Sports
Med 2002;36:39–45.
5. Brooks JHM, Fuller CW et al. Incidence, risk, and prevention of hamstring muscle injuries in professional rugb union. Am J Sports Med. 2006;34:1297-1306.
6. Croisier JL, Ganteaume S et al. Strength imbalances and prevention of hamstring injury in professional soccer players: a prospective study. Am J Sports Med 2008;36:1469–75.
7. Tyler, T F. The effectiveness of a prevention program to prevent adductor muscle strains in professional ice hockey
players. Am J Sports Med. (2002). 30(5).
8. Yeung SS, Suen AM et al. A prospective cohort study of hamstring injuries in competitive sprinters: preseason
muscle imbalance as a possible risk factor. Br J Sports Med. 2009;43(8): 589-94.
9. Yamamoto T. Relationship between hamstring strains and leg muscle strength. A follow-up study of collegiate track
and field athletes. J Sports Med Phys Fitness. 1993;33:194-199.
10. Bennell K, Wajswelner H et al. Isokinetic strength testing does not predict hamstring injury in Australian Rules
footballers. Br J Sports Med. 1998;32:309-314.
11. Orchard J, Marsden J, Lord S, et al. Preseason hamstring muscle weakness associated with hamstring muscle
injury in Australian footballers. Am J Sports Med 1997;25:81–5.
12. Verrall GM, Slavotinek JP et al. Clinical risk factor for hamstring muscle strain injury: a prospective study with
correlation of injury by magnetic resonance imaging. Br J Sports Med 2001;35:435–40.
13. Bennell K, Wajswelner H et al. Isokinetic strength testing does not predict hamstring injury in Australian Rule
footballers. Br J Sports Med 1998;32:309–14.
14. Dauty M, Potiron-Josse M et al. Consequences and prediction of hamstring muscle injury with concentric and
eccentric isokinetic parameters in elite soccer players [in French]. Ann Readapt Med Phys. 2003;46:601-606.
15. Lieber RL, Fridén J. Mechanisms of muscle injury gleaned from animal models. Am J Phys Med Rehabil.
2002;81:S70-9.
16. Brockett CL, Morgan DL et al. Predicting hamstring strain injury in elite athletes. Med Sci Sports Exerc.
2004;36:379-387. 17. Witvrouw E, Danneels L et al. Muscle flexibility as a risk factor for developing muscle injuries in male professional
soccer players. A prospective study. Am J Sports Med. 2003 Jan-Feb;31(1):41-6.
18. Gabbe BJ, Finch CF et al. Risk factors for hamstring injuries in community level Australian football. Br J Sports
Med. 2005;39(2):106-10.
19. Gabbe BJ, Bennell KL et al. Predictors of hamstring injury at the elite level of Australian football. Scand J Med Sci
Sports 2006;16:7–13.
20. Petersen J, Hölmich P. Evidence-based prevention of hamstring injuries in sport. Br J Sports Med. 2005;39:319-323.
21. Hagel,B. Hamstring injuries in Australian football. Clin J Sport Med. 2005; 5:400.
22. Stanton P, Purdam C. Hamstring injures in sprinting: the role of eccentric exercise. J Orthop Sports Phys Ther.
1989;10:343-349.
23. Thelen DG, Chumanov ES et al. Hamstring muscle kinematics during treadmill sprinting. Med Sci Sports Exerc. 2005;37:108-114.
24. Thelen DG, Chumanov ES et al. Simulation of biceps femoris musculotendon mechanics during the swing phase of
sprinting. Med Sci Sports Exerc. 2005;37:1931-1938.
25. Small K, McNaughton L et al. Effect of timing of eccentric hamstring strengthening exercises during soccer
training: implications for muscle fatigability. J Strength Cond Res. 2009 23(4):1077-83.
26. Mair SD, Seaber AV et al. The role of fatigue in susceptibility to acute muscle strain injury. Am J Sports Med. 1996;24:137–43.
27. Sangnier S, Tourny-Chollet C. Comparison of the decrease in strength between hamstrings and quadriceps during
isokinetic fatigue testing in semiprofessional soccer players. Int J Sports Med. 2007;28(11):952-7.
28. Potier TG, Alexander CM et al. Effects of eccentric strength training on biceps femoris muscle architecture and
knee joint range of movement. Eur J Appl Physiol. 2009; 105(6): 939-44.
29. Magalhaes J, Oliveira J et al. Concentric quadriceps and hamstrings isokinetic strength in volleyball and soccer
players. J Sports Med Phys Fitness. 2004;44:119–25.
30. Orchard J, Steet E et al. Hamstring muscle strain caused by isokinetic testing. Clin J Sport Med. 2001;11:274–276.
31. Brandon R and Cleather D. Training the hamstrings for high speed running – part II. Professional Strength and
Conditioning. 2007;7. 3.
32. Mjølsnes R, Arnason A et al. A 10-week randomized trial comparing eccentric vs. concentric hamstring strength
training in well-trained soccer players. Scand J Med Sci Sports. 2004 Oct;14(5):311-7.
33. Holcomb WR, Rubley MD et al. Effect of hamstring-emphasized resistance training on hamstring:quadriceps
strength ratios. J Strength Cond Res. 2007;21(1):41-7.
34. Askling C, Karlsson J et al. Hamstring injury occurrence in elite soccer players after preseason strength training with
eccentric overload. Scand J Med Sci Sports. 2003;13:244–50.
35. Heiser TM, Weber J et al. Prophylaxis and management of hamstring muscle injuries in intercollegiate football players. Am J Sports Med. 1984;12:368–70
36. Croisier JL, Reveillon V et al. Isokinetic assessment of knee flexors and extensors in professional soccer players.
Isokinet Exerc Sci. 2003;11:61–2.
37. Verrall GM, Slavotinek JP et al. The effect of sports specific training on reducing the incidence of hamstring
injuries in professional Australian Rules football players. Br J Sports Med. 2005;39(6):363-8.
38. O’Sullivan K, O’Ceallaigh B et al. The relationship between previous hamstring injury and the concentric isokinetic
Knee muscle strength of Irish Gaelic footballers. BMC Musculoskelet Disord. 2008 6;9:30.
39. Malliaropoulos N, Papalexandris S et al. The role of stretching in rehabilitation of hamstring injuries: 80 athletes
follow-up. Med Sci Sports Exerc. 2004;36(5):756-9.
40. Croisier JL, Forthomme B et al. Hamstring muscle strain recurrence and strength performance disorders. Am J
Sports Med. 2002;30:199-203.
41. Sherry MA, Best TM. A comparison of 2 rehabilitation programs in the treatment of acute hamstring strains. J
Orthop Sports Phys Ther. 2004;34:116–125.
42. Small K, McNaughton L et al. The effects of multidirectional soccer-specific fatigue on markers of hamstring injury
risk. J Sci Med Sport. 2008 Oct 29.
43. Small K, McNaughton LR et al. Soccer fatigue, sprinting and hamstring injury risk. Int J Sports Med. 2009 Aug;30(8):573-8.
44. Verrall GM, Kalairajah Y et al. Assessment of player performance following return to sport after hamstring muscle
strain injury. J Sci Med Sport. 2006;9(1-2):87-90.
45. Orchard J, Best T et al. Return to play following muscle strains. Clin J Sport Med. 2005;15:436–41
46. Orchard J, Best T. The management of muscle strain injuries: an early return versus the risk of recurrence. Clin J
Sport Med. 2002;12:3–5.
47. Koulouris G, Connell D. Evaluation of the hamstring muscle complex following acute injury. Skeletal Radiol. 2003;
32(10):582-9.
48. Thelen DG, Chumanov ES et al. Neuromusculoskeletal models provide insights into the mechanisms and
rehabilitation of hamstring strains. Exerc Sport Sci Rev. 2006;34:135-141.
Fraser, a promising young Australian Rules football player who had sustained an inversion sprain of the ankle. I saw him soon after the episode and it seemed like the rehabilitation process would be short and straightforward. I was confident enough about this to inform the coaching team that Fraser would shortly return to the training paddock, ready for the upcoming final series. As it turned out, I was wrong. Injury specialist, Dr. Alexander Jimenez assesses the case further. A couple of weeks passed; Fraser's ankle selection of motion returned and he managed to finish stationary balance exercises and strengthening exercises. However he couldn't hop on the bad leg or operate without ankle pain. I began to think that this rehabilitation cycle might become a little extended. He was then sent to see a sports doctor to seek further explanation as to why the injury was taking so long to heal. The sports doctor thought that the young footballer should adopt a "wait and see strategy," sitting outside the rest of the season and starting to train again in the brief off-season. This advice did not go down well either with the athlete himself, or the coaching team. Six weeks after, when I next saw Fraser, he still could not jump on the leg pain-free, so was still unable to do any running. He had rehabilitated his ankle as far as he could, but just could not get past this step. He still had swelling over the ATFL, but had full range of motion with no laxity in any of the supporting ligaments. It was then that I tried a different treatment technique, a posterior glide of the fibula in the lateral malleolus. I recorded the fibula in a posterior direction, and Fraser managed to jump pain-free for the very first time in 19 weeks. It was a miracle. Or maybe not: Brian Mulligan, the mythical New Zealand physio, has provided the physiotherapy profession with numerous guide techniques to help fix joint immobilities and subluxations. This is but one of the invaluable therapy methods he prescribes (1). I saw Fraser again 10 days later and he had been up to conducting 1.5km without pain; he was also positive that he would complete his rehabilitation before pre-season training. The fascinating thing about all this is that I'd already attempted Mulligan's posterior glide two months earlier, with no effect -- no decrease in pain nor increase in function. Why did tape and the manual gliding of the fibula belatedly help, and why had it not assisted at a previous stage? The answer can be found in the anatomy of the anterior ankle. Irritation in the lower edge of the inferior tibio-fibular ligament and the very front of the anterior talo-fibular fascia can thicken these ligaments, setting up a series of knock-on effects. The irritated and thickened tissue becomes vulnerable to getting pinched between the tibia and talus as the foot is dorsiflexed. The ligaments may also begin to rub on the joint capsule of the ankle, which can inflame the synovial lining of the capsule, causing synovitis. Finally, the inflamed ligaments can form too much scar tissue along the front and side of the ankle joint, creating a small mass of tissue called a meniscoid lesion. Dorsiflexing the ankle can trap the tissue between the edge of the ankle joint, causing pain, popping, and a feeling that the ankle will give way and not support body weight. The tape helps to offload the fibula or move the pressure away from the antero- lateral surface of the ankle. Fraser was then able to load up the ankle with running and hopping -- with small, if any, soreness. However, my first effort at this therapy, had, I think, been too early, once the area was probably still overly inflamed to reply positively. Only when the structures had all calmed down was it possible to proceed in the rehabilitation. When treating acute ankle sprains, caregivers are educated to encourage the client to regain ankle dorsiflexion as soon as possible, because study shows that the earlier the person regains this motion, the earlier they will be back to normal function. In years past I have awakened many customers pain by making them do repeated dorsiflexion exercises, or simply by mobilizing the anterior ankle joints. Now I'm being much more competitive about pushing my clients to recover this dorsiflexion, as sometimes this can clearly result in more irritation -- slowing rather than speeding recovery. There was not anything unusual about Fraser's ankle injury concerning the origin -- it was only a great deal of damage to a very sensitive portion of the ankle joint. I feel the moral of this brief story is that the therapist needs to add up all the information offered by the patient and treat them without using a pre-determined recipe. Think anatomically, picture what has happened to the tissues and don't be afraid to revise your strategy as you proceed; this will direct you to better treatment choices and the patient will recover quicker. References
1. Brian Mulligan. Manual therapy –”NAGS”, “SNAGS”, ”MWMS” etc. (5th ed) 1995. Wellington. Plane View Press.
Aaron was a final-year high school student and keen soccer referee. Complaining of mid-back pain, especially after he had refereed three or even four matches in a single day (which he often did). He experienced this same pain when he was sitting studying, but it was more prevalent after refereeing. He also advised me his quadriceps appeared to fatigue a whole lot more than the rest of his muscles after running around a whole lot. Scientific spine specialist, Dr. Alexander Jimenez takes a look at the case. My first assessment of Aaron's spinal posture was that he was quite kyphotic (bent forwards) through his torso, with accompanying cervical spine flexion -- in sitting he simply flexed forward all the way through his spine. He experienced his mid-back pain when he strove to extend or straighten himself up, so when he corrected his stance that the pain came on. The erector spinae muscles in their own mid-back proved very developed and seemed like thick ropes. When I assessed Aaron's lumbo-pelvic stability, things got really interesting. I was seeking the way gluteus maximus and the psoas major muscles were performing, each of which help to control the impartial position of the pelvis under load. He'd shake all around the area. To assess psoas major, I asked Aaron to sit and control the natural arch in his low back (neutral posture) as he lifted and hauled his bent leg in flexion past 90° (just an easy knee elevator). He was not able to maintain the leg even slightly off the floor without slipping together with his low back. Finally I asked him to stand on one leg and feel the gluteal muscle activating on that side, while swinging the other leg through as if he were running. Initially he couldn't trigger his gluteal muscles without a great deal of concentration. When he tried to perform the leg swings without moving his anus, he almost fell over. The runner needs to have quite an upright posture, letting the upper body to flex forward slightly, but not too much. The gluteus maximus gives a small amount of hip extensor muscle torque but much more importantly, it controls the upright position of the pelvis on the hip. Without this the body would just bend ahead. Isolated hip flexion is also necessary, in order that the lower back is kept in its neutral arch when the runner initiates the swing phase. As soon as I examined Aaron's running posture, he had been very flexed at the hip, almost leaning over at about a 25° angle. He was managing to maintain his lower back neutral, however, the erector spinae muscles were working extremely hard in this place. He explained that he could feel this occurring and was hoping to liven up -- but he'd been doing this through his chest. This overuse of the erector spinae muscles are what had led to his growing mid-back pain. The thoracic spine is affected substantially by the placement of the spinal column in all positions, from sitting postures to swinging a golf club, throwing a ball or running. The mid-back requires a stable platform in the lumbar spine where to execute its freedom functions. This is especially important in throwing sports but is also crucial in activities like swimming. Thoracic spine motion in running should mainly involve rotation as this helps to counterbalance the hip flexion moment produced at the opposite hip. Over-activity at the thoracic extensors is counterproductive not only for performance but also for injury. TreatmentBut we also needed to correct the pelvic muscle weaknesses that were acting on the thoracic spine and hip. I instructed Aaron to stand and operate tall throughout his hip place, with his gluteals, to take the load off the thoracic erector spinae. To be able to strengthen the gluteals so that they were up to the job, I made him to carry out the one legged bridges (see Figure 1). And in standing, I tied a piece of tubing around the ankle of one leg, and that he then utilized to mimic the running swing phase while he concentrated on keeping his pelvis fairly still on his stance leg (see Figure 2). We also needed to tackle the quadriceps muscle fatigue. My theory here was that he was overusing his quads as a consequence of poor hip flexion when running. Insufficient hip flexion and upward drive would generate a shallow swing stage. This would cause one to plant his foot early, creating a braking kind of activity which forcibly ceased ahead propulsion of the body. It was like he had been thumping down on the floor with each step rather than maintaining forward momentum. Aaron's symptoms eased up quite quickly once he managed to fix his functioning posture and recruit his stabilizing muscles. I encouraged him to continue his exercises for the next six to eight months so that he would fully integrate the muscular recruitment routines into his running technique.
Fatigue related to a diminished ability to make muscular effort as a result of impairment of the central nervous system and/or peripheral nervous system has commonly been referred to as 'neurological fatigue' (NF). El Paso, TX. Chiropractor Dr. Alexander Jimenez examines the data. NF will not only affect performance in the form of lowered muscle contraction force (see poorer and slower and less spring), but in addition it will lead to longer recovery times, bad sleep patterns as well as altered mood states. What's more, the inability to create voluntary muscle contraction appropriate for the demands of their physical requirement of this sport/activity can then cause injury. It is apparent that the cause of fatigue is complex, influenced by both occasions happening in the central nervous system (CNS) and the peripheral nervous system (PNS). CentralCentral fatigue is neural fatigue originating in the central areas of the nervous system such as the higher cortical areas in the brain, brain stem, spinal cord, or cranial nerves. The exact mechanism for CNS fatigue remains largely unknown but it appears that two primary kinds of central fatigue exist: 1. acute CNS fatigue may occur as a result of decreased reflex sensitivity and or less than optimal output from the motor cortex; 2. chronic CNS fatigue, on the other hand, is likely caused by increased inhibitory drive to the alpha motor neurons. Motivation and psychological states also have been linked to both acute and chronic CNS fatigue, but it is not known if that is a cause or effect relationship. It's generally accepted that acute bouts of exercise causing central fatigue require an average of 48 hours to completely recover from. Chronic central tiredness, however, might take much longer. The common practice amongst coaches is to use a 10-day recovery protocol of low-intensity training to reunite the nervous system into a state of balance and homeostasis. The need that's placed on the CNS is a product of both the volume and intensity of training. CNS fatigue can be brought on by performing a higher quantity of low-moderate intensity training or when compared to a low-moderate volume of high-intensity coaching. Insufficient reconciliation of work and rest intervals coupled with over-ambitious training will probably result in CNS fatigue. However, high-intensity training asserts more for CNS activity. The best way to think of the impact various actions have on the CNS possibly to put the mona continuum. The more intense something is (as a percentage of maximal work or speed), the lower the quantity which can be achieved until the CNS gets fatigued. Central fatigue is a tiredness different from peripheral fatigue (in the muscles themselves). Researchers have discovered that central fatigue is different in the so-called fatigue feeling brought on by physical (muscular) fatigue, and in fact is generated in a state that is not accompanied by physical exhaustion. This is something that is relatively new. External factors like lack of sleep, personal stress, sickness, bad diet, inadequate hydration, and genetics might also give rise to CNS fatigue, especially chronic fatigue. Serotonin levels in brain regions has been indicated as a potential causative factor in the growth of central nervous system exhaustion. It is not likely, however, that single neuro- transmitter levels are responsible for CNS fatigue. It's more probable that a combination of neurotransmitters and the boosters which directly controls CNS fatigue, like dopamine and noradrenaline. Meeuson et al (2006) propose that this revised central fatigue hypothesis implies that an increase in fundamental proportion of serotonin to dopamine is related to feelings of tiredness and lethargy, accelerating the onset of fatigue, whereas a low ratio favors improved performance through the upkeep of motivation and arousal. Possible manipulation of these neurotransmitter levels may then potentially enhance CNS recovery. Serotonin levels have been demonstrated to increase during intense exercise in conducting rats and also to remain high in the point of exhaustion (Meeuson 2007). Dopamine release is also elevated during exercise but appears to fall at tiredness, a response that may be important from the fatigue process. The rate neurotransmitter synthesis chiefly depend on the peripheral access to the amino acids tryptophan and tyrosine, with increased brain delivery raising dopamine and dopamine/ noradrenalin activity, respectively. It's been demonstrated that BCAA ingestion can limit the serotonin levels and tyrosine can increase dopamine/noradrenaline levels in the mind. Although tryptophan levels stay reasonably steady, the intake of large carbohydrate meals, immobilization and stress might cause transient increases in tryptophan levels (Davis 2000). Nybo (2010) states that exercise in hot surroundings challenges not just the cardiorespiratory and fluid foundation balance of their human, but in addition the brain is affected by heat. Exercise-induced hyperthermia is associated with CNS fatigue. Improving dopamine action has been demonstrated to counteract heat-mediated CNS fatigue and improve performance whereas preventing noradrenaline uptake has been shown to aggravate CNS fatigue. Peripheral (or Localized Fatigue)Although occasionally called muscular fatigue, peripheral nervous system fatigue (PNS) is still a sort of CNS fatigue since the CNS controls skeletal muscle function. Unlike central fatigue, however, PNS fatigue is localized into a given body site and tends to be found at the peripheral nerves, autonomic nerves (sympathetic and parasympathetic). There are several potential mechanisms for PNS fatigue, which range from the accumulation of inorganic Phosphate and H+, to the failure of the sarcoplasmic reticulum to release adequate Ca++ because of signaling problems from the T-tubules, to inadequate manufacture and release of Achetylcholine at the neuromuscular junction. Unlike in the case of CNS fatigue, each of these mechanisms are severe and should not produce long-term exhaustion. The truth is it is generally accepted that a span of 24 hours is enough to return the body to homeostasis after PNS fatigue. Factors Contributing To CNS FatigueTraining to collapse accelerates CNS fatigue (peripheral and central) negatively impacting muscular co-ordination. When training it's important to understand that your mind will probably recall the previous set or drill over any other. Therefore, the conventional burnout method, as an example in resistance training, leaves your nervous system remembering a light load that mostly taxed the slow-twitch fibers. This is bad news if it's done week in and week out since you'll lose your maximal strength levels in no time. Complicated Loading ParametersWithin a training program there are many different training variables and external factors that struggle for CNS activity. Using complicated pyramid sets, for instance, may be overly complicated for the CNS and as a result strength development won't be optimized. Excessive Amounts Of Speed trainingSpeed work may encourage CNS fatigue (peripheral and central) several hours after the session has ended. In an exercise-intensity continuum, speed training is the hardest on the CNS. Anything that involves maximal velocity and elevated levels of co-ordinated force (sprinters can use force into the floor up to four times their body weight) compete for CNS activity. It's important, therefore, to employ sufficient rest periods during a rate session for CNS recovery and restoration of high-energy phosphates. Non-Training FactorsIt's well known that external factors like lifestyle stress, work pressure, family stress, poor sleep, alcohol and poor diet all contribute to exhaustion in the athlete. These hormones operate mostly at the system level -- muscle, skin, bone, tendon, heart, lung etc.. However, it is also likely that these hormones affect the integrity of the nervous system, both peripheral and central. Signs Of CNS FatigueThere are some obvious and recognizable signs that may indicate that athlete is experiencing neural fatigue. - Lack of motivation
- Poor memory
- Poor mood states
- Cognitive impairments
- High perceived exertion
- Impaired co-ordination
- Inhibition of central drive to muscles
- Heavy footsteps, a sign of central fatigue
- Impaired grip strength
- 10.Muscle twitches – particularly around the eyes and face
Objective Measures Of CNS FatigueThe commonly used measures which are simple to execute and also provide objective comparable data are: 1. Standing long jump. With feet placed together on a 0cm marker, the athlete leaps as far as possible in a horizontal direction. The measure is then taken. Typically most athletes, depending on sport and the ratio of fast-twitch to slow- twitch fibers, will achieve something around 2m as a standard long jump. These can be measured routinely, usually at the start of the week following a weekend competition, and an objective measure can be obtained. This gives the clinician a global interpretation of neuromuscular function. It may be a depressed PNS that results in poor motor output and thus a poor jump, or it could be accumulative and unrecovered muscle metabolite depletion. These tests can be compared to baseline tests that are done in non-fatigued states. 2. Watt bike power tests. On a stationary bike that has the capacity to measure power output (wattage), perform a simple 3-5 second blast as hard as possible. The best power output is measured in watts is then recorded. Again, these can be compared to baseline results. 3. Force platform jumps. If the equipment is available, then a force platform that measures impulse on a drop and jump can also be used as a measure of motor system excitability. This is measured as a time in contact and force output that provides the impulse measure. If the athlete is fatigued they may spend too long on the platform then the ratio of force to time drops. Similarly, the time in contact may stay the same; however, they may not produce the same force profile, again dropping the ratio. Preventing Or Fixing CNS FatigueFirst signs of central fatigue When someone is over-trained, 10 days of recovery utilizing low-intensity training and therapy are recommended. Training It is important during training (especially strength or speed training) to be aware that there is a huge difference between the 95th and 100th percentile of intensity. Athletes can still develop strength and speed significantly without training at 100%. Athletes may get hurt the next session after they’ve run a personal best (PB) on the track or hit a PB in the weights room: not just because they’re psyched up and trying to beat their PB, more because their CNS hasn’t recovered from the previous session. After strength PB, for example, there should be no attempt at the same PB for at least 10-12 days. Weekly planning There is a common misconception during team sport programs that it is the tactical training sessions that contribute the most to fatigue. However, in relation to the rationale behind the cause of CNS fatigue, team training sessions may be classed as having a moderate effect on CNS fatigue. This is because most of the work done in a team training session will be at moderate velocity speeds and force outputs when compared to speed or Olympic lifting. It is recommended that trainers should first have a look at their own training prescription and decide if there is too much (or too little) high-intensity CNS-fatiguing exercises. Only then can we start to criticize team training sessions. During the week, there has to be a balance between low and high-intensity training in relation to CNS fatigue. If two sessions are done in one day, try to make sure they are not both extremely taxing on the CNS. There also has to be a balance between high and low mental performances. High morale, disciplined sessions should be interchanged with more relaxed fun-type sessions. Know your exercises The higher the CNS demand of an exercise, the less volume or numbers should be done. For example, drop jumps are more CNS taxing than jumps up onto a box. Olympic lifts are more taxing than squats. Usually, any movement that involves more of a ‘shock’ will stress the CNS more. Know your athletes High-intensity training elements must compete for central nervous system energy. A novice sprinter can’t tax the CNS significantly no matter how hard he tries because he cannot output enough force, but as he improves the CNS demand rises exponentially, even if the volume of sprinting remains constant. This relays the importance of differentiating between advanced and novice athletes within a squad. Hot and cold showers To promote blood flow to the brain, hot and cold showers can accelerate CNS recovery. It is important, however, that the head is fully immersed under the shower during this treatment. Replenishment of muscle glycogen Carbohydrate feedings are usually taken immediately post-exercise in an attempt to re-fill depleted muscle glycogen stores. However, it may be more important to ingest carbohydrates at this time in an attempt to prevent CNS fatigue, as carbohydrates are the sole energy fuel for the brain. Recovery of protein balance After training, especially weight training or speed training, protein breakdown goes way up, thus creating a negative protein balance and a good potential for muscle loss. Although this eventually rebounds and the body goes into an anabolic state, in the time immediately following training, muscle can be lost. Since no athlete can afford muscle loss, this is an important focus for recovery and subsequent muscle gain. The protein can also accelerate entry of carbohydrates into the muscle cell. Supplements to combat CNS fatigue Some evidence exists showing that when neurotransmitters like acetylcholine, dopamine, and norepinephrine get depleted, physical and cognitive performance suffers. Since these neurotransmitters can be depleted from intense repeated bouts of strenuous exercise, this can be detrimental to the athlete. Since neurotransmitters can be depleted during exercise and this depletion can cause fatigue and over- training, nutritional strategies may offer some support. Decreased testosterone and increased cortisol is also an indicator of CNS fatigue and any dietary manipulation to increase testosterone levels is recommended. The following supplements are recommended: Tyrosine: Tyrosine also crosses the blood/ brain barrier and competes for the same receptor site as tryptophan (the body’s first line of performance inhibition). Tryptophan is a precursor for the fatigue promoting neurotransmitter, serotonin. To block out the sedating effects of tryptophan, tyrosine has to get there first so it is wise to take it before competition. Tyrosine may also help with dopamine and noradrenaline depletion. Branch Chain Amino Acids (BCAAs): BCAAs also suppress the uptake of tryptophan by the brain. They compete in a similar way as tryptophan for the same receptor site. Lecithin: Lecithin is a compound containing two fatty acids and choline. It's by far the most frequent phospholipid in your system. Phospholipids are cells forming a protective sheath around cells and providing to their own framework. As a supplier of choline, lecithin is needed to maintain cell membrane integrity and to facilitate the movement of fats in and out of cells, in addition to ions, wastes, and nourishment. Also, the neurotransmitter acetylcholine includes lecithin as a component. Due to its choline make-up, lecithin has been touted as a memory booster by improving cognitive function. Supplementation with lecithin may prevent the depletion of acetylcholine found with instruction. Since acetylcholine is energetic in promoting muscular force, memory and consciousness, this would offer both cognitive and performance advantages. Avena Sativa: Avena Sativa is a plant that has chemical properties that increase the levels of free testosterone in the body. Neural Fatigue & InjuryIf the neurological system is depressed (CNS or PNS) then the athlete may not be able to produce either a maximum muscle contraction that might result in poor torque generation around a joint, by way of instance, they might not have the ability to produce enough power to move the body from a standing start quickly enough. Not only will performance endure but also the joints that ought to stay secure and locked in the action of the movement (eg backbone) might also not have sufficient stiffness due to bad muscle recruitment to stabilize. The joints (back for instance) may subsequently suffer undesirable movement in the Shape of a shear force and this force might potentially harm the joint. What's more, if the system is still drained neurologically, the athlete may then suffer an accident (such as a pulled hamstring) if called upon to produce an explosive high-speed movement in training or competition. References
Brasil-Neto et al (1993) Postexercise depression of motor evoked potentials: a measure of central nervous system fatigue. Experimental Brain Research. 93; 181-184
Davis et al(2000) Serotonin and central nervous system fatigue: nutritional considerations. Am J Clin Nutr 2000;72(suppl): 573S–8S.
Davis et al(1997) Possible mechanisms of central nervous system fatigue during exercise. Med Sci Sports Exercise. 29(1); 45-57.
Nybo L (2010) CNS fatigue provoked by exercise in the heat. 1(2); 779-92.
Meeusen R and Watson P (2007) Amino acids and the brain: do they play a role in ‘central fatigue’? Int J Sports Nutr Exercise Metab. 17: supps S37-46.
Meeusen et al (2006) Central fatigue: the serotonin hypothesis and beyond. Sports Med. 36(10); 881-909.
When the northern hemisphere winter approaches, millions head for the slopes. With that in mind, El Paso, TX. Chiropractor, Dr. Alexander Jimenez looks at what recent research has to say regarding injury and injury prevention... Skiing and (increasingly) ski have become mass-participation sports, appreciated by participants of all ages and skills. Moreover, the popularity of family holidays means that snow sports are not only appreciated by adults, but by younger participants also. Studies have demonstrated that 20% to 30% of snow game participants are children and teens, while an estimated 15 percent of Canadians over the age of 12, and 4 percent of the US population over the age of seven, reported participating in Alpine skiing, cross- country skiing or snowboarding at least one time in 2008-2009(two). But with increasing snow sport participation comes an elevated rate of traumatic injury as well as the information points to a substantial risk. Figures from US ski hotels revealed that in 2002, an estimated 77,300 ski and 62,000 ski injuries were treated in US emergency departments alone, such as 10,700 traumatic brain injuries(3). Still another study found that snowboarding is responsible for an estimated 25% of non-fatal outdoor injuries requiring emergency care(4). Studies conducted in a number of countries across Europe and North America have suggested that the risk of injury for skiers and snowboarders is approximately 2 to 4 injuries per 1000 participant times, with the maximum threat in snowboarders(5-9). Children and teens at the 7-17 years age bracket appear to have higher rates of injury than younger and older participants(2). There is recent evidence that the incidence of traumatic brain injury and spinal cord injury in skiing and snowboarding is increasing worldwide. This growth in severe injuries may be associated with greater risk-taking, such as jumping and acrobatic activities, both on new terrain and in snow resorts/parks specifically made for snowboarding(15). Typical Injuries Sustained In Snow SportsA number of reviews have been published that summarize the epidemiology of skiing and snowboarding injuries. Skiers tend to maintain injuries to the lower extremities; snowboarders, on the other hand, are much more likely to sustain injury to the upper extremities (see Figure 1)(16-17). Knee injuries are the most frequent type of injury in ski and constitute around 36% of all ski injuries, according to the literature(18). Snowboarders sustain more ripped ligaments and sprains/strains, brought on by a) position sideways on the board and b) that the absence of a safety binding that opens on its own in the event of a collapse. In a snowboard autumn, the wrists are particularly vulnerable to trauma, especially on impact. It reported that in Alpine skiing, the most common injury site is the lower extremity (40% to 60 percent of all injuries); knee injuries (eg fractures and sprains) are common and observed more frequently in younger children. Other typical injuries are to the head and neck (10% to 20 percent), upper extremity (15% to 25%), and thumb (10% to 20%). In ski, the most commonly injured site is that the wrist (22%), together with upper-extremity accidents (like wrist injuries) at roughly 50 percent of cases. Of them, 10% required emergency treatment and 30% to 40% requiring following admission for trauma treatment. Personal details, snow sports-related factors, diagnosis, and treatment have been recorded, and control data were gathered at random from uninjured people at all three areas. A total of 732 accidents were listed at 674 people and the injury rate for the study was 3.7 injuries per 1000 skier days -- very much in accordance with the studies above(5,6,8). Yet again, snowboarders lasted more injuries to the upper limb and axial areas than their skiing counterparts, also ski- boarders and snowboarders also suffered a higher incidence of fracture. Table 1 demonstrates how these injuries were broken down by sport type and anatomical location. Much of the information on snow sports injury was collected in the late 1990s and early 2000s -- coinciding with a time of rapidly growing popularity. But have the injury tendencies changed over time and what would be the implications for injury prevention? A current (2012) US study looked at snow- boarding injury trends at a ski resort in Vermont within a span of 18 seasons (1988-2006) and compared these with Alpine skiing injuries over precisely the same interval(21). The researchers also looked at the differences in injury patterns between snowboarders and Alpine skiers according to age, experience, and sex. The injury rates were assessed as mean days between injuries (MDBI -- the lower the number, the greater the injury rate). The findings were as follows: ● The average MDBI for all harms among snowboarders has been 345 as compared with 400 for skiers. The most frequent type of harm for snowboarders was a wrist injury (MDBI, 1258), although for skiers it had been an anterior cruciate ligament (ACL) sprain (MDBI, 2332). ● Wrist injuries accounted for 27.6% of all snowboard injuries and 2.8 percent of skiing injuries. ● ACL injuries composed 1.7% of all snowboard injuries and 17.2% of skiing injuries. ● Among snowboarders, more wrist injuries, shoulder soft tissue injuries, ankle injuries, concussions, and clavicle fractures were seen, while skiers had more ACL sprains, medial collateral ligament (MCL) sprains of the knee, lateral collateral ligament (LCL) sprains of the knee, lower extremity contusions, and tibia fractures. ● There was a trend towards an increased incidence of clavicle fractures and a decrease in MCL injuries and ankle injuries among snowboarders over time. ● Skiers had a decrease in thumb metacarpophalangeal-ulnar collateral ligament (MCP-UCL) injuries and MCL injuries of the knee over time. ● The highest rate of injury was among young, inexperienced, female snowboarders. Overall, whilst injury rates in snowboarders have fluctuated over time, they now remain higher compared to skiers. This may be partly because of changing demographics -- snowboarding is frequently portrayed as a youthful, 'trendy' sport and the data indicates that injured snowboarders were significantly younger, less experienced, and more likely to be female than wounded skiers or snowboard management participants. The growth in rates of clavicle fracture might be connected to a heightened interest in snowboarding acrobatic/airborne maneuvers. Injury Prevention In Snow SportsSnowboarding equipment -- Since its inception, snowboarding has always been associated with a higher incidence of upper limb injuries compared to alpine skiing, with the wrist being the single commonest site of injury. In case of a collapse, the natural tendency for a snowboarder is to stretch out (and land on) the hand. Back in 1999, the evidence indicated that less than 10% of snowboarders were utilizing wrist guards to defend the wrist in these falls, despite there being a few epidemiological and laboratory evidence to support their use(22-24). With an increasing emphasis on security, you may think that the situation now is radically different but the evidence is less encouraging. A 2011 meta-study by US researchers studied all of the published literature about wrist guard use, trauma prevention, the biomechanical effects of wrist guards, and the various kinds of wrist guards commercially accessible for snow- boarders(25). The authors concluded that the use of protective equipment for the wrist is a helpful method for preventing injury. However, they pointed out that while numerous studies looked at the impact of wrist guards, there was no consensus about which particular kind of wrist guard would be most effective; the vast majority of the studies did not mention a brand name or a description of the type of wrist protector that was used by participants. It was also apparent that the literature generally reported low usage of wrist guards by snowboarders -- as low as 6 percent -- possibly because of aesthetics, societal acceptance, match or wrist guard and availability. Some research has suggested that using wrist guards might increase the possibility of sustaining an elbow, upper arm or shoulder injury -- by transferring the loading during a fall further up the arm. On the other hand, the evidence for this can be conflicting and has not yet been confirmed in a controlled trial or well-designed prospective study and the present best guidance for snowboarders is to use a wrist guard to help avoid injury. Skiing equipment -- Injury prevalence among skiers has declined over a few decades, largely because of improvements in ski gear, particularly boots and bindings; proof proves that modern bindings decrease the incidence of foot, ankle and lower tibial injuries providing they are properly mounted, adjusted and maintained(26,27). Many accidents are the result of poorly adjusted bindings; in one analysis of adult lower extremity equipment- related injuries it had been determined that in 96% of cases the ski bindings did not release when the accident happened(28). Non-release of bindings has also been reported as an injury contributor in different studies of the two youths and adults. In one study, skiers younger than 13 decades of age with poorly adjusted bindings were much more likely to be injured than children with correctly adjusted bindings(29). Unsurprisingly, therefore, some investigators have proposed that a professional should adjust children's and beginners' ski bindings at the start of every lesson and that these groups should be taught to check their bindings at the beginning of each ski day(30). Snowboarding and skiing equipment -- One place where there's little doubt over powerful equipment-based harm prevention is helmet use. A new systematic review found that helmets significantly lessen the risk of head injury(31). Skiers and snowboarders wearing a helmet were far not as likely to have a brain injury, and this threat was further reduced when research which included children younger than 13 decades of age were included. Overall, the pooled results showed that helmet use reduces the chance of head injury by around 35%. Some researchers have raised concerns that while helmet use during skiing and snowboarding reduces head injury rates, it may increase the risk of cervical spine injuries. However, these concerns are not supported by many of case control studies(32-35) and also a 2010 systematic review also concluded that helmets weren't related to an increased risk of neck injury(31). Moreover, there's also no proof that helmet usage in skiing and snowboarding is connected with riskier behavior (36,37). The obvious conclusion here is that helmet usage ought to be considered compulsory at all times where safety is an issue. Physical Conditioning: Snow Sports & Injury PreventionPower, endurance and cardiovascular fitness are all central components in sports injury prevention throughout a vast range of sports, and yet in snow sports, there appears to be a much greater emphasis on equipment-based and third party alternatives. A comprehensive and systematic overview of the literature printed in 2013 looked at injury prevention recommendations specific to recreational Alpine skiers and snowboarders. The attention was to discern recommendations that concentrated physical fitness, exercise and/or training in preventing musculoskeletal injuries in these two sports(38). Studies were included if they dealt with injury prevention, recreational Alpine skiing or snow- boarding and musculoskeletal injuries and articles on elite athletes were excluded. Overall, 80 recommendations for the prevention of musculoskeletal injuries in recreational Alpine skiers and snowboarders were identified and classified into five main categories: ● Equipment use(n=24) ● Education and knowledge(n=11) ● Awareness and behavior ● Experience(n=10) ● Third-party involvement(n=20) Amazingly, there was no research that made recommendations pertaining to physical fitness, exercise and/or training per se, or its role in preventing injury! The authors commented thus about the frequent recommendations for preventing ski and snowboarding injuries by an equipment-based or third party approach: "The dominance of equipment-related steps in the injury prevention literature may be rationalized from a sports biomechanics perspective, because these activities involve high velocities and impact forces. Nonetheless, this also suggests a need for proper levels of power, conditioning and endurance to fulfill the technical requirements of the sports." To put it differently, while it makes sense to take precautionary measures regarding proper equipment use, consciousness, behavior etc, neglecting essential physical conditioning could be counterproductive. Unfortunately, there are no peer-reviewed studies about which type of conditioning system is the most suitable for snow sport injury prevention, but some of the general principles that are very likely to be useful are summarized in Box 2 below. OverviewSkiing and snowboarding by their very nature carry a substantial risk of injury, which could sometimes be serious. The most common injuries are to the knees in skiers and wrists in snowboarders, and the rate of injury is greatest in novices, the less experienced and the young. Along with equipment-based measures, (eg bindings when skiing and wrist guards when snowboarding) is critical for reducing injury risk. Helmet use is also vital to reduce the incidence and severity of head injury in both skiers and snowboarders. In addition a proper pre-skiing/snowboarding conditioning system may also play an important part in ensuring a visit to the slopes is memorable for all the right reasons. References
1. National Ski Areas Association. Kottke National End of Season Survey 2010/11: Final Report. Table 6: Estimated US Ski Injury Skier Visits by Region 1978/79 – 2010/11. http://www.nsaa.org/nsaa/press/historical-visits.pdf
2. Inj Prev 1996;2(4):286-9
3. J Trauma 2005;58(1):112-8
4. Wilderness Environ Med 2008;19(2):91-8
5. Br J Sports Med 2004;38(3):264-8
6. Sports Med 2004;34(2):133-9
7. Br J Sports Med 2002;36(2):135-40 8. Am J Sports Med 2004;32(1):96-103
9. Am J Sports Med 1995;23(5):597-600
10. Am J Surg 2009;197(5):560-4.
11. Inj Control Saf Promot 2004;11(4):281-5
12. Injury 2003;34(12):892-6
13. National Ski Areas Association. Facts About Skiing/Snowboarding Safety: Updated March 2006. http://www.nsaa.org/nsaa/press/0506/facts-about-skiing-andsnowboarding.asp
14. Sports Health. 2009 Nov;1(6):486-92
15. Inj Prev 2007(6);13:368-75
16. Acta Orthop Scand 2001; 72: 657–660
17. Am J Sports Med 1999; 27: 94–97
18. Am J Sports Med 1999; 27:381–389
19. Schweiz Monatsschr Zahnmed. 2013;123 (7-8):655-9
20. Paediatr Child Health 2012;17(1):35-6
21. Am J Sports Med. 2012 Apr;40(4):770-6
22. Skiing trauma and safety. 12th volume. Philadelphia: American Society for Testing and Materials, 1999:141–9
23. Am J Sports Med 1998;26:825–30.
24. J Trauma 2000;48:1109–14
25. Bulletin of the NYU Hospital for Joint Diseases 2011;69(2):149-57
26. Sports Med 1999;28(1):35-48.
27. Aust Fam Physician 2003;32(7):499-502.
28. J Orthop Sci 2002;7(1):1-5
29. Am J Sports Med 1999;27(5): 644-50.
30. Sports and Recreation Injury Prevention Strategies: Systematic Review and Best Practices; Executive Summary. Vancouver: BC Injury Research and Prevention Unit, 2001.
31. CMAJ 2010;182(4):333-40
32. BMJ 2005;330(7486):281
33. Semin Neurol 2000;20(2):233-45
34. Epidemiology 2008;19(2):270-6
35. JAMA 2006;295(8):919-24
36. Accid Anal Prev 2005;37(1):103-8.
37. Inj Prev 2007;13(3):173-7
38. Sports Med. 2013 May;43(5):355-66
39. Br J Sports Med. 2008 Jun; 42(6):394-412
Injury specialist, Dr. Alexander Jimenez reviews the middle and forefoot anatomy -- also discusses several common athletic injuries. The foot consists of 26 interconnecting bones. The intricate anatomy of the foot makes it to be both a passive service structure and an active vehicle for force production (see Figure 1). The mid foot begins at the transverse tarsal, or midtarsal, combined. The talus, navicular, calcaneus, and cuboid bones include this joint. The connections between these bones form an 'S'-shaped single joint line across the waist of the foot, with the navicular bone itself function as the structural link between the forefoot and hindfoot. The multiple articulations within the joint permit the forefoot to move independently in response to hindfoot movement. All five rays, comprised of the metatarsals and phalanges, work in concert to maximize foot stability. Navicular Stress FractureA once obscure identification, navicular stress fractures, now account for 14% to 35 percent of all reported stress fractures(1). It's a particularly widespread investigation in runners, and athletes that execute volatile jumping, as in track and field sports. Suspect a navicular stress fracture in an athlete that complains of obscure mid foot pain but who can not remember actually hurting his foot. Palpation of the apex of the dorsal aspect of the navicular, called the 'N' place, causes pain in 81 percent of patients having a stress fracture(1). The navicular lies at the crossroads of their longitudinal and transverse arches, and thus endures a unique utter stress in the middle third of the bone, where it's the most susceptible to fracture. The center third of the navicular is also the area with the least amount of vascularization. For this reason, fracture in this website resolves slowly. Treatment requires at least fourteen days in a non-weight posture throw(1). One to 2 weeks following boot elimination, begin running and sport-specific training as tolerated, with weekly clinical evaluation of the navicular. If tenderness over the palpated navicular yields, refer for further immobilization or surgery. With conservative therapy, athletes typically return to game in five to six months, compared to three to four weeks for people who undergo surgical fixation(1). Lisfranc Joint InjuryNamed after Napoleon's field surgeon Jacques Lisfranc, who first observed this mid foot injury in men who had dropped from their horse in battle, this injury is due to forced plantar flexion at the joint. In today's sports, the mechanism of trauma is an axial load put on the elevated heel, usually from a fall or tackle by a different player (see Figure 2). Lisfranc injury is not uncommon in American football players (especially lineman in blocking stance, up on feet), football players, bicyclists, surfers, and equestrians. In sports which require feet in straps or clips, a Lisfranc injury may result in the entrapped forefoot in a fall. An injury to the Lisfranc joints most commonly occurs medially, with a consequent separation of the first and second metatarsals, along with a dorsal displacement of the second metatarsal on the next cuneiform. Trainers with a Lisfranc injury normally present with significant pain, moderate to severe swelling, and bruising at the mid foot. Initial radiographic studies don't detect joint diastasis in up to a third of cases; therefore, weight bearing x-rays are justified if Lisfranc injury is suspected(2). An uncommon harm to the lateral Lisfranc joints happens as result of forced supination, and usually with no dislocation of the fracture or joints. When just the ligaments of the joint are injured, care for the sprain conservatively. Begin weight bearing as tolerated but protect the joint by hammering the foot, using an orthotic shoe insert, or, in severe circumstances, immobilizing the joint using a walking fracture boot. Advance the athlete to cross- training activities, like swimming or biking, as soon as possible to keep fitness. Progress rehab to shut chain activities as tolerated. The athlete might need to utilize joint protection through taping, a shoe insert, or a stiff- soled shoe for up to 12 months(3). If the injury does not significantly improve after several weeks, ask repeated x-ray assessment in a weight bearing position. Post-operatively, the athlete is generally non-weight posture for three to six weeks; however, encourage range of motion exercises with the feet, even while immobilized from the post-operative splint. Screw removal takes place between three to four months post-procedure, depending upon individual protocols. Rehabilitate with speed, strength, and endurance training as well as tolerated. Return to play just when the athlete illustrates closed-chain plantar flexion strength and single limb equilibrium appropriate for their sport, normally within four to six months. Metatarsal Stress FractureDuring extended periods of training, muscles on the bottom of the foot fatigue and fail to protect the metatarsals from floor reaction forces. With no plantar muscles to dissipate this stress, the bones suffer recurrent micro-trauma that results in stress fractures. Athletes complain of obscure forefoot pain that resolves with rest, but intensifies with continued instruction. The forefoot might be bloated and bruised. X-rays performed shortly after symptoms begin may not demonstrate a fracture; however, a bone scan or magnetic resonance image (MRI) often reveals the severe injury. These fractures usually respond well to conservative therapy with weight bearing as tolerated but restricted activity for four to six weeks. Following six weeks, restart game training as tolerated and track for a return of symptoms. Using custom orthotics corrects biomechanical problems, such as flat feet, which could induce the athlete to repeated injury. Dancer's FractureAn avulsion fracture at the tuberosity at the base of the fifth metatarsal may be known as a 'dancer's fracture'. Within an avulsion fracture, the athlete complains of pain, bruising, and swelling in the base of the fifth metatarsal. This injury often accompanies a foot sprain. Simple avulsion fractures respond well to conservative treatment of rest, ice, compression and protection. Permit weight bearing as tolerated at a splint or walking boot. Symptoms usually improve within six to eight months, at which time progressive return to sport training begins. Monitor the athlete clinically for any signs of mal-union of the fracture. Avulsions with displacement are treated surgically. Jones FractureAcute fractures of the shaft of the fifth metatarsal are known as Jones fractures, called after Sir Robert Jones who first described this fracture in his own foot in 1902(4). Jones fractures happen if the heel is off of the floor and also a force is applied to the forefoot in the lateral direction, causing the ankle to reverse and roll cartilage. This region is minimally vascularized and are also the website of repetitive micro-trauma. This sort of fracture happens in amateurs, footballers, baseball and hockey players, who commonly pivot to a plantar flexed foot. An athlete with a Jones fracture poses with pain, swelling, and bruising at the bottom of the fifth metatarsal. Weight bearing may be difficult. Fractures are categorized into three kinds. Type I is a serious fracture with clean margins and no displacement, and responds well to conservative therapy. Because of the decreased blood supply to that area of the bone, recovery takes at least six to eight months, and upward of 20 weeks to get complete calcification. A fracture with delayed recovery is classified as a Type II. The fracture line is widened and X-ray reveals increased bone reabsorption at the margins of the fracture. A Form III is absolute non-union of the fracture. Types II and III may be because of repetitive micro trauma at the website prior to a serious event, or even the lack of vascularization which delays recovery from a serious injury. Post- surgical protocols differ, but most progress to partial weight bearing in a walking boot in one or two weeks. Athletes may start partial weight bearing activities, such as aquatic biking and training, at about fourteen days post-op and start working with shoe alterations or orthotics at six to eight weeks after surgery. Most return to sport by 12 weeks post-op. Sesamoid InjuryThe sesamoid bones are two oval-shaped bones inserted in the flexor hallucis brevis tendon, at the distal end of the first metatarsal. These bones function to lengthen the first metatarsal and assist with weight change and toe off through gait. As such, they suffer great stress in athletes that repeatedly 'push off' with the ankle in plantar flexion and the forefoot dorsiflexed, such as runners, dancers, football lineman, and golfers. Of all sesamoid accidents, stress fracture happens 40 percent of the time, whilst sesamoiditis and acute fracture appear in just 30 percent and 10% of cases, respectively(5). As with other repetitive stress injuries, the onset of pain using a stress fracture could be insidious and vague. Passively bending the big toe can reproduce the pain. X-ray evaluation isn't always conclusive in such harms; therefore, a bone scan or MRI may be necessary for diagnosis. Treatment consists of rest from the offending activity together with custom orthotics or a metatarsal pad to eliminate weight bearing directly to the bones. For athletes using sesamoiditis, an inflammatory condition caused by repeated stress to the bones, treat with rest, ice hockey and protection, and gradually initiate a return to action once they bear weight without pain. For those who have actual fracture, six months of non-weight bearing is necessary. If the fracture does not heal adequately following this time, consult with surgery. Athletes possibly return to sport within six months after surgery, which either partly or entirely eliminates the bone, or even fixes the fracture. 'Turf Toe'Dancers, football lineman, rugby players, golfers, and wrestlers often assume a position of MTP joint dorsiflexion with ankle plantar flexion (see Figure 3). More and more flexible shoes, along with artificial turf surfaces, have been implicated in the greater incidence of this harm. Participants present following an acute event with pain and tenderness over the joint, accompanied by swelling and bruising when the injury is categorized as Grades II (partial tear of the ligaments) or III. Conservative therapy with immobilization of the MTP joint through taping or bracing; protection with steel shoe inserts; progressive weight bearing; and restricted activity is the normal treatment course for all MTP harms. Initiate progressive sports instruction after three to six weeks as tolerated, and monitor for a recurrence of symptoms. Surgery is warranted only in the most extreme injuries with joint dislocation or harm to the sesamoid bones. Morton's NeuromaMore common in women than men, Morton's neuroma is a nerve entrapment disease of the nerve between the toes. The nerve becomes thick and painful because of chronic friction together with the adjacent ligaments, for example happens when pivoting in tennis or dancing. Abnormal foot body is thought to contribute to the problem. Athletes whine of burning pain between the feet, at the metatarsal heads. The pain can improve with rest and worsen with activity. A clinical diagnosis can be made with the lateral squeeze evaluation (see Figure 4). Since not a true neuroma, but instead a result of entrapment or compression, sneakers with a large toe box generally improve symptoms. Conservative physiotherapy modalities are sometimes helpful. Therapeutic exercises may also help fortify the foot and reduce strain to the injured nerve. When all else fails, surgical decompression or resection of the nerve eliminates the pain, but results in a level of numbness to the area. ConclusionInjuries into the mid and forefoot result in a significant number of lost playing time in all sports. By some reports, sports- related injuries to the toes comprise 2% to 18 percent of all athletic injuries(6). While many of those mid and forefoot accidents occur needlessly, they do so in regions already exposed, due to either a decreased blood supply and also the biomechanics of the foot structure. To minimize these injuries, use orthotics, taping, and therapeutic exercise to correct biomechanical and structural abnormalities inside the foot. Guide your athletes at proper shoe selection, eschewing whatever the shoe business rep could possibly be telling them is so popular. Look closely at functional deficits in gait and regions of relative weakness or strength imbalance. 1 weak gluteus medius muscle sends ripples down the biomechanical string that could leave a participant pivoting on a foot under more pressure than necessary. References
1. Am Fam Physician. 2003 Jan 1;67(1):85-91.
2. BMJ. 2013 July;3,347:f4561.
3. Clin Sports Med. 1997 July;16(3):435-65.
4. Am Fam Physician. 1999 May 1;59(9):2516-22.
5. Curr Sports Med Rep. Sept/Oct 2011;10(5):249-55.
6. Sports Health. 2012 Nov;4(6):518-34.
Science based therapist, Dr. Alexander Jimenez looks at the anatomy and biomechanics of this quadriceps muscle and how to evaluate and treat injuries. Strains of these proximal quadriceps happen in sprinting (particularly the acceleration stage), jumping and kicking a ball. With four muscles containing the quadriceps group, the rectus femoris is the more common muscle to pressure as the muscle moves over two joints and consequently is intimately affected by both hip and knee posture, whereas another vastus muscles are just influenced by knee motion and knee posture. Strains into the rectus femoris seem to affect sports like football (soccer), Gaelic football and Australian Rules foot- chunk (AFL) due to the repetitive sprint efforts involved, the repetitive kicking involved, leaping and shooting during the match and the length of period of a common match (90+ minutes) highlighting exhaustion as being a prevailing element. Rectus femoris muscle injuries have a tendency to take longer to heal than other muscle injuries such as injuries and also can be debilitating to the athlete, along with the re-injury rate is high particularly from the 'tendon' injuries. Anatomy Of The Rectus Femoris MuscleThe anatomy of the rectus femoris is exceptional in that It's comprised of two limb heads which originate on the anus: 1. The straight (direct) head that runs directly in the anterior inferior iliac spine (AIIS); and 2. The reflected (indirect) head that begins deeper on the hip joint capsule and anterior labrum. The direct head blends with the rectus femoris muscle to form a muscle, which looks like the quills on a pen as the fibres run on one side of the anus. The head to form a tendon is then joined by the head that is direct. The head that is direct creates the shallow portion of the conjoined tendon and blends anteriorly with the anterior part of the muscle. The indirect head forms the tendon that creates a muscle and passes through the rectus femoris muscle. It maintains its central position, as it mixes together with the muscle of the rectus femoris and the tendon spans downwards about two-thirds the length of the muscle. A good analogy of central tendon and the rectus femoris would be a dog: the muscle is represented by the meat. The presence of the tendon within the rectus femoris gives it a 'muscle in a muscle' look within the muscle belly. As the tendon disappears two- thirds down the rectus femoris, the muscular belly and the tendon which creates the patella tendon and folds on the tuberosity of the tibia proceeds and blend. BiomechanicsThe rectus femoris spans two joints (hip and knee) and operates over a great selection of movement due to the broad excursions of hip flexion/extension and knee extension. It is subject to bizarre loads in twisting and sprinting, and is comprised of a large proportion of fast-twitch fibers, suggesting that it is a significant manufacturer of hip muscle power in hip flexion. The mechanism of injury is acceleration as its swing phase is started by the leg, in sprinting. At this stage of the cycle, the rectus femoris is eccentrically loaded as the knee is loaded as the hip begins to bend at the start of swing phase and starts to bend in the end of stance and into swing phase. The muscle is subjected to two opposing forces in this point of the cycle - a high eccentric load due to knee flexion as well as concentric load at the hip flexion stage. The other common mechanism of injury is kicking. The phase is characterized by quick hip extension and knee flexion to kick a ball. Accelerated muscle action subsequently follows this later in the cycle that the knee goes to maneuver the foot into place to kick the ball and as the hip flexes to create hip torque. The ball contact phase then puts a sudden and large load on the rectus femoris in a position of quick muscle shortening. It has been indicated that hip flexion strength is significantly more significant in reaching a distance, than knee extension strength. The rectus femoris takes up to a larger level then acceleration of their leg through hip flexion in the event the iliopsoas does not produce enough power. Therefore, injury and/or weak- ness in the iliopsoas may be a precursor to femoris injury. During kicking the stance leg may suffer an accident. As the kicker plants the non-kicking foot, the quadriceps and hamstrings stabilize the knee. Since the pelvis then proceeds to move forward over the position leg, then the stance leg hip is taken into expansion since it functions to command the hip extension, and also a top load is set on the rectus femoris. As the leg moves right into flexion, further load is placed on the stance leg, and also also the stance leg muscles work hard to stabilize and manage the transmission of electricity throughout the pelvis and trunk onto the leg. Interestingly, the speed of muscle strain seems to be higher. A potential explanation is that surfaces allow for ground traction on the stance leg and thus higher forces are dissipated via the stance leg hip. Lumbopelvic stability seems to play a part in the incidence of rectus femoris strain. Kicking and sprinting require a lumbopelvic platform so as to be able to transmit the large forces involving the back and the thighs. Bad management of pelvis and the lumbar spine will lead to load. In consequence, if the athlete cannot generate enough abdominal strain to form a stable pelvis to sprint or kick a ball, the rectus femoris (amongst others) will be required to boost its force production to compensate for the lack of abdominal control. Injuries To The Rectus FemorisA number of differential rectus femoris injuries exist. The discussion will concentrate on: - 'bull's eye' lesions
- Peripheral rectus femoris strains
- rectus femoris tendon injuries -- one-tendon harm and complete ruptures.
Bull's eye LesionsThe central tendon which divides the two heads of the rectus femoris muscle separates from the direct mind of the tendon and runs upward through the muscle. An injury to the tendon that was blended to its own contribution and the mind is termed a 'bull's eye' lesion as it has a resemblance to a bull's eye. As no pathology is present in the direct mind and its own contribution to the central tendon in this instance the tendon is still intact. As this indirect mind of the central tendon is injured, a fibrotic scar forms around this tendon that then gives the appearance of a chronic 'bull's eye' on MRI imaging. New muscle-tendon junctions shape round the central tendon widening the interval between the muscle and the tendon that is central. Histologically the damaged tendon demonstrates dense mature fibrous tissue with edema. The region fills in with damaged and normal muscle fibers to create fresh 'pseudo'- muscle tendon junctions. It's recognized that these kinds of injuries predominate in kicking-based sports like AFL football and Gaelic football, and contribute to longer rehab periods. Tendon injuriesPartial injuriesPartial tears of the rectus femoris present as acute onset thigh pain. Uncomfortable and although painful, these may not be limiting to the athlete at the brief term. They could be able to compete with a distress in the thoracic and they can notice they cannot get exactly the space on the kicks. The athlete may detect pain, weakness and disorder, as they become chronic. One-tendon tearsThe reflected/indirect head will be involved with a one-tendon rupture whilst the head stays intact. This can create a type effect as the ruptured reflected head goes against the head that is whole. Complete tearsAlthough rare tears of the two heads might happen. It's been revealed that the extreme duration of the rectus femoris tendon (nearly two-thirds the length of the quadriceps) make it unlikely to be completely torn. It is more common to rupture the indirect head and in the event the direct mind is involved it will be a two-head rupture of direct and indirect head. Signs & SymptomsIn any of the demonstrations, the patient subjectively complains of: - a tender anterior thigh
- weakness in the hip with hip flexion lack of function with acceleration and kicking.
- a ‘tearing’ sensation or ‘popping’ sensation in complete tendon tears
- a noticeable retraction of the muscle distally if ruptured.
Clinical AssessmentThe examination begins with viewing any noticeable defects . With muscular retraction and ruptures it'll be common to observe a lump form in the thigh muscle as the stomach of the muscle pulls down as a result of tension generated in the long rectus muscle. Tests for the rectus femoris include: 1. Seated hip flexion. This is an inner-range muscle test that is quite sensitive to rectus femoris tendon injuries. This will demonstrate fatigue and pain in the event of an injury. The athlete is asked to maintain the knee over the knee by 2-3 inches and the assessor pushes downward on the thigh requesting the athlete to meet with up with the pressure. 2. Thomas test for rectus. Perched on the end of a bed, ask the athlete to hold one knee to the chest and then to fall back into a supine position. Place the athlete’s foot up against shoulder of the assessor. Then use a hand to push the thigh into extension and take note of pain response. If painless, passively flex the knee and note any pain response. 3. Prone knee bend (PKB). Have the athlete lie in prone. Bend the knee and notice the presence of motion limitation as well as pain. The heel to buttock distance can be measured. InvestigationsThe standard investigation is MRI using T2 T1 and fat suppression images in axial plane and the coronal plane. Axial T2 with reduction is in identifying strain injuries to the rectus 18, easily the image and they'll show high signal . MRI will show perifascial fluid, muscle fiber disturbance, T2 hyper-intensity and scarring/fibrosis. Grade 1 breeds is compatible with interstitial hemorrhage and edema and will show a appearance on all pulse sequences. Grade 2 strains show partial disruption of the M-T intersection with feathery interstitial high signal. Grade 3 tears show complete disruption and retraction of the tendon. Bull's eye rhythms reveal glowing high sign surrounding the low- signal tendon on axial T1 or fluid-sensitive sequences (Gyftopoulos et al 2008). MRI will assist in identifying a number of attributes: - exact location of the injury
- the size of the injury. Both the cross- sectional area (CSA) and also the length of the injury (cm). The size of the injury is predictive of time to return to sport
- visualize if it is central tendon vs peripheral rectus femoris injury.
A fundamental limb injury could demonstrate high signal on one or either side of the central tendon on the axial MRI picture. Peripheral rectus femoris no high signal will be shown by breeds around the thoracic but will show high signal in the peripheral areas of the rectus femoris on axial MRI. Rehabilitation Of Muscle Strain InjuriesThere is no universally approved management strategy for muscle strain injuries in the rectus femoris. What's accepted is that 'bull's eye' lesions do take longer to heal than muscle-tendon injuries and straightforward muscle. Ruptures that are complete will be discussed later in this particular piece. Stage 1: Acute management 1. RICE and crutches for first 48 hours. 2. Physiotherapy: soft tissue therapy to rectus femoris as it develops widespread trigger points in presence of injury. 3. Stretching: generally aggressive stretching is avoided in the early rehab phases as it does seem to delay healing, in contrast to hamstring strains that tend to do well with early stretching. 4. Strengthening: limited to knee extension initially. 5. Pelvic balance: regular chiropractic, osteopathy and soft tissue therapy (massage and dry needling) will be necessary to balance the pelvis and the muscles that contribute to pelvic muscle tone such as the iliopsoas, adductors, TFL and gluteals. 6. Core stability: low-level activation of the deep spinal stabilizers can be instigated at this point. 7. The time frame for this stage on acute muscle-tendon strains can be variable and between 4-8 days. Stage 2: Restrengthening 1. Continue with soft tissue management of rectus femoris tone as well as pelvic muscle balancing. 2. Continue with and progress core stability training. 3. Attempt to achieve full strength in knee extension prior to hip flexion. The strength programs can run in parallel for the knee extension power and hip flexion power; however, delay strong hip flexor work until the athlete has knee extension strength and achieves full range. Some examples of rectus femoris strength exercises are shown below. 4. This stage may run over 7-10 days depending on presentation. Stage 3: Return to running 1. Full stretch on passive knee bend (PKB) in prone. 2. Full hip flexion power (inner range) in sitting as compared to the opposite side. 3. Able to hop 3 x 10 pain free. 4. Hip flexion strengthening and continue to run in parallel with a return to running program. 5. Running retraining is performed on alternate days (train high/train low days). a. Stage 1: easy 2km jog pain free b. Stage 2: 30-20-30m (acceleration/ hold/deceleration) 3 x 4 reps. Build to 100% over a number of sessions. c. Drop acceleration distance down to 20m, therefore 20-20-20m 3 x 4 reps at 100% d. Once able to sprint, can incorporate long kicking and aggressive change of direction. Progress is variable depending on lesion in muscle strain injury. Timeless muscle strains or M-T junction strains that are mid-thigh can advance. Bull's eye lesions have a tendency to take longer and therefore are influenced by ongoing pain, weakness and disorder. Cross et al (2004) set fundamental tendon injuries return to play as being 14-43 (average as 27) days and peripheral breeds as being placed at 5-15 times to return to play. The proposed reason for that is protracted return to play with fundamental tendon injuries is due to the shearing effect of the central tendon (indirect head) with the direct head. The central rib almost creates when injured a muscle in this distinctive anatomical arrangement and a muscle creates the shear effect that is undesirable. Therefore the shear effect does not happen to the tendon, the damage isn't in peripheral rectus injuries. Return To Play Protocol For Surgically-Repaired Rectus Femoris InjuriesIn the event of complete indirect head rupture and/or direct head rupture, a surgical outcome may be considered necessary to return the athlete to full function. The rectus femoris tendon can be exposed surgically and repaired with anchor sutures that allow continuity between the torn tendon ends. The typical time frame for a surgical repaired rectus femoris rupture is 12-15 weeks. The rehabilitation time frame can be broken down into 3 x 4-5-week stages. Stage 1: Protection (4-5 weeks of range of movement and weight- bearing limitation) - The athlete will initially be placed in a knee motion-limiting brace to prevent any knee flexion that may ‘stretch’ the repaired tendon. This may be in place for up to four weeks.
- The athlete will be instructed to avoid any hip extension past 10 degrees of flexion initially. The range of hip exten- sion will be gradually allowed to increase over the initial four-week period so neutral extension is achieved by four weeks post-repair.
- The athlete will be non-weight-bearing and partial weight-bearing for the initial four weeks. Aim to achieve full weight- bearing by 4-5 weeks post-op.
- The athlete will require soft tissue therapy to mid and distal rectus femoris.
- Maintain hip mobility into flexion, rotation and abd/adduction.
- Muscle stimulator can be used on rectus femoris in protected position and in disuse atrophy mode only. No strong contraction.
Stage 2: Range of movement and strength (4-5 weeks) - Gradual increase in range of movement and loading through the proximal hip into flexion.
- Focus on low load and low speed with a gradual increase in both over a 4-5 week period.
- Continue manual therapy to improve hip mobility and soft tissue to rectus femoris to improve tissue compliance.
- Direct scar massage to improve fascia and scar tissue compliance.
- Progress and develop concentric strength prior to eccentric strength.
Theraband Isometric Hip Flexion & Concentric Knee ExtensionThe affected hip stays neutral. This activates the hip flexor isometrically. - Actively take the knee from flexion into extension. This is concentric and then eccentric rectus femoris using the knee as the moving segment.
- Perform 3 x 20 reps. Slow and controlled reps with abdominal activation.
Theraband Hip Flexion On Box- Wrap a band around the affected foot.
- Stand on a box with hip in full extension.
- Drive the affected hip up into flexion.
- Hold and return to start position.
- Perform 3 x 10 reps. Increase effort with thicker bands.
Bodyweight Lunge & Hold- Split the stance on a box. This is a split squat position.
- Slowly descend so that the thigh approaches parallel to floor position.
- Hold and return to start position.
- Perform 3 x 10 each leg.
- Bodyweight step-ups and step-downs
- Start and quickly develop posterior chain strength and hip abductor/ adductor strength.
Stage 3: Return to function (4-5 weeks) - Progressively load anterior hip.
- Functional leg strength – squats, dead- lifts, lunge, step-ups.
- Start eccentric focus on rectus femoris:
Reverse Nordics- Kneel on floor.
- Keep hips in neutral extension.
- Slowly lower backwards taking knee into more flexion. This loads the rectus femoris eccentrically.
- Perform 3 x 10 and increase speed as a progression.
Ball Bounce- Bounce a medicine ball off the knee.
- Start with 2kg ball and progress the ball weight as strength improves.
- This trains rapid eccentric hip flexor in a shortened position.
- Work on sets of 10-15 reps.
Supine Hip Drops- Hold affected hip in slight flexion.
- Forcefully push clients hip into extension and direct them to hold your pressure.
- Increase amount of push and depth of thigh to increase extension component.
- 3 x 15 reps, rapid contractions.
- Return to running
- Pool jog – high knee drive
- Alta G if available 70-80% BW Field base run through. See above plan for return to running post-strain injury.
- Interval training
- Active deceleration over short distance
- Agility
- Return to kicking
- Progress soft ball to ball that is hard.
- Increase distance and quantity the flipping meniscus programs for femoris injuries.
Preventative Programs Rectus Femoris Injuries.1. Identify at-risk athletes. Injury to preceding injury into the alveolar and the rectus femoris have been identified as risk factors. Also shorter athletes (less than 1.82cm) have a greater chance of quadriceps injury in addition to leg dominance in kicking. 2. Hip extension flexibility. An asymmetry in hip extension flexibility from left to right has been found to be a risk factor in rectus femoris injury. Poor hip extension flexibility in additional hip flexors like psoas and iliacus might be a precursor to rectus femoris injury. Greater hip torque needed for hip flexion from the association between the femoral nerve as well as the rectus and psoas was postulated to some risk factor for femoris injury. 3. Eccentric strength. The rectus femoris due to its biarticular arrangement is subject to bizarre loads in the knee flexion and hip extension in terminal position to swing phase as well as wind up for kicking. 4. Core stability. Keeping a stable toenails structure is necessary to prevent unwanted 'torque leakage' round the hips during kicking and extending. Unwanted excess anterior and posterior pelvic tilt because of inferior pelvic stability can predispose the rectus femoris to the changing of 'torque' to the hip flexors such as the rectus femoris due into a strain injury. 5. Training monitoring.
With systems like video tracking and GPS, it is possible to modify the athletes training load and intensity . It is anticipated that in the return to competition, the athlete/player may not be able to withstand the levels of volume and intensity as a non injured player in the same position. Trainers, the athlete along with all support staff have to be made conscious of training abilities that are anticipated early in the return to competition phase. References
1. Cross et al (2004) Acute quadriceps muscle strains: MRI features and prognosis. American Journal of Sports Medicine. 32; 710-719.
2. Balius et al (2008) Central aponeurosis tears of the rectus femoris: practical sonographic prognosis. British Journal of Sports Medicine. 43; 818-824.
3. Mendiguchia et al (2013) Rectus femoris muscle injuries in football: a clinically relevant review of mechanisms of injury, risk factors and preventative strategies. Br J of Sports Med. 47: 359-366.
4. Gyftopoulos et al (2008) Normal anatomy and strains of the deep musculotendinous junction of the proximal rectus femoris: MRI features. AJR: 190.
5. Hassleman et al (1995) An explanation for various rectus femoris strain injuries using previously undescribed muscle architecture. Am J of Sports Med. 23(4): 493-499.
6. Straw et al (2003) Surgical repair of a chronic rupture of the rectus femoris muscle at the proximal musculotendinous junction in soccer player. British J of Sports Med. 37: 182-184
Injury scientist, Dr. Alexander Jimenez looks at a often misunderstood problem -- the 'high ankle' sprain... Ankle injuries are prevalent in sport and the type of injury will fluctuate based upon the tissue structure injured in the complex. Ankle and the foot can be subject to impact loads in the performance of sport related activities the ankle can absorb six times body weight from activities. Because of this energy dissipation throughout the ankle, these forces may result in fracture and ligament disruption. Lateral ligament sprains are undoubtedly the most frequent (85%) type of ankle sprain, accompanied by medial 'deltoid' ligament sprains and more infrequent is injury to the distal tibiofibular syndesmosis. It is thought that syndesmosis injuries comprise 1-20% of ankle injuries (Zalavras and Thordarson 2007; Hopkinson et al 1990); however this is very likely to be considerably greater in collision sports like football and rugby. Where a player was tackled by another, tibiofibular syndesmosis injuries often occur in contact situations. The equilibrium of the distal tibiofibular syndesmosis is offered by the structure of the portion of the intervening ligaments and fibula and the tibia. Injuries to the syndesmosis, otherwise known as "high ankle sprains", many commonly occur when the foot is hyperdorsiflexed or rotated, or both (orthe foot is forced upward or outward) and are more common in sports like football, rugby, skiing, basketball, softball and wrestling. Sports medicine professionals love that syndesmosis injuries or "high ankle sprains" are complex and difficult to diagnose and properly handle often with misdiagnosis and poor direction. Rehabilitate and therapists cite the syndesmosis as being one of the injuries that are most difficult to totally comprehend. The outcome following a syndesmosis injury is the athlete attempts to return to competition only when they can't perform in the level due to pain from the ankle and/or malfunction in running and stepping action to be disappointed. Therefore, diagnosis and early recognition is critical for a good outcome and to avoiding chronic problems. If needed surgical intervention is recommended. Both part Rehabilitation Masterclass' objective is to describe in detail the things important in tibiofibular syndesmosis injuries, to highlight the assessment considerations and also to detail the rehabilitation program required after this rather difficult to handle sports injury. Anatomy & Biomechanics Of The SyndesmosisThe ankle proper is called the joint and it is made up of the articulation between the talus bone in the ankle as well as the lateral malleolus of the tibia and lateral malleolus of the fibula. This joint is where authentic dorsiflexion and plantarflexion occur. The dome-shaped arrangement of the talus fits into the concave tibial undersurface and this arrangement is known as the ankle 'mortise'. Beneath the talocrural joint is the subtalar joint, formed by the talus. It's a gliding joint (like the hinge joint that's the talocrural joint) and this is the place where the ankle increases inversion and eversion, moves necessary for midfoot pronation and supination. The joint amongst this complicated is the distal tibiofibular syndesmosis. The syndesmosis is a tough fibrous joint that allows fibula and the tibia to allow functional movement to happen in locomotion and to work collectively providing a congruent and stable joint for function. The distal fibula articulates with the tibia through the vertically orientated fibula top notch (incisuria fibularis tibiae) found on the lateral tibia between the anterior and posterior tibial tubercles. They form the distal tibiofibular syndesmosis. It has been shown (Lundberg 1989) which with active dorsiflexion of the ankle the talus glides posteriorly in relation to the tibiofibular joint. During movement and locomotion, against the mortise the talus will 'push' since the ankle approaches dorsiflexion and exert an outward force. This is a result of the distinctive anatomical arrangement of the talus with the anterior area of the talus being 4.2mm narrower than the anterior part. This causes a widening of the mortise as the anterior ankle wedges to the mortise with dorsiflexion (Norkus 2001). The talus in dorsiflexion exerts a force so degrees rotates, moves posteriorly and proximally 2-4mm 1-3mm as well as roughly 1mm is widened by by the mortise. These movements are reversed with plantarflexion. Clearly the distal tibiofibular articulation needs to be a secure relation- ship to maintain the solid ankle 'mortise' but has to be flexible to allow the motion during stance and dorsiflexion. To prevent the syndesmosis from widening during this motion, the following soft tissue structures encourage the integrity of the joint (Ogilvie-Harris et al 1994; Xenos et al 1995): - Anterior inferior tibiofibular ligament (AITFL) -- supplies about 35% of power of the syndesmosis. This ligament is the most vulnerable to injury; syndesmosis ligament or poor tansverse ligament (ITL) -- 33%;
- Posterior inferior tibiofibular ligament (PITFL) -- 9%;
- Syndesmosis or interosseous ligament/ tissue (IOL) -- 22%.
These structures are responsible for holding the leg bones together and they produce a ankle 'mortise'. By strengthening the lateral ankle mortise stability is indirectly provided by the deltoid ligament on the medial side to the syndesmosis. If the ligaments are compromised, fibula and the tibia are allowed to proceed apart or 'gap' and also a diastasis develops. In this case the joint becomes secure. Mechanism Of InjuryAny step that widens the ankle mortise can damage the syndesmosis. In how much the injury progresses, the severity of the force and the length of the force are determining factors. The typical and normal mechanism of injury is forced closed kinetic chain external rotation of the foot with abduction and dorsiflexion of the ankle with forced internal rotation of the tibia. This classic mechanism could take place if the leg was caught under the body suddenly and the leg twisted on top of the ankle (because of fall or tackle), or when an athlete quickly changes direction whilst the foot has been fixed on the ground (usually the studs or cleats avoid any shear motion of the shoe-foot interface). A frequent example in skiing is really for the ski to stay in the snow and the ski imparts a solid and sudden external rotation on the foot. This rotation position of the foot/ankle moves the talus laterally and into rotation and the ankle mortise widens by abutting the fibula and forcing it laterally and posteriorly. Calcaneus eversion further widens the mortise and the lateral fibular is pushed from its articulation with the tibia. The ligaments are sequentially torn in order to posterior from anterior; hence the AITFL is almost always involved in all grades of injury. The size and duration of the force at the time of injury determine the level of harm. Significant force and duration of force will damage PITFL, ITL, IOL and the AITFL. What's more, additionally damaged with this particular mechanism and it is not unusual for the external rotation force to be transmitted upward towards the superior tibiofibular joint. In this instance, the athlete may whine of co-existing lateral knee pain (Seymortier et al 2008). It is also feasible as in the end of plantarflexion range that is accessible, the mortise is incapable of rotation of the talus in the mortis, that plantarflexion and inversion movements may injure the syndesmosis. Therefore the rotary forces might cause a diastatic strain on the syndesmosis (Pajaczkowski 2007). With this common mechanism, trauma to the anterior talofibular ligament (ATFL) and the calcaneofibular ligament (CFL) is more possible, and the AITFL might also be called the force of the inversion can make an abutment of the talus against the tibia and 'open' that the mortise. The only real structure involved in the syndesmosis is going to function as AITFL if it occurs and the harm will be steady. Types Of InjuriesGrade 1 (sprain without diastasis) A typical low velocity and/or very low force external rotation-type mechanism that's strong enough to 'gap' that the mortise will make an injury to the thoracic ligament as the talus rotates laterally and the distal syndesmosis may marginally separate, hammering the AITFL. This force is generally inadequate to injure the deeper behind structures like the interosseous membrane or the deep deltoid ligament on the medial side. The AITFL will probably be tender to palpate. AITFL injury's degree may vary from a strain to some significant strain/tear; nonetheless, since the syndesmosis remains intact the injury is considered to be stable. Therefore grade 1 injuries by definition are stable, but the level of AITFL damage may be classed as grade 1 (minor but steady injury) to more acute AITFL damage (important but stable harm). Grade 1 injuries can be successfully managed conservatively within an Aircast walking boot for a time period (mentioned later). Grade 2 (diastasis clear on stress radiographs) This involves a greater level of dorsiflexion/external rotation force and also entails damage to: - anterior deltoid ligament (complete disruption usually);
- deep deltoid ligament;
- significant tear in AITFL;
- interosseous ligament.
The ankle will probably be shaky but may appear fine on non-stress x-rays. After the syndesmosis shows congruency and stability on x-ray but then reveals uncertainty on anxiety x ray, this is known as a 'latent' diastasis. These type of injuries are often tricky in that the instability may be overlooked originally and treated as a secure syndesmosis with early mobilization and early return to running. Typically, if these are misdiagnosed and thus mismanaged, a poor outcome will result leading to operation at a later stage. A mismanaged syndesmosis may then lead to a chronic and shaky ankle which may predispose the athlete to ongoing pain, further injury, arthritic changes and osteochondral lesions. Some exact low-level tier 2 injuries can be managed conservatively surgical intervention will be needed by the injuries. This is the type of injury that most commonly gets mismanaged as frequently they are suspected of being adequate for conservative management as the mortise heals in a widened position with talus motion in the mortise, they do to function. Grade 3 injuries (frank diastasis) This involves abduction of the foot and external rotation. This will result in severe injury to the syndesmosis (AIFTL, PITFL, interosseous ligament and membrane) as well as complete disturbance of the deltoid ligament. This is often associated with fracture of the distal fibula (Masionneuve fracture). When there is, syndesmosis rupture is supported on x-ray. Widening of the medial clear space in connection with extending of the tibiofibular interval in the level of the ankle, and these are observed on non-weight bearing x-ray that is regular. These injuries are unstable on standard radiographs and management will demand a surgical intervention. ExaminationSubjectiveThe athlete will often complain of pain that is intense at the distal tibiofibular joint which makes it tricky to weight bear. They may also complain of knee pain if the proximal tibiofibular joint is involved. The incident may be remembered by them as mimicking the mechanism of injury like the foot being captured under the body and they twisted on top of the foot. Knowing the exact mechanism of injury is vital in identifying a lateral ankle sprain when compared with a high- tier syndesmosis injury. The prior can be handled whereas the latter will want a stabilization operation for your syndesmosis. What's more, willingness or the ability to weight bear also can be a indicator that is decent. Often lateral ankle sprains have the ability to weight bear early whereas injuries with or without fracture will be reluctant to burden bear. A missed shaky syndesmosis injury that is not properly treated can result in outcome and prolonged morbidity. Hence getting the diagnosis is vital. ObjectiveNo single goal test is legitimate for confirming a syndesmosis injury (Sman 2013). Confirmation is usually made on the answer as well as history on numerous evaluations. It has to be mentioned that in severe syndesmosis sprains many if not all of these tests may be due to pain, spasm and swelling. Often the initial suspicion is based on mechanism of injury and also palpation pain. 1. Gait. Typically if the individual is able to partially weight bear they will do so about the forefoot (walk on toes) as this normally avoids dorsiflexion that probably will be painful. 2. Palpation. The deltoid ligament will be tender to palpate along with the AITFL are also tender. At a high-grade syndesmosis that the palpation pain will expand a way up the fibula. Often the lateral ankle ligaments (ATFL, CFL) will not be tender, especially in dorsiflexion/external rotation mechanisms. 3. Swelling. Swelling over the joint line between the tibia and fibula is often indicative of syndesmosis injury. 4. Squeeze test. A non-weight posture evaluation where the mid shaft of the fibula and tibia are squeezed and pain is felt at the distal syndesmosis. The compression of the bones will create an opening effect on the distal tibiofibular joint. It has been shown to be a good prognostic indication for length of absence. 5. External rotation. Another non-weight- bearing evaluation. The patient sits on a mattress with knee flexed at 90 degrees and shin vertical. The examiner stabilizes the shin with a single hand and with the other hand rotates the foot. Here is the mechanism that creates the harm, therefore a disruption of the syndesmosis ligaments will probably undoubtedly be perceived as being painful within the anterolateral ankle. In the presence of a completely ruptured syndesmosis ligament this evaluation may actually not be debilitating, so this may be a good test for harm but not instability. 6. Dorsiflexion compression test. A burden- bearing evaluation where the athlete lunges forward and a pain response is noted. The assessor then compresses the tibia and fibula together to increase stability and the test is repeated. If pain is diminished with compression it may be diagnostic for a syndesmosis injury. This evaluation can only be carried out on relatively functional accidents that will tolerate weight bearing. 7. Fibular translation test. Passively translating the fibula in an anterior and posterior direction in relation to the tibia. The joint play will be raised in existence of a syndesmosis injury. 8. Cotton test. By applying alternating lateral and lateral pressure into the talus the talus is rocked from side to side. This can reproduce a sensation along with pain . 9. Weight bearing. If the athlete has difficulty weight- injury imagine a injury. Investigations1. X-ray. Routine x-rays (AP, lateral and mortise views) will probably be needed to exclude fractures of the fibula, avulsion injuries and talar dome fractures. To see syndesmosis injuries that are unstable stress x-rays will be necessary to gauge the amount of separation. Due to the pain this repeats, a local anaesthetic block might be required to fully stress the joint. Externally rotating the foot or simply by having the athlete stand on one foot applies stress. On x-ray the medial clear space (should be less than 4mm) and lateral clear distance (should be less than 6mm) can be quantified and also the tibia-fibula overlap which should be greater than 1mm on all views. Stress views will reveal anterior and lateral displacement of the fibula compared to viewpoints. 2. CT. These are somewhat more sensitive than x-rays in discovering a injury and these can detect differences as small as 1mm. 3. MRI will show the anatomical injury. It is used to identify AITFL, interosseous and PITFL injuries, osteochondral lesions and bone bruising. 4. Arthroscopy. This can be used to validate a suspected syndesmosis injury found on imaging. With arthroscopy, the ligaments may be assessed and an arthroscopic stress test could be conducted to evaluate instability. Furthermore talar dome lesions could be assessed under arthroscope. A positive diagnosis to get a injury usually involves a mix of factors: 1. A typical history with a expected and typical mechanism of injury; 2. The location of pain focused the tibiofibular joint round with degrees of pain along the fibula and possible ligament pain; 3. An inability to weight bear; 4. Favorable signs on a number of the evaluations; 5. Imaging which could show uncertainty on anxiety viewpoints on instability or perspectives; 6. If accessible, MRI and CT can confirm the degree of tissue damage and joint separation. The potential differential diagnosis that may mimic a syndesmosis injury include: 1. Lateral ankle sprain; 2. Fibula fracture in the absence of syndesmosis soft tissue injury; 3. Osteochondral lesions on the talar dome; 4. Capsular sprains of the anterior ankle; 5. Retinculum strains without underlying tibiofibular joint damage. SummaryInjuries are ankle injuries seen from the population. The normal mechanism is a forced external rotation of the foot/ankle in regard to the tibia and fibula. It is more common in contact sports and skiing. The athlete can present with a ankle with pain/ swelling present on the inferior tibiofibular joint and potentially along the fibula and involving the superior tibiofibular joint. Timeless syndesmosis clinical evaluations may prove inconclusive because of the lack of specificity and sensitivity with some of these tests. Imaging such as anxiety perspective x ray and more sensitive MRI may be required to confirm the diagnosis. References
1.Athletic Therapy Journal. Sept 2002.
2.J Bone and J Surgery Am. 1976. 58(3); 356-357.
3. Foot Ankle Clinic. 2009. 14(2); 277-298.
4. Foot Ankle. 1990. 10(6); 325-330.
5.BJSM.2013. 0; 1-7.
6.American Journal of Sports Med. 2012. 40(10); 2348-2356.
7.J Athletic Training. 2012. 47(3); 339-357.
Chiropractor, Dr. Alexander Jimenez summarizes some fascinating injury stories in the combat game... I was recently on a holiday in Koh Lanta in Thailand and throughout my holiday I visited a Muay Thai training gym for two reasons. Firstly, as I've had a fascination with the sport for some time having formerly handled some injuries in some fighters in Australia it was to have a private Muay Thai training session with a few of the boxers. I was that I could use as material. I clarified the purpose of my visit and approached the head coach and discover a few of the interesting injury stories they'd out and he was pleased for me to talk to a few fighters. The following are just two case studies from this fact-finding mission. The Biker's ElbowThe initial fighter was a seeing K1 fighter out of Holland who spends six weeks a year in Thailand. He had been a fit and healthy 25-year-old man with a history of prior knee and back injuries; nonetheless, his complaint at this stage was pain on the inside of the right elbow that made grappling through fighting and also lifting weights at the gym hard. The pain had started only a few days to his recent trip to Thailand and had been present for about five days. It had been focused around the medial epicondyle of the elbow. Any powerful gripping moves whilst flexing the elbow was shown to be debilitating. It had been affecting his coaching as some other work that was grappling was too painful and he was unable to perform any type gym movements such as chin ups and rowing motions. All pushing type movements were asymptomatic. He whined no preceding elbow pain and refused any trauma to the elbow such as a arm lock-type situation or a hyperextension type injury during training or fighting. He had been tender to palpate the source of the wrist flexor muscles which start on the elbow along, as well as any forceful wrist extension was uneasy. His elbow felt secure and using a stress test. Strong grip of the hands was painless until he was put to a position of wrist extension that is complete. With no history of injury and without any changes to his coaching regimen I quizzed him. We exercised that whilst in Thailand he traveled on a scooter -- a pastime for thieves to tackle when. He'd spent plenty of time around the sightseeing on the bicycle when he came. The type of scooter he used was a automatic without equipment shifting the accelerator is on the right side of the bars. The reasoning was because of the continuous wrist extension used to accelerate the scooter at a pronated position, the wrist flexor muscles were put in a position of stretch with constant tension due to the co-contraction of this wrist flexor/extensor group required to do this particular movement. Coupled with this was that the vibration that is constant on the bicycle caused by the movement of the scooter in addition to the frequent pot holes and undulating road typical of Thai roads. The diagnosis was an inflammatory response in the wrist flexor origin. I made the following suggestions: 1. Regularly extend by putting the hand flat on a table with the wrist turned to supination, the wrist flexors. He was to hold this for 30-second efforts. 2. Soft tissue massage to the wrist flexor muscle group, something he could do in Thailand using the massages on offer. 3. Moderate outrageous wrist flexor exercise working with a 5kg dumbbell using the forearm put on a desk (palm upward) and also to slowly lower the weight into wrist extension and use the flip side to help the concentric lifting. He was to do this 4. Change the hand place on the accelerator. It was suggested he can do three distinct things to achieve this. Primarily he can flare the elbow out broad whilst riding to decrease the amount. He up to this point kept the elbow close in to the body to perform this. Secondly he could occasionally hold the accelerator handle on the end so that he could keep his forearm supination position as this requires radial deviation to quicken the bike. Finally, on stretches of street I invited him undo the grip so he utilized wrist flexion to accelerate the bicycle and to actually supinate his forearm. 5. Rub some topical gel. Two weeks later, I saw him and he maintained that the elbow pain had entirely subsided. The Buzzing ThighA 30-year-old Thai local fighter had whined a six- month history of a 'buzzing' kind pain on the outside of the thigh and in the calf that was ideal region. It'd started after he obtained a hard kick to the back of his right hip. The kick was so strong that he lost function of his right leg at the time and needed a sensation down the thigh into the foot and calf. As this occurred in training, he rested on the leg and stopped and used the Thai concoction of heat and ointments to manage this harm. He returned to coaching a couple of days later and had been involved in a couple of fights after. He felt he had been still practical, but still felt a buzzing sensation every time. He claimed that he managed to perform everything and even blows to the thigh and hip were no longer painful than normal. On examination he had movement in both hips his internal rotation when lying prone was decreased compared to another side. He was able to squat and perform a single leg pain free. All knee motions and ligament testing demonstrated unremarkable. What was painful was a slump test on the ideal side and this reproduced the proper- sided throat sensations he experienced with kicking. The pain was made worse with dorsiflexion of the ankle whilst at a slump position. It was concluded that when he had sustained the blow to the posterior hip, he had bruised the subsequent hematoma and the right piriformis muscle had created fibrosis around the sciatic nerve. Each time he had to stretch into full hip flexion with the knee extended and the foot dorsiflexed to complete a roundhouse kick, he had been effectively stretching the nerve against the port made by the scarring and fibrosis around the guts by the preceding injury to the soft tissues. This would be sufficient to give him a neuropathic-type pain down the leg across the course of the nerve and in the superficial peroneal nerve. I explained that the way to remove this was to frequently 'extend' or move the guts from the vents to try to release the nerve out of any fibrosis. I showed him how to run his own gentle nerve mobilizations as a slide and slide method (neurological wracking) and also how to hold the place on stretch to make a sustained elongation. He did so sitting on the conclusion of the fighting ring at a full slump position (neck flexed, spine arched into flexion) and he had been to straighten the ideal knee with the foot dorsiflexed until he felt a gentle uncomfortable tug onto the guts (felt like a buzzing down the ideal leg). This was to be achieved to this point of discomfort but not pain. I explained that if he overdid motion and this stretch he could make the issue worse, so I invited him to underdo this and not over do this. He had been to spend five minutes after a warm-up finishing a string of knee extension and release the stretch. After a pause continue this on/off movement for five minutes per day and he was to stretch again. I didn't figure out how this solved as this movement would take a few weeks to make a noticeable shiftI can expect that he would have discovered a relief from his signs at some stage in the future.
Chiropractor, Dr. Alexander Jimenez appears at the way in which the foot and ankle combine -- and explains how to avoid injury. In sports, the ability to consume and transfer force through the foot and ankle complex is crucial for functionality and resilience against harm. The most obvious examples are in any running or jumping - based sport, but the capacity to push off the starting blocks and propel the wall off may be a significant determinant of sporting achievement when we consider swimming. What about a non-weight posture game like water polo, however? Well, whilst it's a legitimate point not much of the true match necessitates force absorption by the foot and ankle (except for holding your opponents at bay), then we need to consider all of the dry land training that these creature athletes will need to finish, including key lower body power lifts. So, as we can see, with the exclusion of stationary target sports such as archery and prone rifle shooting, we want our ankles in good shape. Fundamental to all damage avoidance, operation and rehabilitation training programs is located a solid underpinning of an understanding of biomechanics and it's that I want to follow in this report. Instead of the usual dry approach that appears at force vectors and trigonometry equations, however, what I will aim to pronounce here is on how we could use our understanding of biomechanics to drive our programming a useful focus. It Is ComplexWhilst many Individuals often think of the As existing as the talocrual that is hinged joint ankle, the reality is that this is just part. It Includes the: - Talocrual joint -- between the talus and Both tibia and fibula;
- Subtalar joint -- involving the talus and the calcaneus;
- Inferior tibiofibular joint -- in the 'southern' end of the tibia and the fibula.
All three areas will need to work together to permit the foot to lift (dorsiflex), point (plantarflex) and rotate (supinate and pronate). In a way like the wrist and hand working together to permit the fingers to operate well, the various midfoot joints will need to work in concert articulations to allow the foot to be positioned nicely for loading absorption and application. It is complicated in the name and nature! Movement & Stability -- Dual MastersFor your ankle to be able to work at its optimum level, it has to be a adaptor plus a lever. While both of these aims seem antagonistic, the effective co-ordination of these goals is to sporting achievement, essential. Let me clarify. A stable and strong base is needed by the body to be able to apply force. In exactly the exact same manner we cannot fire a cannon we need to have the ability to retain stability to fulfill our motion wishes. How the ankle and foot complex achieve this is by: - Keeping integrity between both the tibia and fibula through a structure known as the syndesmosis;
- Maintaining a "dynamic defense system" orchestrated from the nervous system by employed from the surrounding muscles to make sure that the ankle and foot aren't "loose" upon earth impact;
- Maintaining a force bridge As the plantar fascia to permit power to be amplified and applied to the foot in a fashion reminiscent of a spring.
At the same time, but the foot requirements to be able to adapt to alterations in the platform upon which it interfaces. If we had been too stiff, we'd not have the capability to accommodate to these requirements and our purpose would be obviously compromised. Obvious examples of those demands are: - Shifting terrain (like sand, loose Rocks or even landing from a jump on an opponent's foot);
- Changing management when running;
- Manipulating foot posture to impart twist on a football when kicking.
As we could see, these demands can be quite... well, demanding! When this sport's need is to execute the tasks in a split 18, this is amplified. Think about a goalkeeper in football who, after running out off the line to maintain a corner, lands on one leg on an opposition player's foot, then has to change direction out of traffic and then kick the ball long into his teammate on the halfway line. This can take place at a second's space, and in this moment, ankle and the foot have needed to execute biomechanical tasks, some proposed, some fanatical. The Spring-Like LeverWe love the double functions of we could put our decision making regarding injury direction and injuries that impact these functions should make sense, the complex. For example, if we view a syndesmosis diastasis, an accident which affects the structural integrity of this inferior tibio-fibular joint, we all know that we will need to let it heal naturally to ensure that we have proper stability, or to manage it if conservative therapy is deemed unlikely to achieve this objective. Alterations in the lively defense system, in which the ankle is not appropriately positioned to absorb floor contact, often from poor proprioception, leaves us vulnerable to ankle sprains and reduces our capacity. Finally, any injury or dysfunction compromises the "Windlass effect" provided from the entrance of the Achilles tendon to the plantar fascia underneath the foot and onto the first metatarsophalangeal (big ft) joint, will reduce the capability of the spring to lever us into the propulsive phase of the next step. The Windlass Effect This is a mechanical model whereby the plantar fascia, which runs longitudinally from the heel to the toes, supports the medial longitudinal arch of the foot and allows for effective force transition from ground contact (force absorption) to push off (force application). We can see, therefore, that we will need to assess all of these areas to determine where the issue may lie, and know that frequently there's an where dysfunctions in one, overlap domain can lead to dysfunctions in another. The Mobile AdaptorMany people's idea of treatment is to receive the athlete to stand on a wobble board and that is it! I know so it's no surprise this really is deemed satisfactory and that my education at university severely lacked in this sort of area. We know that the wobble board can be an effective tool in enhancing equilibrium that is dynamic but it cannot exist as the only intervention. Let's think about it. When you are standing on a wobble board, your ankle is at either a dorsiflexed or, at best, neutral position. Now, we know that the vast majority of ankle sprains happen when the ankle is at its loose-packed position (plantar-flexed). This is the neck of the talus is exposed to being pressured stretching the lateral ligament complex and because the restraints of the joints will be open. With this in mind it is logical to ensure our athlete is capable and confident before we send them back to battle? It is with the role of the mobile adaptor in your mind I vary the surface which any retraining takes place on (beginning stable and then finally progressively to, quite literally, shifting sands), but also I change the position in which the ankle is made to function in, commencing in a close crowded place (weight bearing in dorsiflexion) to progressively more vulnerable positions (for instance, standing on tip toes). Role Of The Calf ComplexIt seems that everything in this region is known as 'complex' and this holds for the calf. This is due to the fact that the calf is comprised of the plantaris, both the soleus and the two heads of the gastrocnemius. From the texts, they act to plantarflex the foot and there is not any denying that this is a portion of the function. They have arguably a role, however, one that isn't taught well at college, and that entails the notion of isometry. We are taught that there are three Kinds of muscle contractions: 1. Concentric (shortening); 2. Eccentric (lengthening); 3. Isometric (holding). In my head, the terms isometric and eccentric contraction are oxymorons, and we ought to rather refer to them as isometric and eccentric muscle actions. Whilst this may seem semantic and pedantic in nature, the truth is that an understanding of these activities are designed for is essential to our program design and delivery. This is especially the case once we consider the role of the complex from ankle and the foot. There have been a number of studies examining the function which calf strength has in both functionality and predisposing us to, or resulting from an ankle sprain. Many are equivocal because most do not examine the nature of calf function, but that is. As we run towards a complete sprint, we have to employ force with much less time in which to apply it because foot contact instances are reduced. If, as we were taught, our ankle consumed the floor contact and implemented pressure by a coupling of contractions, it would be impossible for us to move at pace. It would be too slow and far metabolically expensive. Take, for example, that the 'burn' when heel raises over a measure, you are feeling on your calves. This is a good instance of an concentric and eccentric muscle action coupling. When was the last time you believed this when running? Never! The reason behind this is because the role of the calf muscle is to supply a foundation to permit the Achilles tendon to stretch and recoil. It does this by retaining behaving to hold without lengthening. We utilize the tendon to its entire extent. The tendon has the ability to recoil faster compared to muscle may and, because it's non-contractile in character, it is metabolically efficient. Think about the fastest animals in the world — cheetahs, horses, Usain Bolt. Do they have big calf muscles or long, rapidly recoiling Achilles tendons? Most definitely the latter! Big calves, unless you are a front row forward in rugby or a bodybuilder, are a waste of mass. We are much better off placing our hypertrophy emphasis upstream at the glutes. But with this in mind, and given that the calf complex attaches to the Achilles then onto the plantar fascia below the foot, when looking at developing the purpose of this spring-like lever we ought to do what we can to prepare the isometry of this calf. How do we do this? There's nothing wrong with doing great old-fashioned heel raises to make sure that the calf has good capacity, but to instruct operate, we need to do plenty of plyometric training. Not only can this train calf function's nature in locomotion, but it may be improved during the rehabilitation period to make sure landing competencies are improved. It's because of this that I love skipping as a rehabilitation drill and a core competency that I want out of my athletes is to be able to perform 50 'double unders' . At which the rope travels around two for each one jump A double beneath is. There is undoubtedly a skill component here and it takes some time to develop it, but out of an ankle perspective, if you can't retain calf isometry along with the heel slows down via a slow rhythmic stage, what ends up happening is that the rope hits the shin on the next trip around. Because there's just no way to deceive 13, the rope is loved by me. It can be a frustrating encounter throughout the learning phase but for the athlete, the skill acquisition curve is intense. Summary By having an understanding of the true nature of not just the structure, but the function of a joint, we have a greater appreciation of how best to improve performance. Nowhere in the body is this better demonstrated than in the foot and ankle complex. Through a knowledge of both the spring-like lever and mobile adaptor roles of the complex, we can specifically examine each capacity and then be strategic in our interventions. Equally as important are the isometric conditions in which the calf operates most efficiently. Armed with this information, we can no longer excuse an injury prevention or rehabilitation program that seeks to improve foot and ankle function simply by getting the athlete to stand on one leg, balance on a wobble board to perform heel raises. We need to examine the positions and conditions in which the complex are expected to operate and we need to train them specifically here, starting from the most stable when the ankle is least competent (for example early on in rehabilitation) and then progressing to the most demanding.
Chiropractor, in part 1, Dr. Alexander Jimenez outlines the relevant anatomy and biomechanics of the ACJ, the way they are hurt to clinically assess injury and the radiological requirements in determining the extent of injury. IntroductionInjuries to the acromioclavicular joint (ACJ) are recreational pursuits like cycling and a injury in the athlete. It's a frequent complaint in contact sport athletes like rugby, AFL, NFL and combat sports like MMA and judo. In actuality, Headey et al (2005) show that in elite level rugby union in the United Kingdom, ACJ injuries account for 32% of shoulder injuries, being the most frequent structure to be hurt playing Rugby Union. These injuries are managed Remains controversial. Low grade ACJ sprains are managed conservatively the ACJ separations could be managed surgically or non-surgically. Bosworth at 1941 offered the surgical intervention to ACJ dislocations. Surgical methods are available to repair a ACJ today. Relevant Anatomy & BiomechanicsThe joint between the clavicle and the acromian (AC joint) as well as the sternum and the clavicle (SC joint) are the only links that the appendicular skeleton (arms) has into the axial skeleton (backward). Thus the acromioclavicular joint (ACJ) may be subject to elevated forces due to this unique anatomical arrangement. The ACJ is a diarthrodial joint with four planes of motion, anterio-posterior (forwards and backwards) and supero- inferior (down and up). It's also able to spin on its axis. A capsule surrounds the joint and has an synovium making a synovial joint. Both clavicular and acromial bones are covered with a cartilage (hyaline in late teens and early twenties that matures into fibrocartilage from the 20s). The ACJ also has an intervening meniscoid disc between the two bones. The specific use of the meniscoid disc is poorly known and the disc is not as well defined since the menisoid disc that's placed within the sternoclavicular joint (SCJ). This may explain why the disk degenerates with age. By age 40 it might be non-existent (Peterssen 1983). Because of the small nature of the disc along with the large compressive forces struck in the joint due to muscular contraction of the powerful shoulder muscles like the pectoralis major and latissimus dorsi this disk is thought to be prone to premature breakdown along with the distal end of the clavicle. Both the disc and distal clavicle are prone to compressive failure, evidenced by the high rate of osteolysis in the distal clavicle, especially in athletes who impose substantial drives on the joint such as weightlifters (Richards 1993). The ACJ is supported by four AC ligaments -- inferior, superior, anterior and posterior. Excess movement is prevented by these ACJ ligaments. What's more, ligaments combine the coracoid process to the clavicle (the coracoacromial ligaments -- CC ligaments) and these would be the trapezoid and conoid ligaments. These ligaments provide superoinferior support (up and down) as well as anterior translation service. After the acromion and the separate clavicle (collapse on the shoulder) the ACJ ligaments would be the first ligaments to extend and withstand force (in particular the exceptional ACJ ligaments), followed then by the conoid ligament and trapezoid ligament. Therefore, injuries to just the AC ligaments may be considered a stable injury whereas trauma to the conoid / trapezoid ligaments will result in there being part of the CC ligament complex in addition to disruption of the ACJ. Back in 1986, Fukuda et al performed a research play at ACJ stability. What they found could be summarized below: 1. The AC ligament acts as a main restraint to anterior clavicle displacement and rectal axial rotation; 2. The conoid ligament constrains anterior and superior rotation as well as superior and anterior displacement of the clavicle. Furthermore, Rockwood (1998) says that the AC fibres blend with the upper trapezius and deltoid's fibres which attach to the aspect of the clavicle and acromian, and consequently he argues these muscles may be significant in providing the ACJ with active support. Injuries To The ACJAccidents to the ACJ are far more common In men in their twenties, highlighting behavior as a element in ACJ injury. Young men are involved in pastimes and sports that will lead to a traumatic ACJ injury. Sports such as football, rugby, motorcross riding, mountain bike riding and combat fighting (judo, MMA, ju jitsu) are sports where there is a potential for traumatic ACJ injury. The most frequent mechanisms of Injury are direct falls onto the shoulder and the clavicle separates in the attachment that is acromial. This sometimes happens in contact scenarios in the football sports or falls off a bicycle. After the acromian contacts the floor, a downward displacement of the clavicle is primarily resisted through an interlocking of the sternoclavicular ligaments (Bearn 1967). The clavicle remains in its normal position, along with the scapula and shoulder girdle are driven. A downward force being applied to the superior aspect of the acromion's outcome is give-way of the CC and AC ligaments or clavicle fracture. There may be an anteroposterior direction to the force. Tears of the deltoid and trapezius muscle attachments occur from ruptures of the CC ligament, as well as the clavicle if the pressure proceeds. With pressure, the epidermis can also be interrupted. From the rare type VI injury to the AC joint, a mechanism of harm is responsible. A direct force onto the surface of the distal clavicle has been described. The clavicle is pushed where it lodges under the coracoid or the acromion. A fall onto an outstretched Arm may force the humeral head to push against the acromian leading to an ACJ separation. This is called an indirect injury. These type of injuries impact the AC ligaments and the CC ligaments remain intact. Clinical AssessmentUsually the mechanism of injury is obvious ACJ pain after a direct fall onto the shoulder's point. Anxiety highlighting a grade ACJ injury and gross swelling could be evident in addition to a clear step will be felt within the ACJ. Most measures like range of movement (especially horizontal adduction) will be pain-limited, and also the capability to create isometric rotator cuff strength will also be pain-limited. In low regular injuries, frequently the athlete is able to reach of motion; nonetheless tier will be pain-limited. RadiographyA range of exposures are required to properly visualize the ACJ and the structures. This is best described under the following points: 1. Reduce the penetration to A half of the commonly employed for a shoulder x-ray. 2. Zanca view is the best for visualizing the ACJ. This is done by leaning the x-ray beam 10-15° cephalad and imaging equally ACJ on the same cassette to compare the coraco-clavicular distance (CC distance). 3. Axillary view is required for Type IV Injuries in which the clavicle has been posteriorly displaced. 4. A Strykner notch view is the opinion for imagining process cracks. 5. Stress views using weights connected to the wrist (rather than holding in the hands) is used to exacerbate the ACJ separation. Tossy et al (1968) and Rockwood (1998) Provide the most comprehensive grading system for ACJ harm, and all these are typed from Form I-VI (see Table). Management Of AC InjuriesNormally, Type I ACJ separations are minor accidents and are treated. This will involve a brief period of immobilization to reduce the strain on the AC joint this is not common across all sport. Standard ice is used to your first 48 to 72 hours. As with most severe soft tissue injuries, non-steroidal anti inflammatory drugs (NSAIDs) are usually avoided for the first 3-4 days due the capacity for delayed healing of collagen structures (Warden 2005). Immediate tender and isometric range-of-motion exercises are encouraged. There is a structured strengthening program initiated whenever the individual's symptoms begin to resolve. Gross power movements (gym-based) can be gradually improved, typically in the following order: 1. Horizontal pulling movements (seated Row, prone fly, bent over row); 2. Vertical pulling -- elbows facing Shoulder (near clasp pull-downs, hammer grip chin ups, direct arm pull-downs); 3. Horizontal pushing (bench press, dumbbell bench press); 4. Vertical pushing (shoulder press movements); 5. Diagonal PNF patterns. Type II injuries usually involve more soft tissue injury. Although the time frame is as a result of the trauma treatment for type II injuries is exactly the same as for type I injuries. A period of immobilization will be needed. A sling is generally used for 1 to 2 weeks. The patient is informed that a cosmetic deformity may be present after the injury is healed. The time period for return to sport is varied based on severity of initial injury, type of sport played, associated previous shoulder injuries. Simple type 1 injuries may be back within 7-10 days, more type II accidents might take up to come back to full function to sport. The attention in part two of the guide will be on the rehabilitation after surgical fixation of the ACJ in kind III-VI injuries. ConclusionACJ injuries are common injuries in the contact sport athlete and in recreational pursuits the victim falls upon the point of the shoulder. A collection of AC and CC ligaments which may fail leading surrounds the ACJ. The benign kind I and II injuries may be managed the type III injuries type the 'hard to decide' category whereas type IV, V and VI need intervention. Part 2 of the masterclass will outline in detail the surgical options available to reconstruct the and a kind IV-VI injury typical post-operative rehabilitation.
|


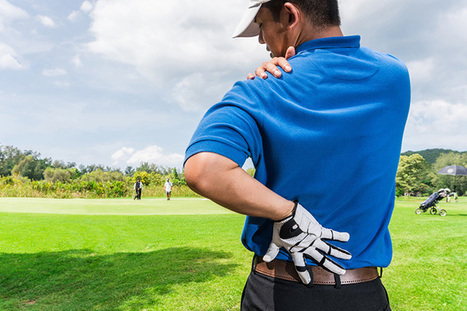
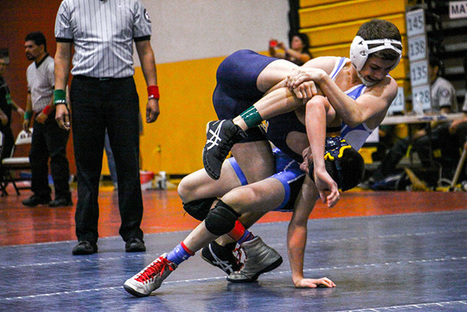
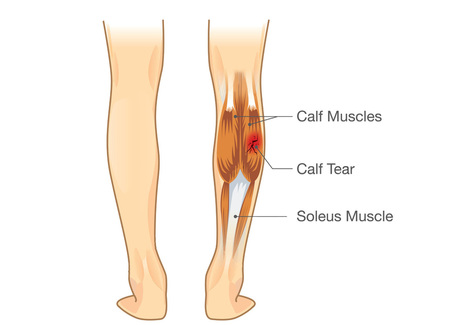
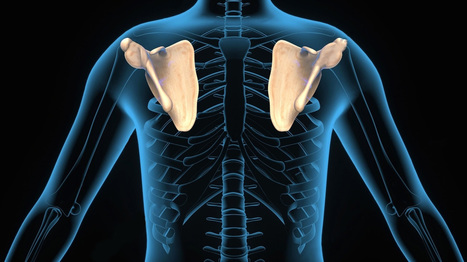
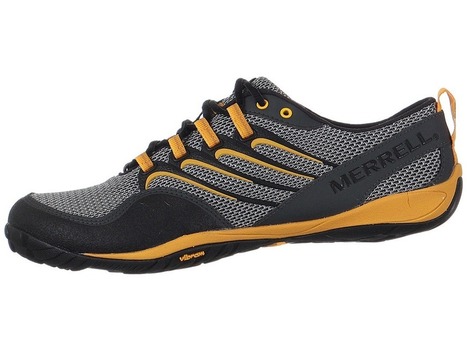
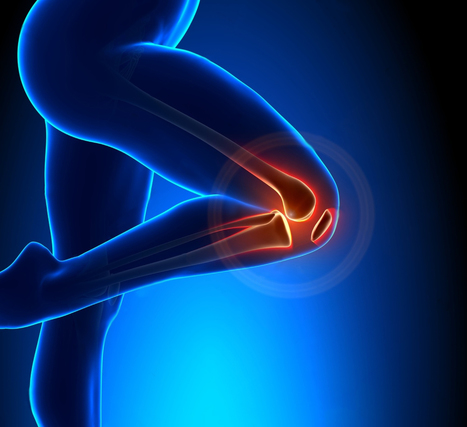
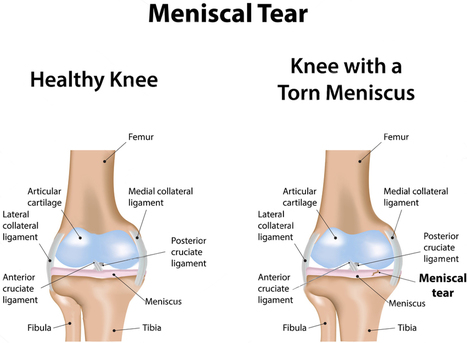
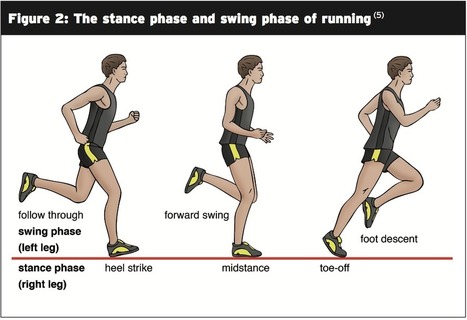

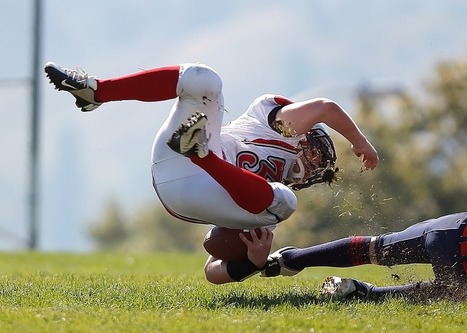
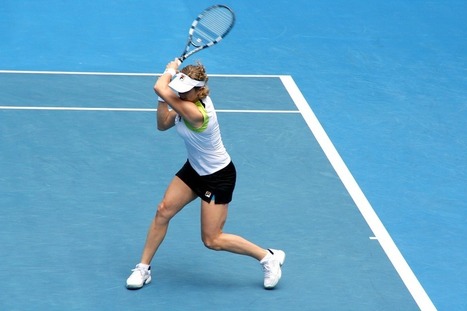

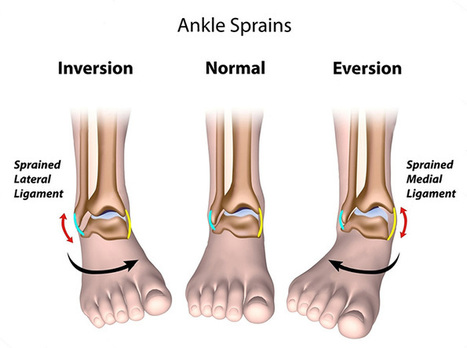
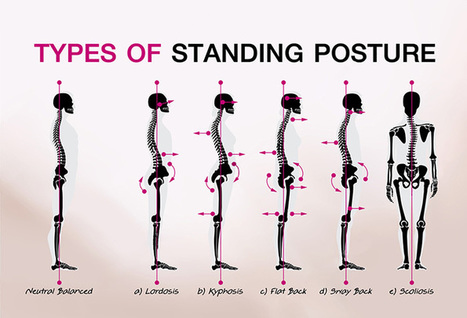

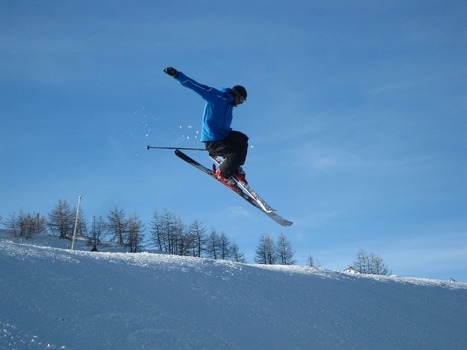
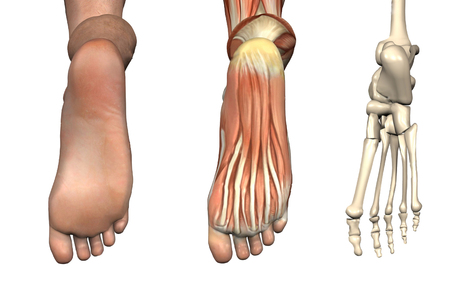
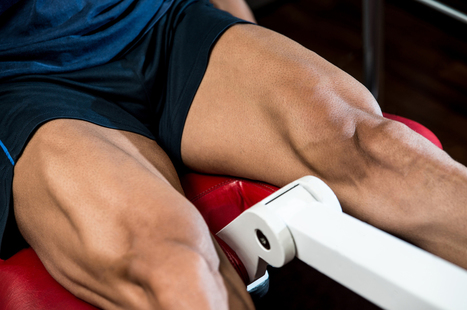
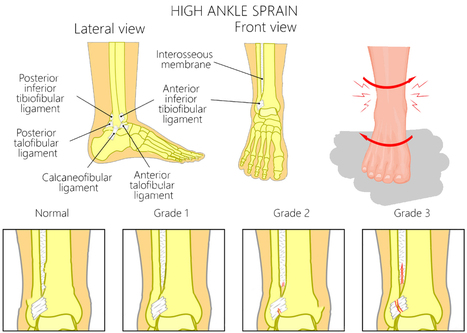
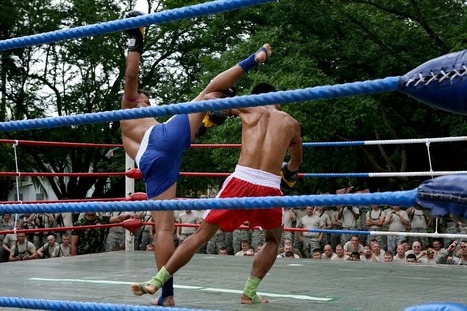


5 Universal Myths About Chiropractic Medicine