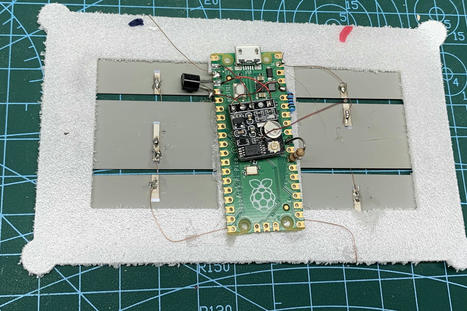
Arduino controlled L network antenna coupler. Homebrewed.
Research and publish the best content.
Get Started for FREE
Sign up with Facebook Sign up with X
I don't have a Facebook or a X account
Already have an account: Login

Raspberry Pi
1.1M views |
+13 today

A complete ARM GNU/Linux computer for $25.
(also covering Arduino and BeagleBone)
(also covering Arduino and BeagleBone)
Curated by
F. Thunus
 Your new post is loading...
 Your new post is loading...
Your new post is loading...

The Raspberry Pi project website is http://www.raspberrypi.org/ This is one of my news digests. If you like my editorial choices, there are more to be found by clicking on the "dear reader" link, and on my name above. 

Wuzea Recherche's comment,
March 15, 2015 6:45 AM
Propose de rechercher une ressource en tapant un mot clé dans le champ de recherche. Wuzea : http://www.wuzea.com

Vasu10's curator insight,
June 9, 2021 1:49 AM
Takeoff projects help students complete their academic projects. Register at takeoff projects today to find and learn about different interesting big data projects and grab the best jobs. Get started right now.
From
www

So finally I got my hands on a Raspberry Pi 5 and If you're an Apple HomeKit enthusiast like me, you're going to love this. Cause We're going to build a powerful smart home hub & take your HomeKit experience to the next level with the 7 wonders of building a DIY Smart Home. Last but the least, Towards the end of the video I also have a surprise App Install that will push your Smart Home Journey to the NEXT LEVEL !
From
www
Demo of a lil' thing I'm working on. I wanted a compact way to have a bunch of sliders available that can be mapped to whatever.
From
www
Take your engineering project to the next level! In this video, we explore LiFi technology and showcase a unique project using Arduino to build a LiFi system that transmits text data using your smartphone's flashlight!
From
dev
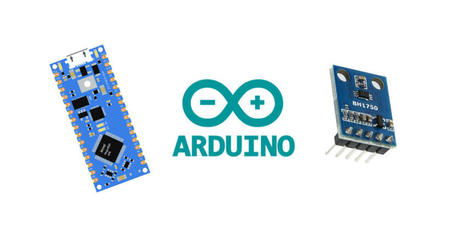
In this tutorial video, you'll learn how to physically connect the BH1750 light sensor to your...
"Hello and welcome to this tutorial where we'll be exploring how to use an RFID-RC522 module with an Arduino to control an LED. This is a fantastic project for beginners looking to delve into the world of Arduino and RFID technology."

As mentioned in the Orange Pi Developer Conference 2024 article, the Orange Pi 5 Pro launch was just around the corner, and the latest Rockchip RK3588S...
From
www
First, starting early April, Raspberry Pi OS comes with Vulkan driver support natively, I use tinyllamafile f16 and Q8_0 to run sample Q&A. The results coming from the set up of raspberry pi 5 is different from what Justine showed. I hope I can do something to make the throughput (tokens/sec) run as fast as what Justine showed.
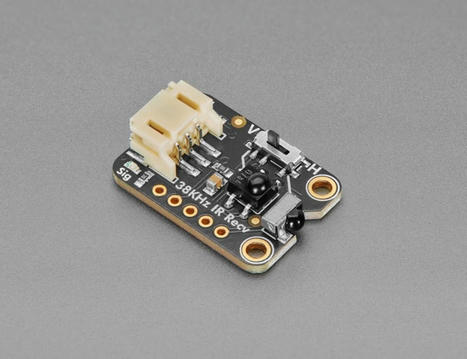
NEW PRODUCT – Adafruit Infrared IR Remote Receiver – STEMMA JST PH 2mm A year ago we designed a high-current-output Infrared Transmitter STEMMA which makes it easy to create high-powere…...
From
www
Welcome to 'Microcontroller Programming: Basics and Beyond 💻🔧'! In this video, I guide you through the fundamentals of microcontroller programming, laying the groundwork for your journey into the world of embedded systems. 🌐

From
www
Most microSD cards are good enough, but if you know what to look for, it’s not hard to get one that’s great.
From
www
@ARRoboTics @Robonyx
From
www
You can find the lesson here https://www.youtube.com/watch?v=3wyCL9QK_uY
|
From
linuxgizmos
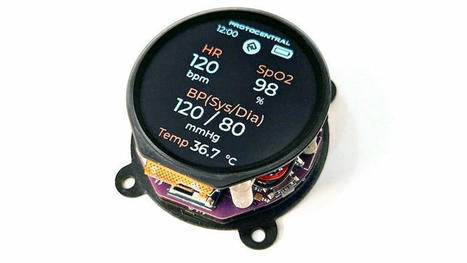
CrowdSupply recently showcased the HealthyPi Move, a biometric monitor designed in a convenient wristwatch form factor. Equipped with Nordic Semiconductor's nRF5340 SoC and multiple advanced sensors, this portable device is advertised for both personal health tracking and data logging for research...
From
www
Raspberry Pi 5 Orange Pi5 Retropie Gaming Comparison PS2 Emulation Sega Deka Supreme Ultra
From
www
► CODICE E SCHEMA: https://www.mediafire.com/file/h4zqk1m69qglu2o/21.steppermotor.zip/file
From
www
Hello Everyone!
In trying to make a wifi repeater/extender using the esp32 board
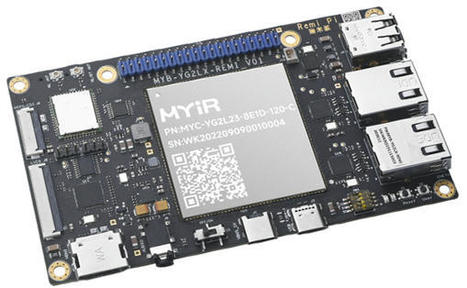
MYIR has launched the Remi Pi, a unique and compact computer board that offers an affordable...
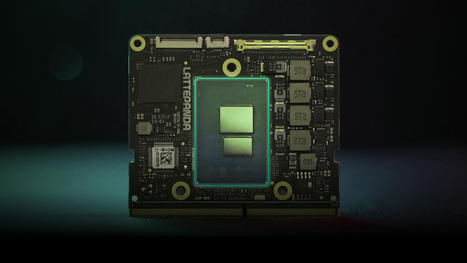
LattePanda Mu has just joined the company's growing single board computer (SBC) lineup. With a capable Intel N100 CPU, 8 GB of RAM, 64 GB of storage, and 9 PCIe 3.0 lanes, the compute module stands as a solid Raspberry Pi 5 challenger.
From
www
Welcome to our latest video where we delve into the world of smart home energy management! In this video, i will showcase how to monitor the total power consumption of your entire household using the ESP32 microcontroller and the Shelly Power Meter.
From
www
#shorts
From
www
Arduino is programmed in C++ but beginning programmers don't often take advantage of or fully understand this feature. However object-oriented programming can be used to build solutions more successfully. In this talk, Evan Williams will discuss what object-oriented programming is a give some examples of techniques used to improve a code base.
From
www
I have a broken VIC-20. No, it can’t be repaired. Not cheaply. It would be more cost effective to just buy a different one. So I’ve carefully removed its innards and am converting it into a Raspberry Pi-powered emulation machine using the original keyboard and a KB2040 keyboard controller from @adafruit (shout out to Adafruit for being the best).
From
www
Waveshare 7-Inch Display Review for Raspberry Pi - 1024x600 IPS, DPI Interface, No Touch
|